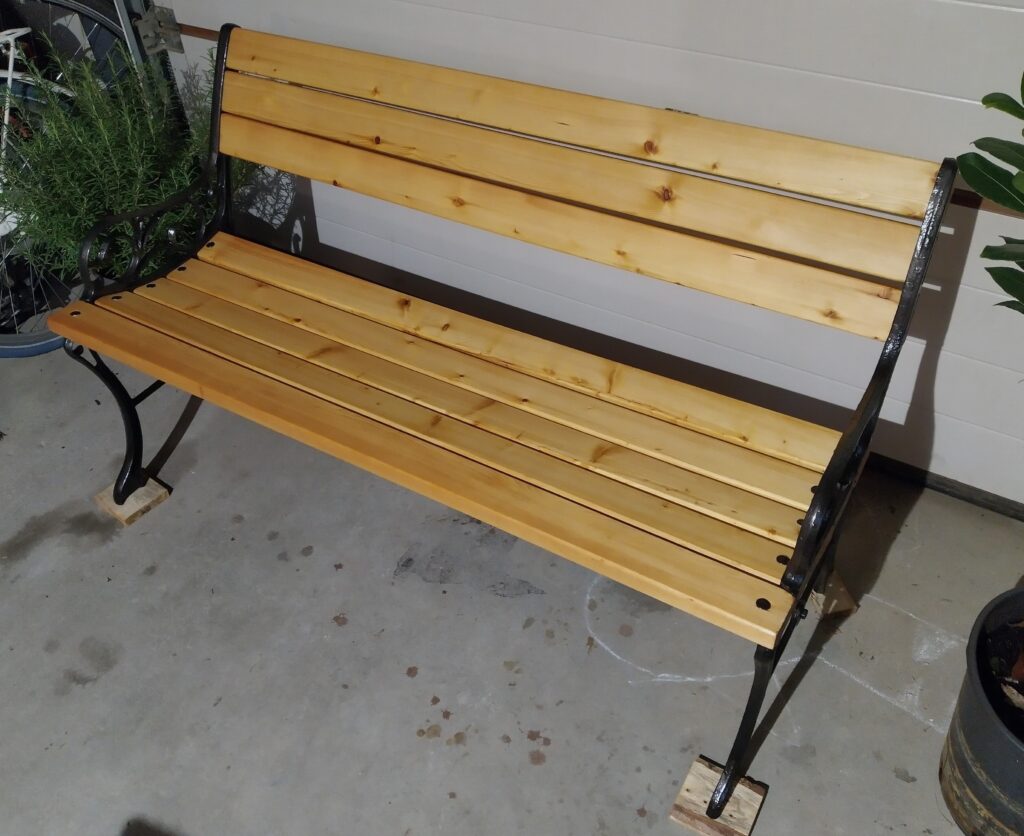
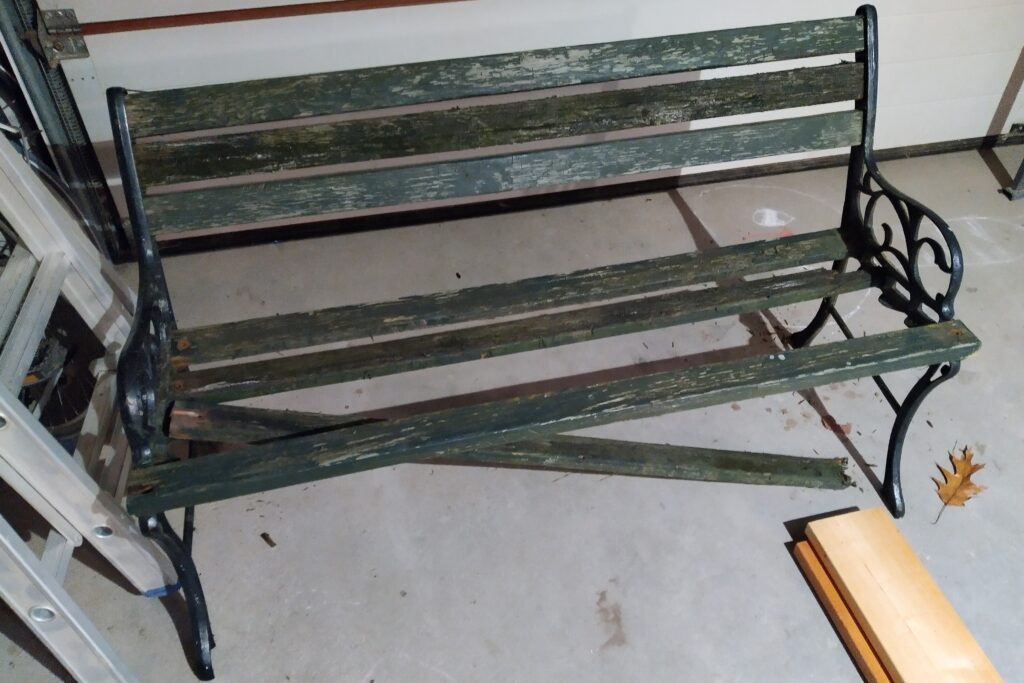
This garden bench was in dire need of some serious love. Most of the slats were either rotten, broken or missing. The condition of the cast iron legs was technically good but they were looking rather dull. It was decided to renew the slats and give the legs a fresh coat of paint.
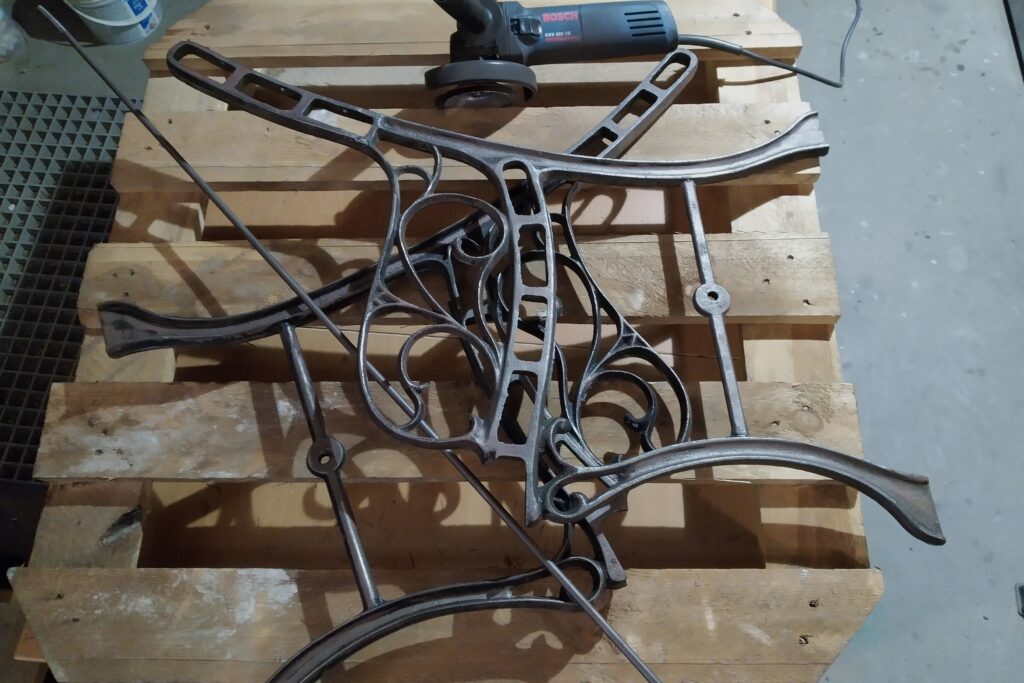
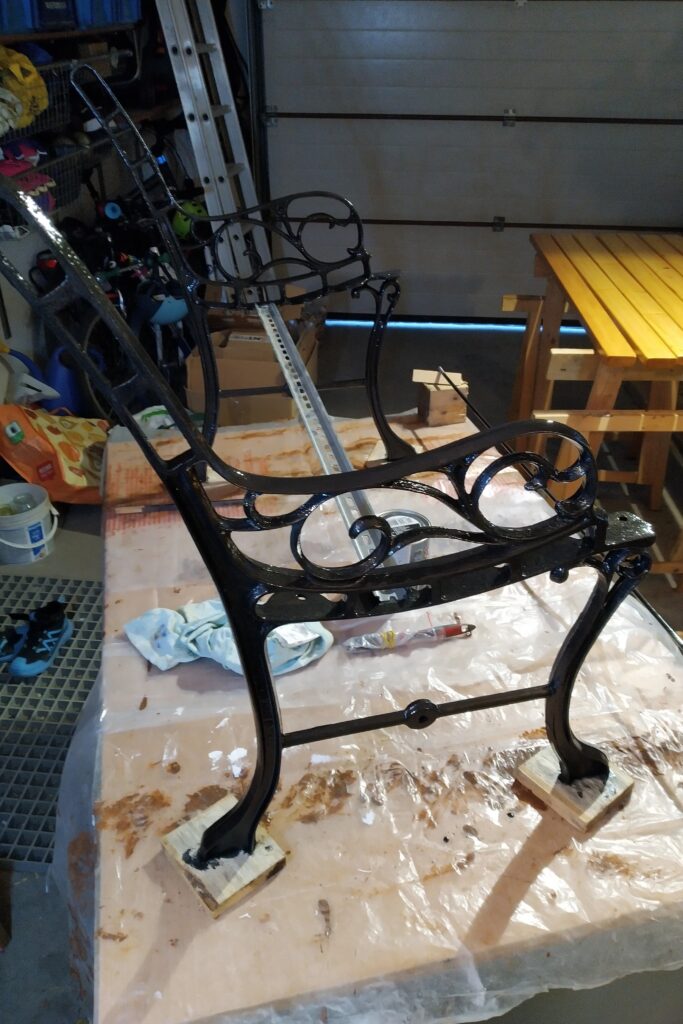
Cleaning the legs
After removing the old slats and the reinforcement rod at the bottom I removed the old paint from the legs and rod as much as I could with a steel brush on a grinder. The more difficult to reach areas I gave a quick brush with a small hand brush to remove anything loose.
Making the new wooden slats
The old slats were about 6 cm wide and 2 cm thick but upon removal of the old slats I could see that the slots in the legs would easily fit bigger slats. I measured all the holes as they had different dimensions and decided that new slats 7 cm wide and 2,7 cm thick would give the best overall fit.
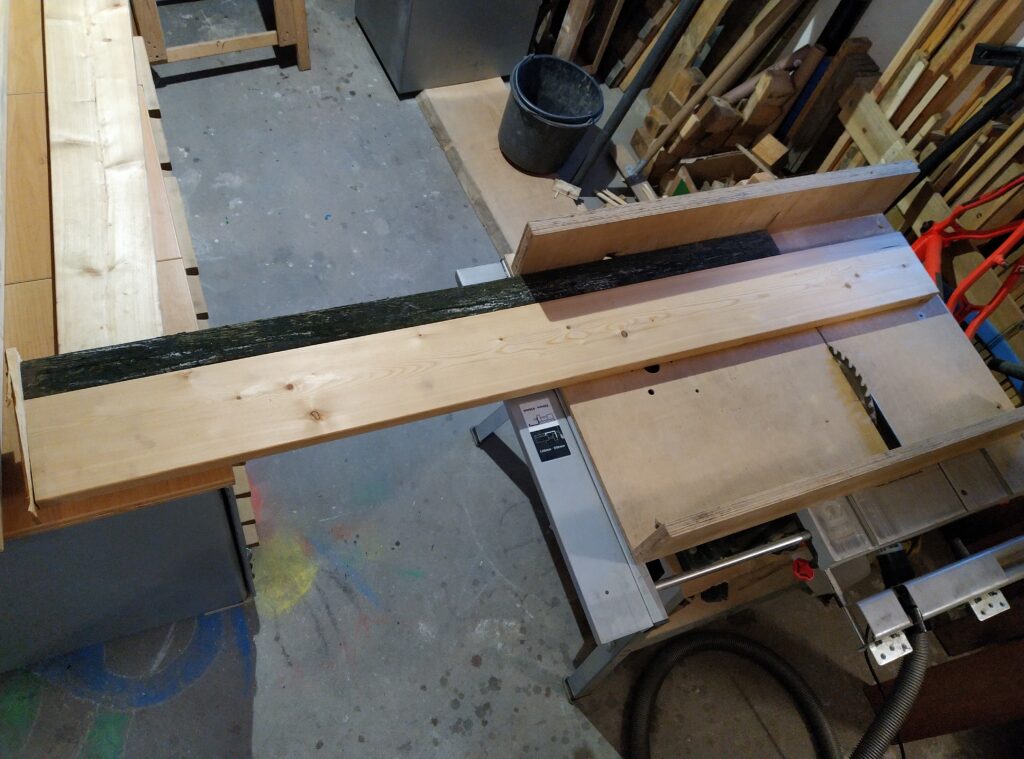
For the wood type, the choice fell on Siberian larch. It is extremely durable and rot resistant and has a high density and strength. Even when left untreated, it should last for decades. Without treatment, it will age to an attractive silver-grey colour.
After some looking I found deck boards 14,5 cm wide and 2,7 cm thick. When cut in half longitudinally, they would be perfect for the job.
I first cut the deck boards approximately to length with a reciprocating saw and then trimmed them square and to the exact length on my crosscut sled. I don’t have a mitre saw so I screwed an old slat to my crosscut sled and screwed a board on it at the end so I could use my cross cut sled to cut the boards to a consistent length.
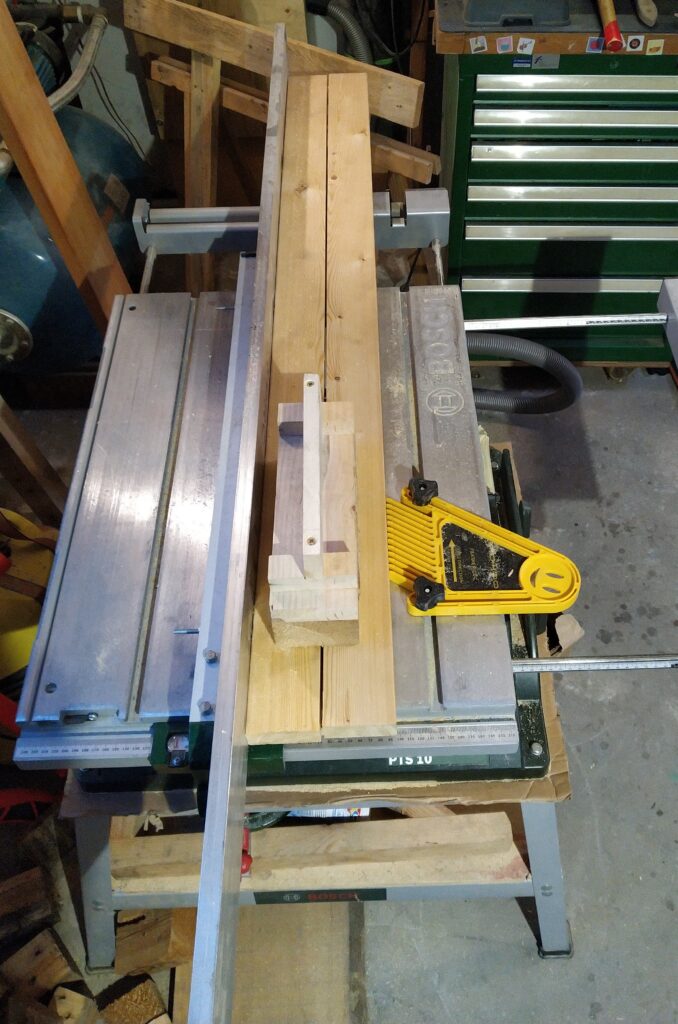
Next I ripped them in half on my table saw.
Then I rounded over all the longitudinal edges on my router table.
The slots in which the slats fit are not perfectly straight, they are tapered towards the ‘outside’ of the bench. I numbered each slat as not to mix them up and chiselled down the ends so they would nicely (but not tightly) fit in their respective slots.
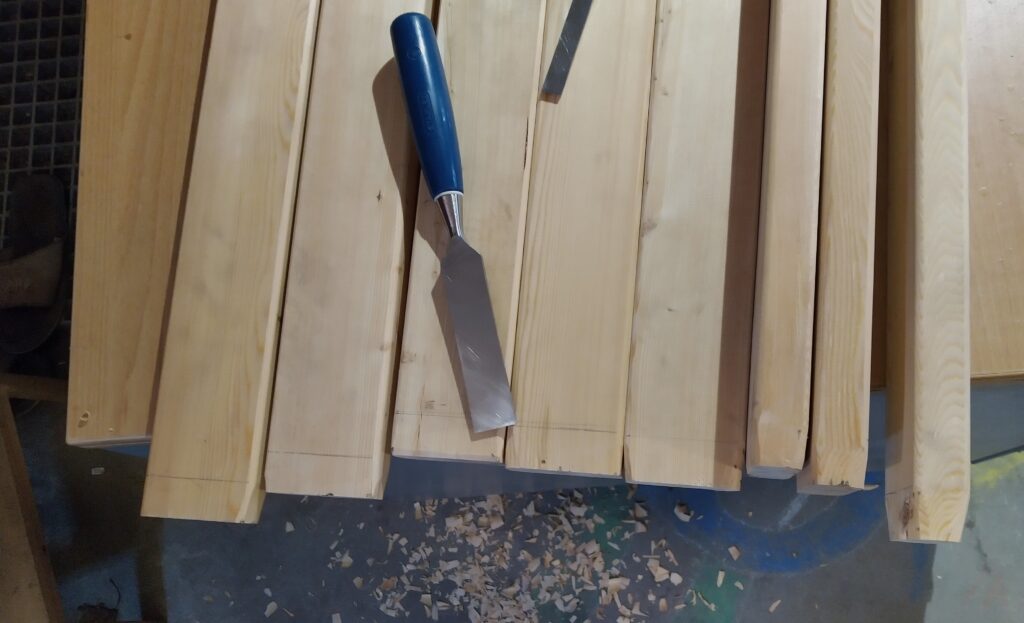
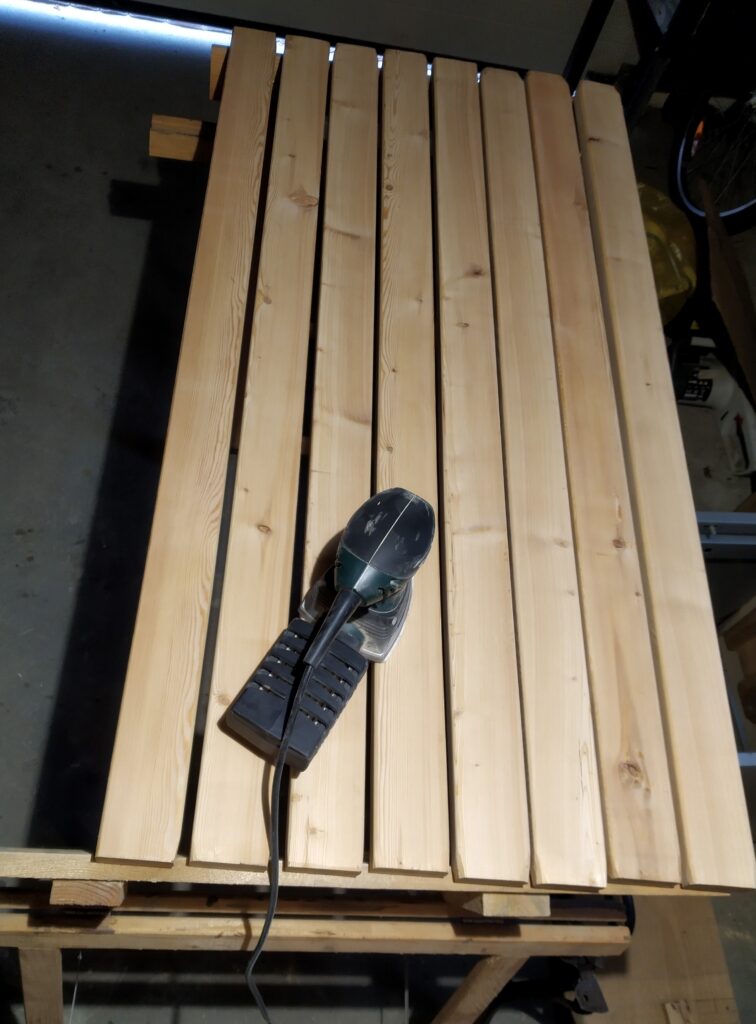
Once all the chiselling was over I gave all slats a quick sanding. (Well,…. has any sanding ever been quick…? It probably sounds less tedious when you write ‘quick’ sanding…)
First 80 grit, followed by 120. 240 seemed overkill for this outdoor application.
Painting
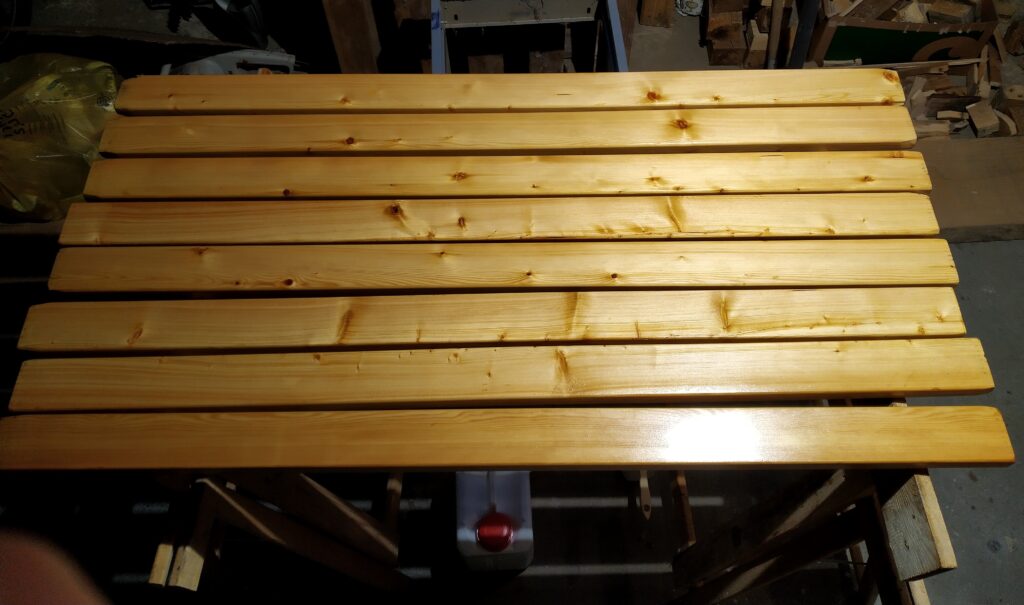
I treated the wooden slats three times with linseed oil over a couple of days. Always making sure to remove excess oil after half an hour with a rug.
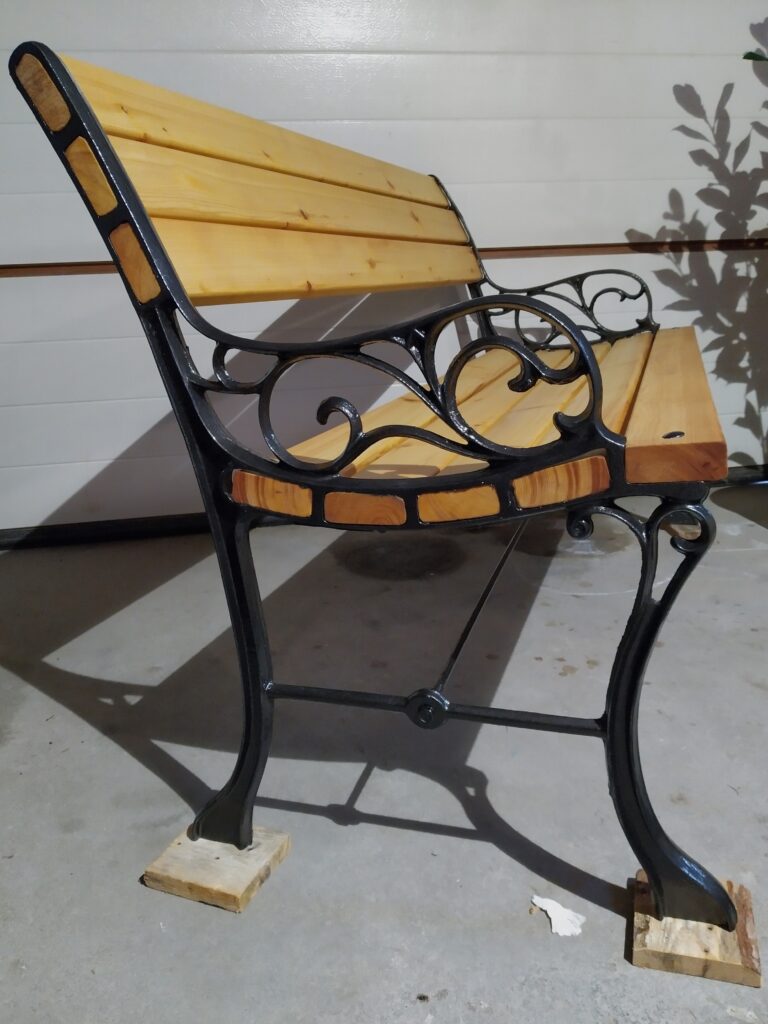
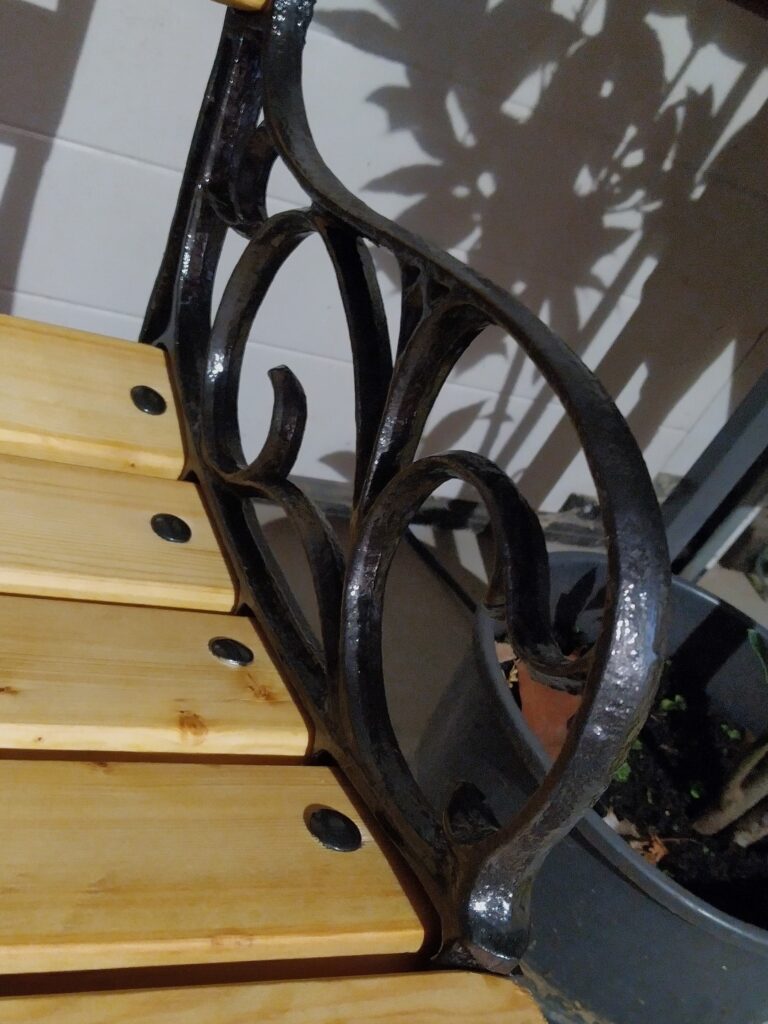
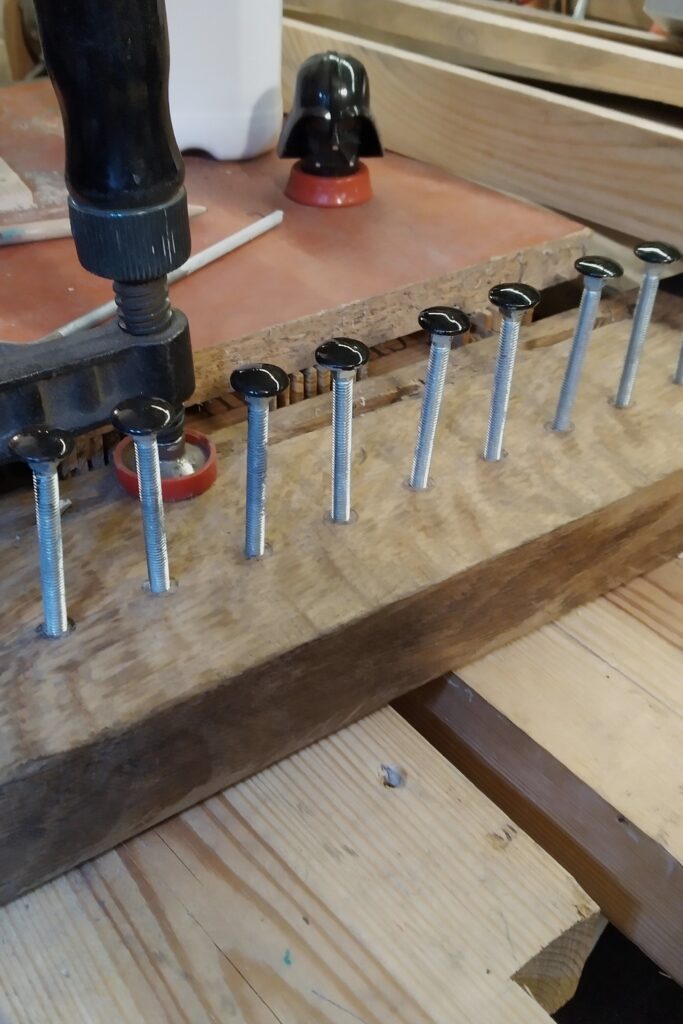
The legs and the reinforcement tube got a double helping of Hammerite “direct to rust” metal paint with a hammered finish. I really like the hammered finish for this kind of cast iron applications. It really makes the legs shine. I bolted the legs together with a metal profile so they were standing up and I could paint them on all sides in one go. I also gave the heads of the flat head square neck bolts a coat of paint so the whole bench would look consistent.
Assembly
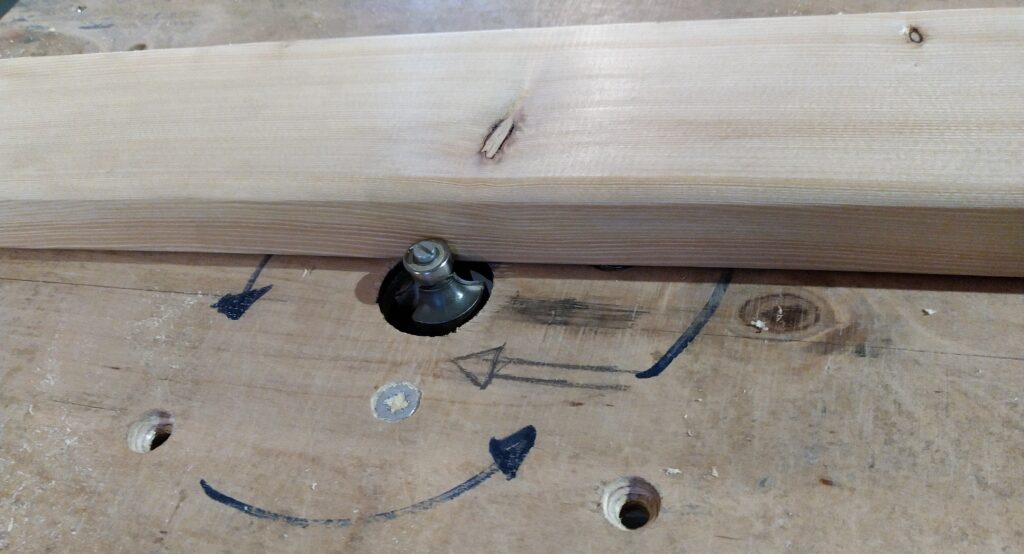
I put one of the legs on my work table and slid the slats in their respective slots. Then, using the holes in the legs as a position guide, I drilled 6mm holes for the bolts. I installed the bolts and tightened them loosely. I then did the same on the other side where I could easily slide the second leg over the standing slats. Once all slats were loosely tightened I put the bench on its legs and installed the reinforcement rod. I checked everything for proper positioning and squareness Once I was convinced that everything was looking good I tightened the flat head bolts and the reinforcement rod. To hold the backrest slats in place I installed 4 mm wood screws through holes in the back of the legs.
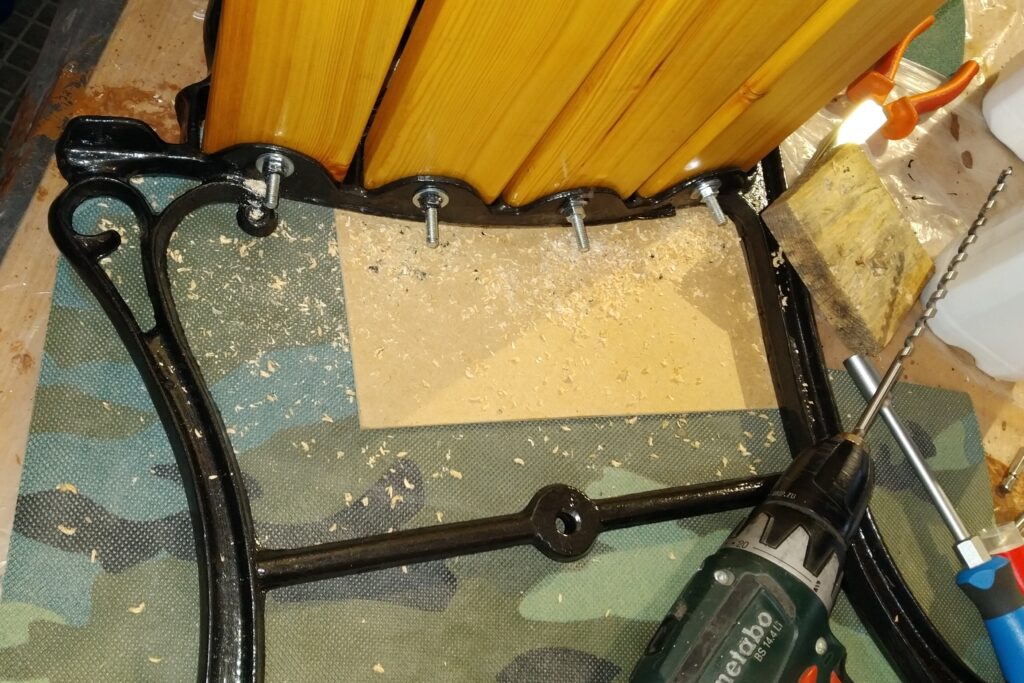
The front slat does not fit in slots but is simply positioned on some supports. Once all was properly tightened, I positioned the front slat and fixed it with the remaining 2 flat head bolts.
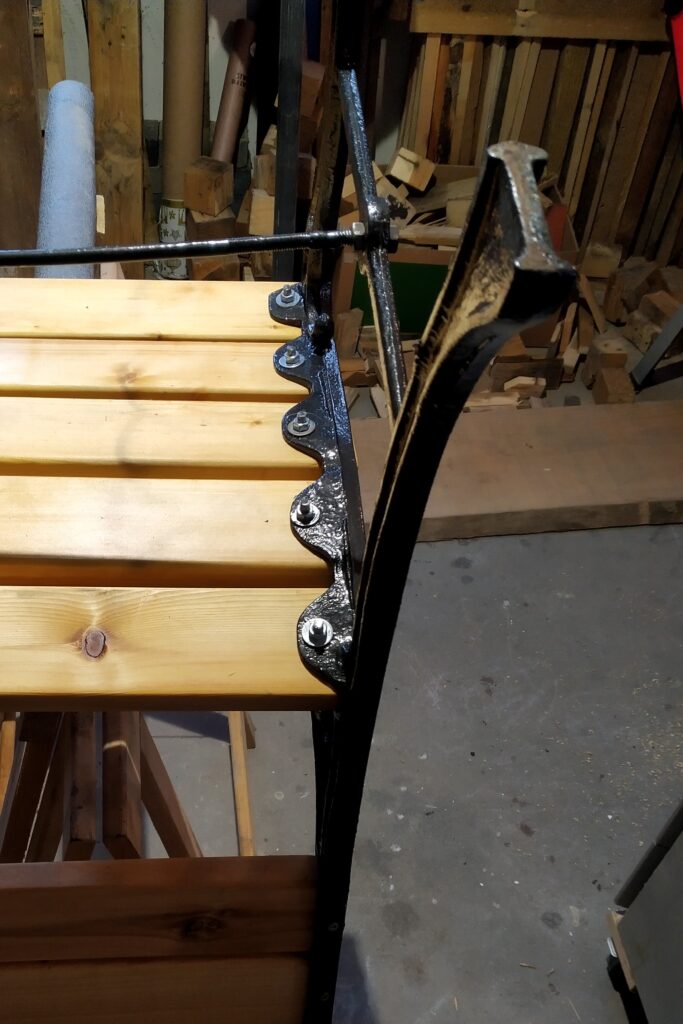
Finally I flipped over the bench and cut off the excess of the bolts. In this position I painted the remaining blank metal parts. These were: the bottom end of the bolts & washers, the nuts for the reinforcement rod, the heads of the wood screws for the backrest slats and the bottom of the feet of both legs. I also checked both legs if they needed any touch-ups.
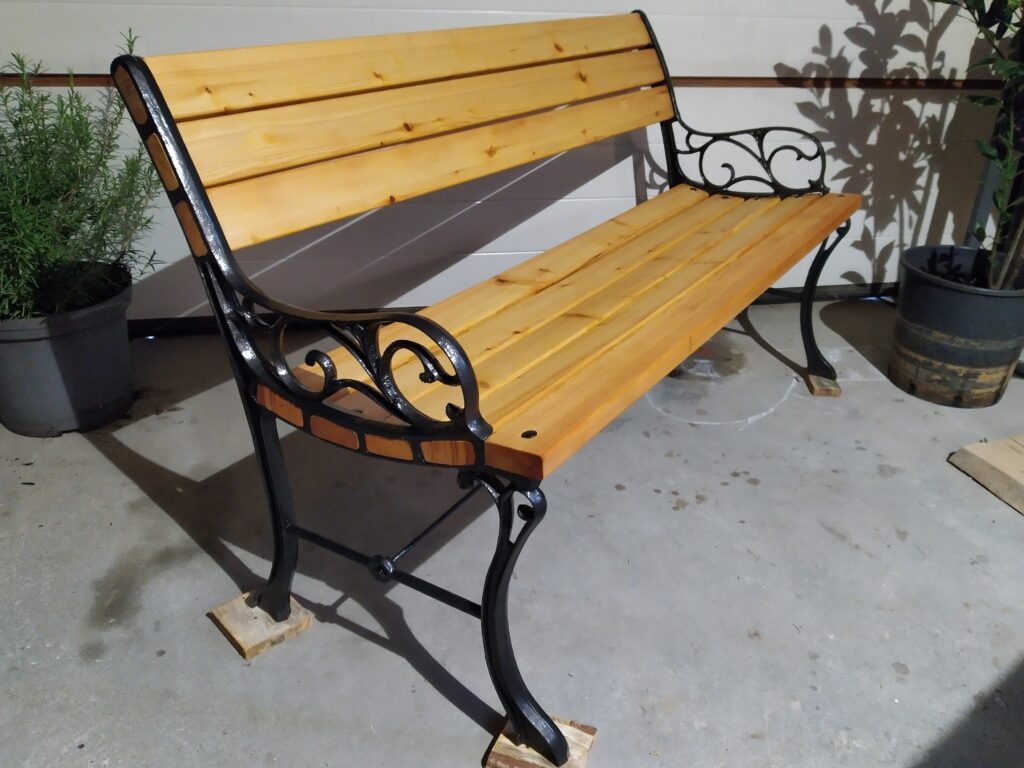
The result