

In 2012, we bought our first Oral-B Pro toothbrush. It faithfully served us until 2023 — not bad for an electric toothbrush! As our family grew, we added more units, and over the years I’ve become quite skilled at maintaining and repairing them.
Below, I’ll share the practical fixes and solutions I’ve learned for the most common problems:
- Not charging (green light doesn’t blink when placed on the charger)
- Short runtime or completely dead (battery issues)
- Broken drive shaft
- Water ingress
- Degraded rubber on the housing and buttons
Open up the toothbrush
The first step for most repairs is to open the toothbrush handle. Here’s how I do it safely and effectively:
1. Removing the bottom cap
I place the bottom of the toothbrush in a cup of boiling hot water for 2–3 minutes. This softens the plastic. I then seat the toothbrush on its charger and gently tilt it backward. The softened plastic allows the bottom cap to separate gently from the main housing.
2. Removing the top washer/seal
I hold the toothbrush upside down and dip just the top section into boiling hot water for about a minute to soften the plastic. Once softened, I carefully pry or off the washer using a thin 10 mm flat wrench.
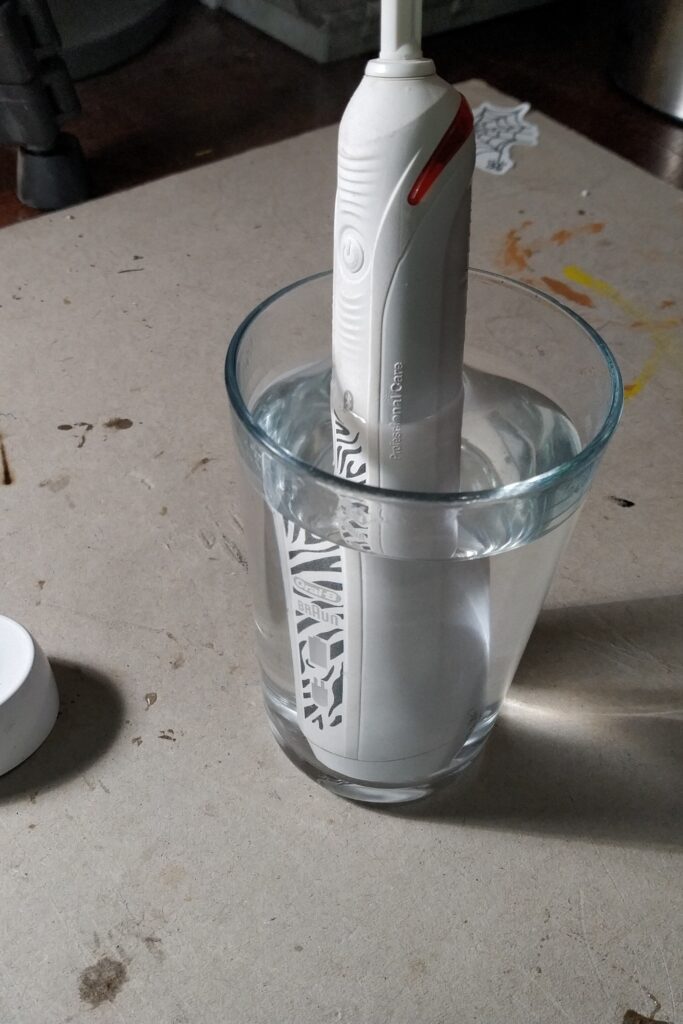
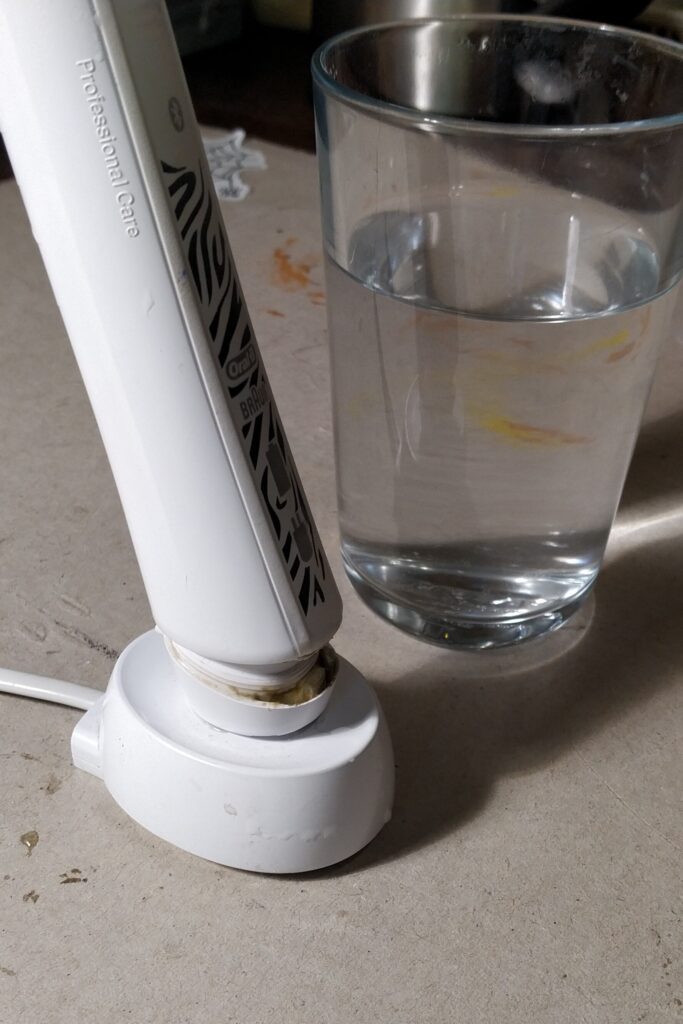
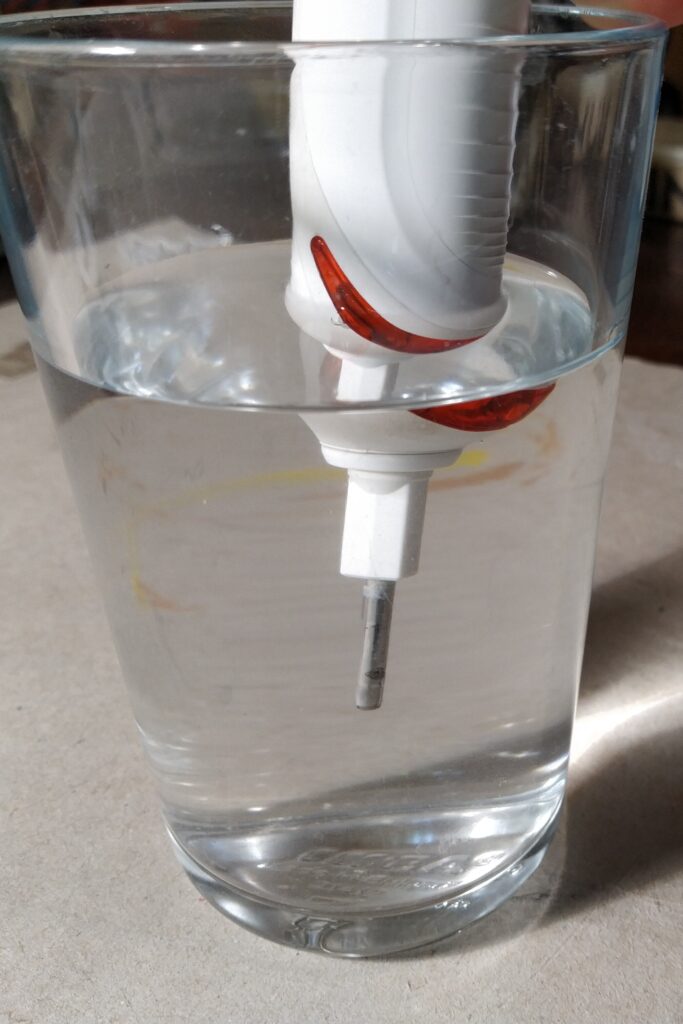
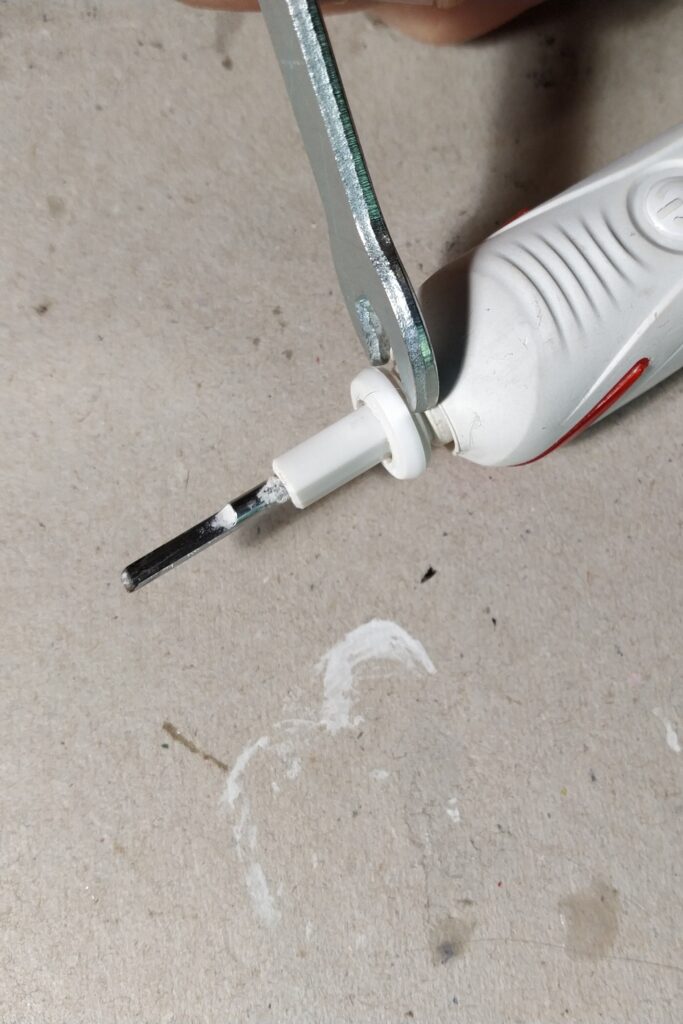
Note1: The housing can also be opened without using hot water. However, I strongly prefer softening the plastic first. It makes the whole operation much gentler, reduces the risk of damage, and gives you better control.
Note2: You can also pry off the washer with a small flat screwdriver or push the toothbrush upside down firmly against a hard surface. Both methods work, but the thin 10 mm flat wrench gives you more control and reduces the risk of damage.
Toothbrush not charging (green light not blinking when placed on charger)
I’ve encountered two issues that prevent the toothbrush from charging: the first is a broken wire on the charging coil, the second a broken connector wire from the battery.
1. Broken wire on the charging coil
Carefully inspect the thin copper wires of the charging coil. One of them is often broken right where they connect to the control board. Sometimes the break is hard to see with the naked eye. Gently tug on the wires — if one feels loose or comes free, it’s broken.
Fix:
- Unwind one full turn from the coil to give yourself enough slack.
- Route the wire around the plastic hook on the coil’s mounting plastic.
- Solder the wire securely back into place.
- Trim off any excess wire.
Prior to re-assembly of the toothbrush, put it on the charger and see if this fixes the issue.
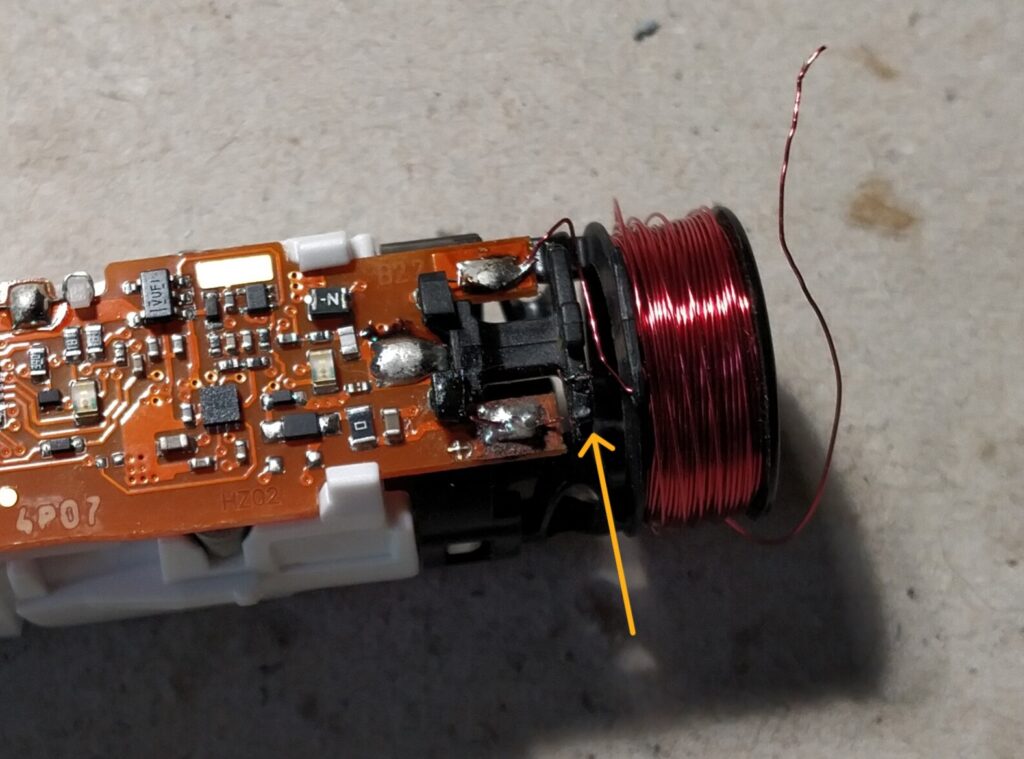
2. Broken battery connector strip
If the charging coil wires are intact, the next step is to check the metal strips that connect the battery to the control board. These strips can crack or their welds/solder can loosen over time. In the photo below, you can see a broken strip I discovered during inspection. I have already de-soldered the charging coil to get better access for the repair.
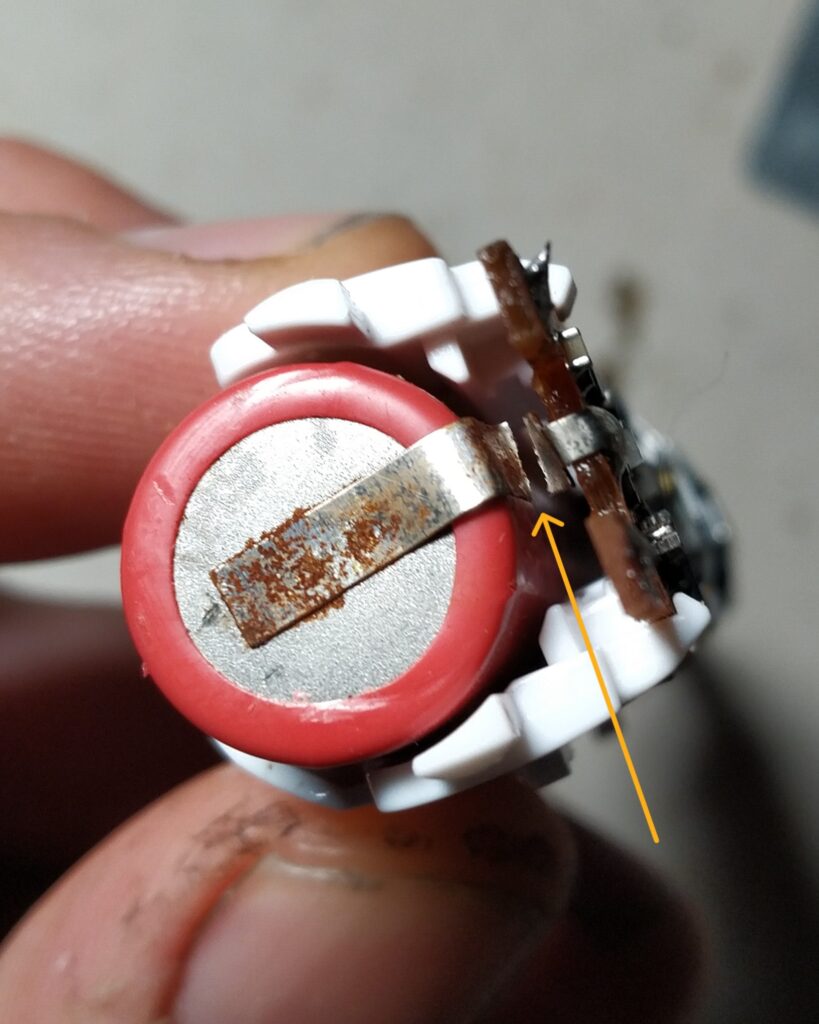
A quick fix for this battery strip: overlay repair
- Clean the old strip still attached to the battery + scratch it a little. (this will make the solder attach better/quicker)
- Apply a little flux + a bit of solder to it.
- Desolder the broken piece that was attached to the control board.
- Cut a similarly shaped piece of nickel strip from a scrap battery pack.
- Put some solder on both ends of the strip.
- Solder the new strip directly over the old one. (Work quickly when soldering to avoid overheating the battery cell.
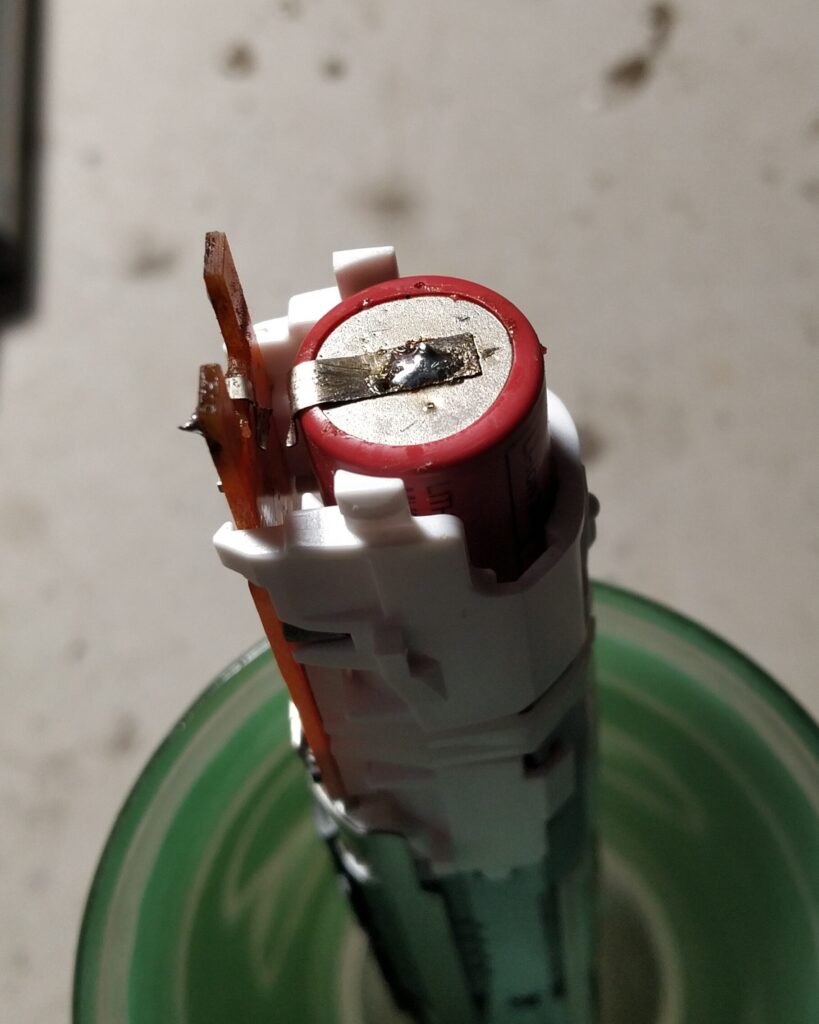
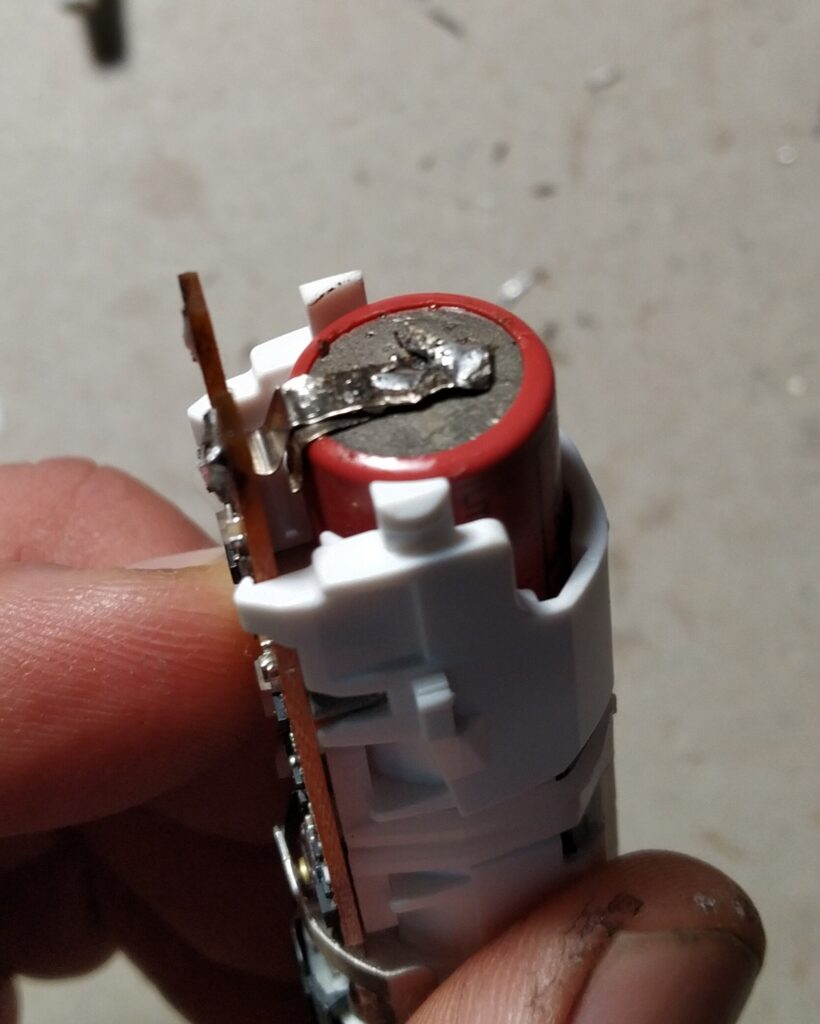
Solder the charging coil back in place and prior to re-assembly of the toothbrush, put it on the charger and see if this fixes the issue.
Short runtime or completely dead (battery issues)
When the toothbrush runtime becomes noticeably shorter — and eventually it may not turn on at all — the battery is almost certainly dead and needs replacement.
Steps to access the battery:
1. Desolder the charging coil wires and remove the coil.
2. Remove the metal on/off lever.
3. Desolder the black piece on top of the motor.
4. Desolder the wires going via the plastic frame at the back to the led on top and remove the frame.
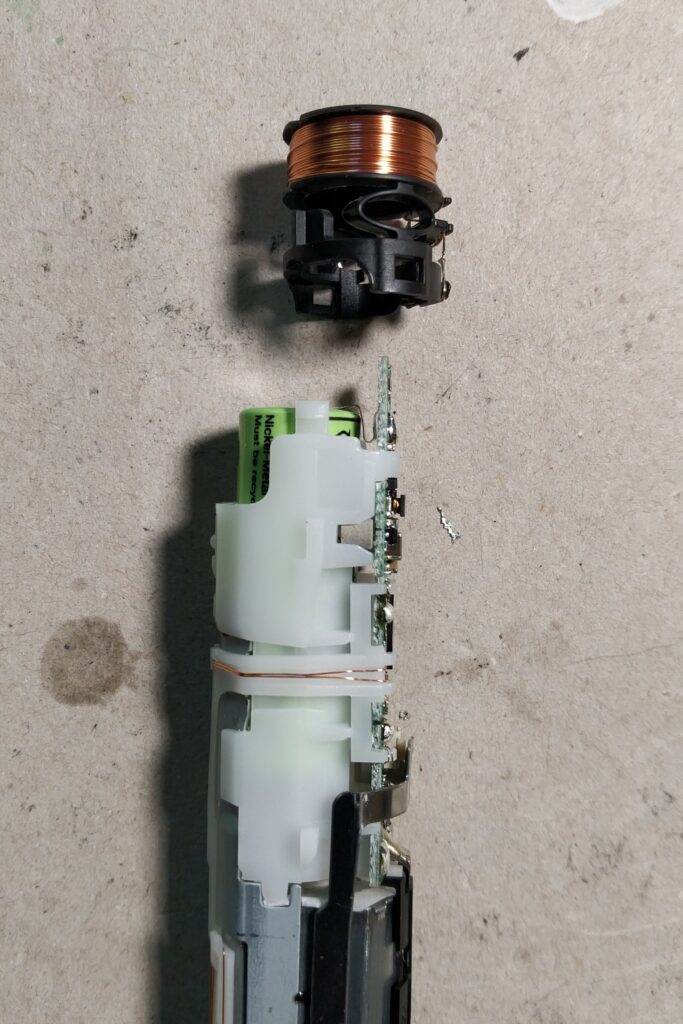
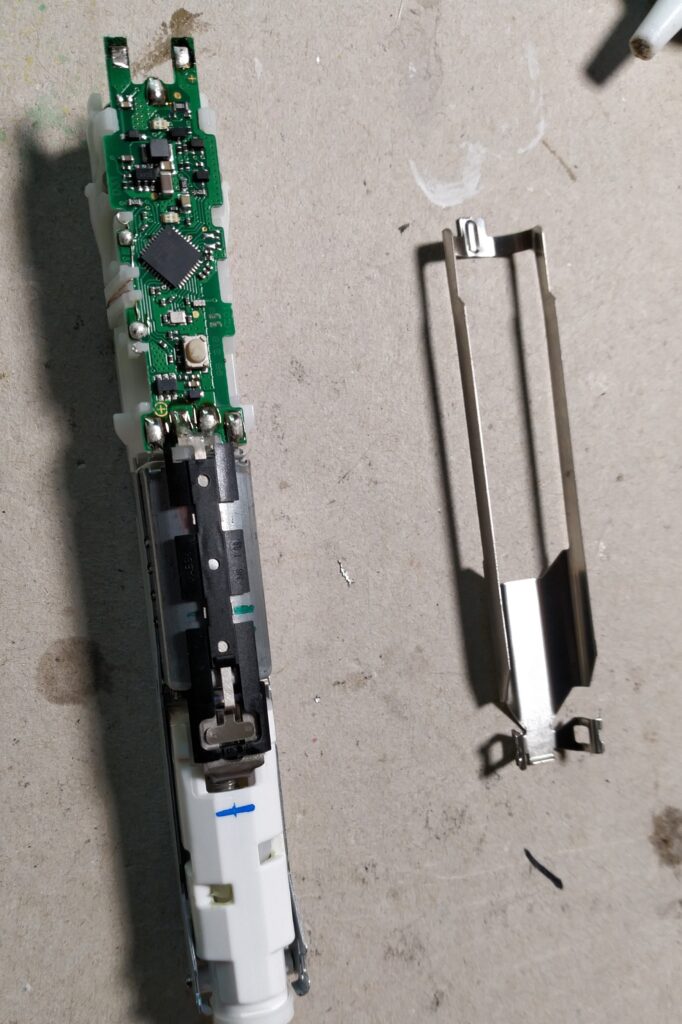
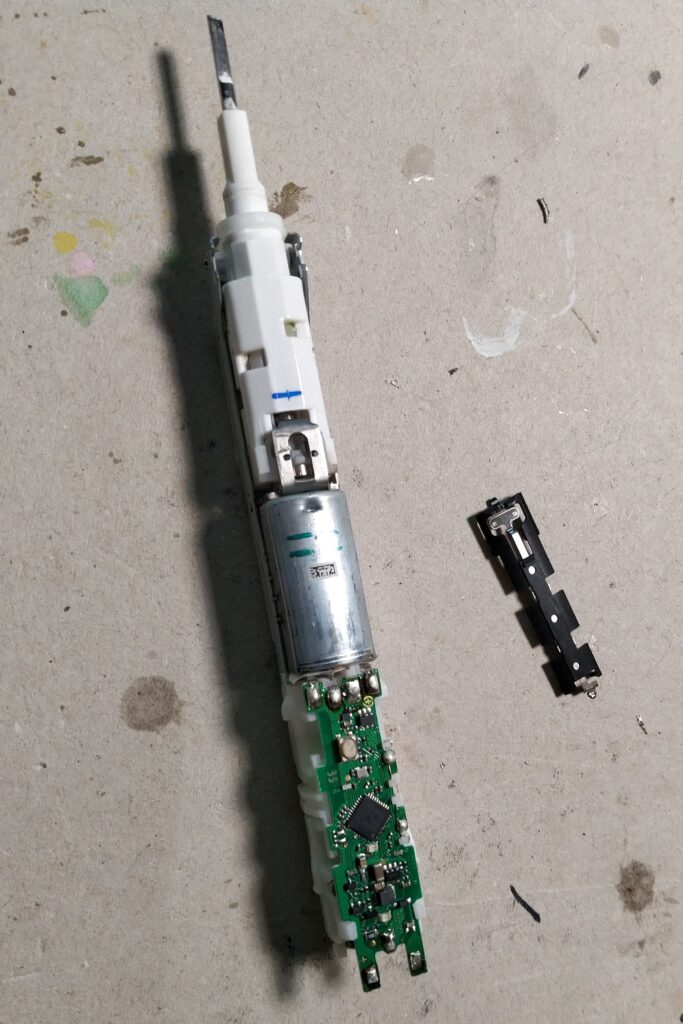
Steps 1 and 4 are quite tricky. Be careful not to heat the area for too long, as the plastic can easily start to melt.
The best technique is first to remove as much excess solder as possible. Then heat each joint briefly and carefully lift the wires using a pointed tool.
Tip: I strongly recommend clamping the toothbrush securely in place (using a small vice or helping hands clamp) when soldering or desoldering. It makes the job much easier, safer, and far more precise.
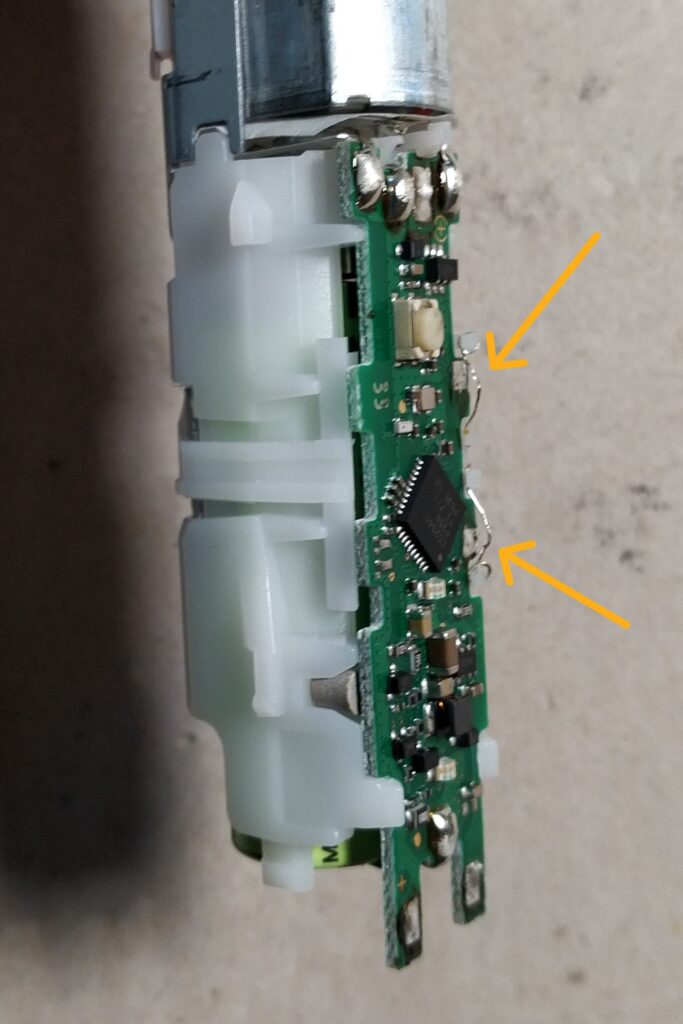
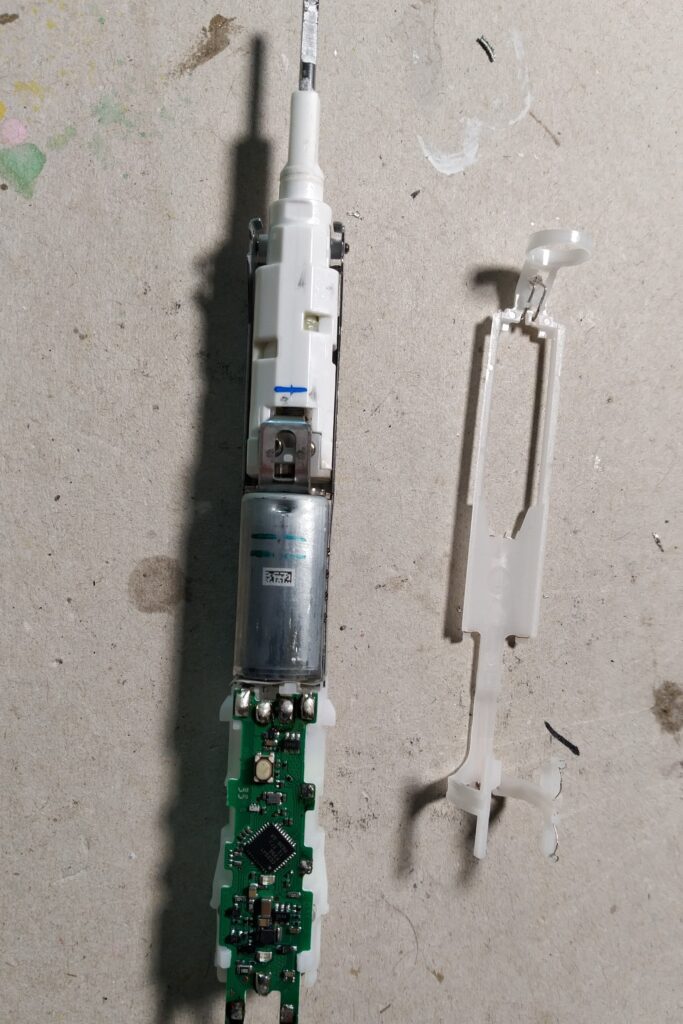
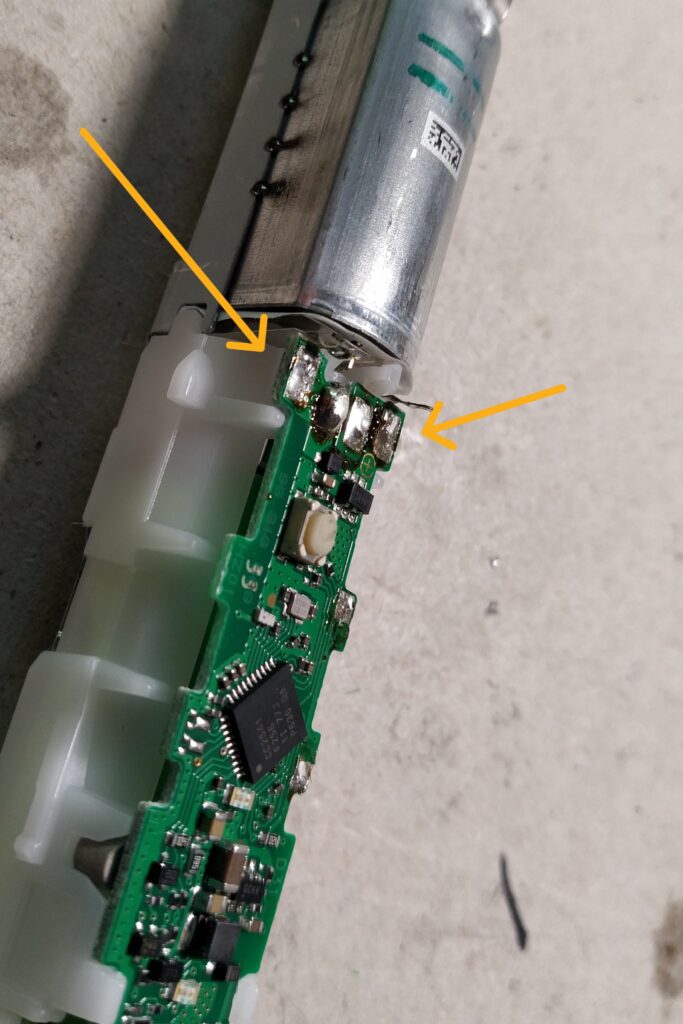
5. Desolder both motor connections.
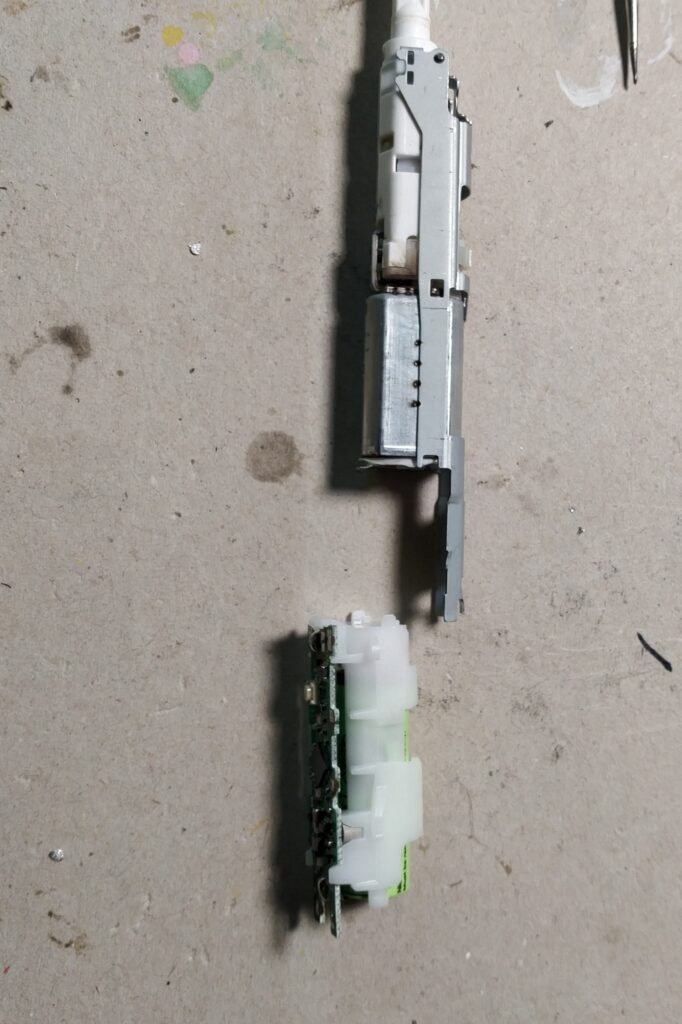
6. Remove the control board and battery housing from the metal support frame.
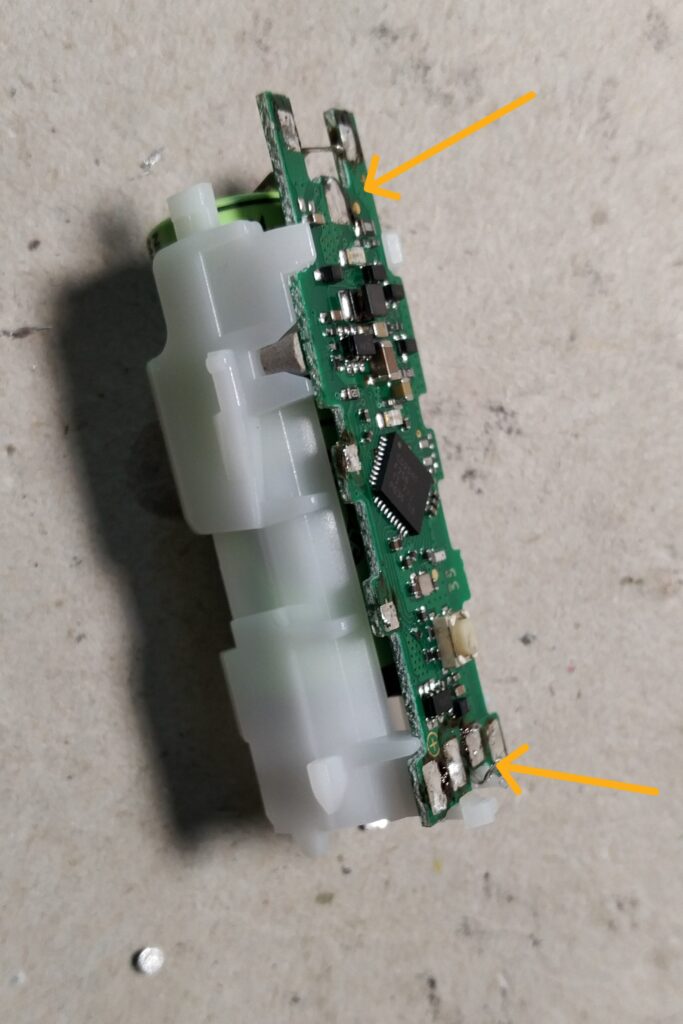
7. Desolder the battery strips from the control board.
8. Finally, remove the control board and take the old battery out of the housing.
Battery types
Depending on the model, the toothbrush uses either a Li-ion or a NiMH battery.
If it has a NiMH battery, it is almost always the shorter, lower-capacity version. So far, I have not come across any Oral-B toothbrush equipped with a full-length NiMH battery.
For Li-ion models: I replace them with new Sanyo 740 mAh Li-ion batteries.
For NiMH models: I replace them with Eneloop 2000 mAh batteries.
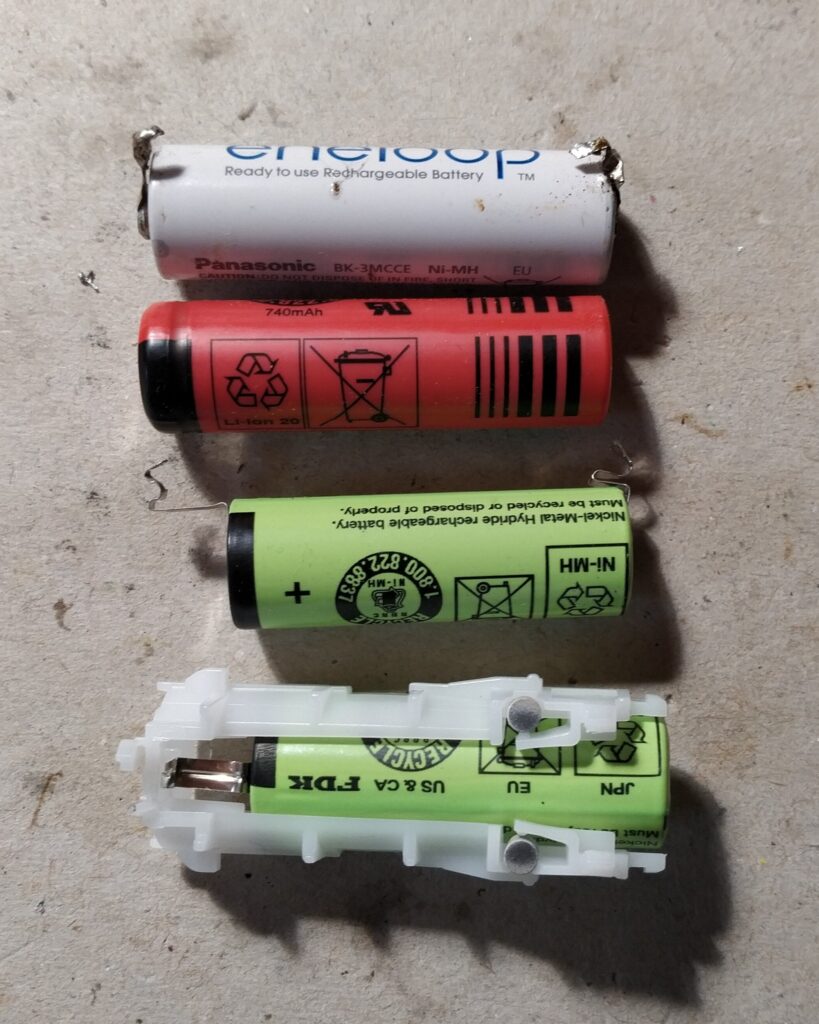
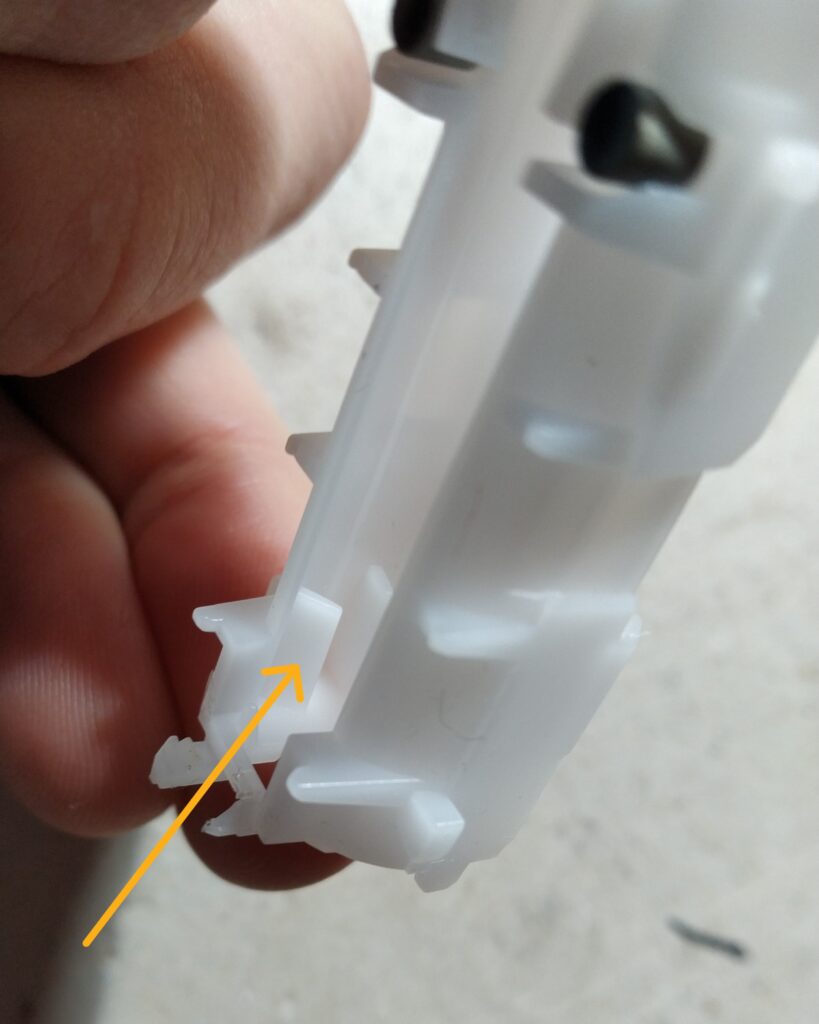
Upgrading to a Full-Size NiMH Battery
If your toothbrush has the smaller NiMH battery, it’s well worth upgrading it to a full-size, higher-capacity NiMH battery.
The only modification required is to remove 4 small plastic tabs and one raised plastic piece inside the battery holder. I usually cut them away carefully using a sharp hobby knife or utility knife.
Adding Soldering Tabs / Wires to the New Battery
New replacement batteries usually come without pre-attached tabs or wires. Since I don’t have a spot welder, I solder them manually. The following method helps minimise heat transfer to the battery while creating a strong, reliable connection.
- Prepare the nickel strip:
Carefully peel the strip from the old battery or cut a new one from scrap nickel strips. - Pre-tin the strip:
On the battery side of the strip, apply flux and solder both sides. (The solder on the outer side helps with heat transfer during the final soldering.) - Prepare the battery pole:
Lightly scrape the battery terminal with a small file (I find that this the solder to adhere faster and more reliably.), then apply a minimal amount of flux and add a small amount of solder. - Attach the strip to the battery:
Position the strip on the pole and quickly solder it with a clean, hot iron. Work fast to avoid overheating the battery. - Repeat for the second pole.
Installing the new battery
Once you’ve successfully soldered the strips onto the new battery (or purchased one with tabs already attached), it’s time to install the battery back into the toothbrush.
- Test fit and shape the strips:
Insert the battery into the holder together with the control board. Bend, twist, and trim the strips so they align perfectly with the solder pads on the control board. - Pre-tin the connection points:
Remove the battery again and apply solder to the areas of the strips that will connect to the control board. - Battery assembly:
Put the battery back in the holder and solder the strips to the control board. - Testing before final assembly:
Before fully reassembling the toothbrush, I recommend testing the repair: Solder the charging coil back onto the control board and place it on the charger. If the charging light starts blinking, the circuit is working correctly and the battery is receiving charge. This is a good sign that everything should function properly.
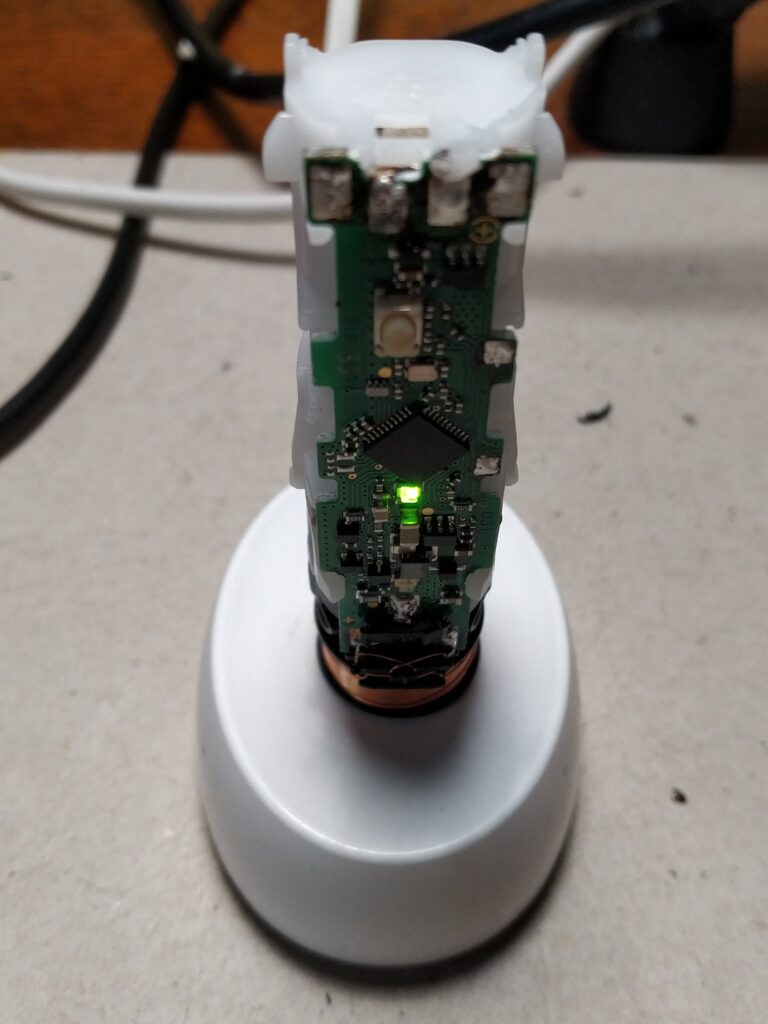
Assembly of the toothbrush
Reassembling the toothbrush is essentially the reverse of the disassembly process. Follow these steps:
- Insert the battery housing (with control board and charging coil) back into the metal support frame.
- Solder both motor connections.
- Reinstall the plastic LED holder and solder the LED wires.
- Solder the black piece back on top of the motor.
- Reinstall the metal on/off lever.
- Perform a final test (place on charger / power on the toothbrush).
Broken drive shaft
I’ve encountered two toothbrushes where the top part of the drive shaft had broken off. I’m not entirely sure how it happened — possibly from being dropped.
Since spare parts for Oral-B Pro toothbrushes are almost impossible to find, the only realistic solution is to salvage a good drive shaft from another irreparable toothbrush.
- To remove the drive shaft, the plastic LED frame on top must normally be taken out first, as it wraps around the drive shaft housing.
However, if you only need to replace the drive shaft and don’t want to touch the electronics, you can avoid desoldering by simply cutting the thin plastic ring that wraps around the drive shaft area.
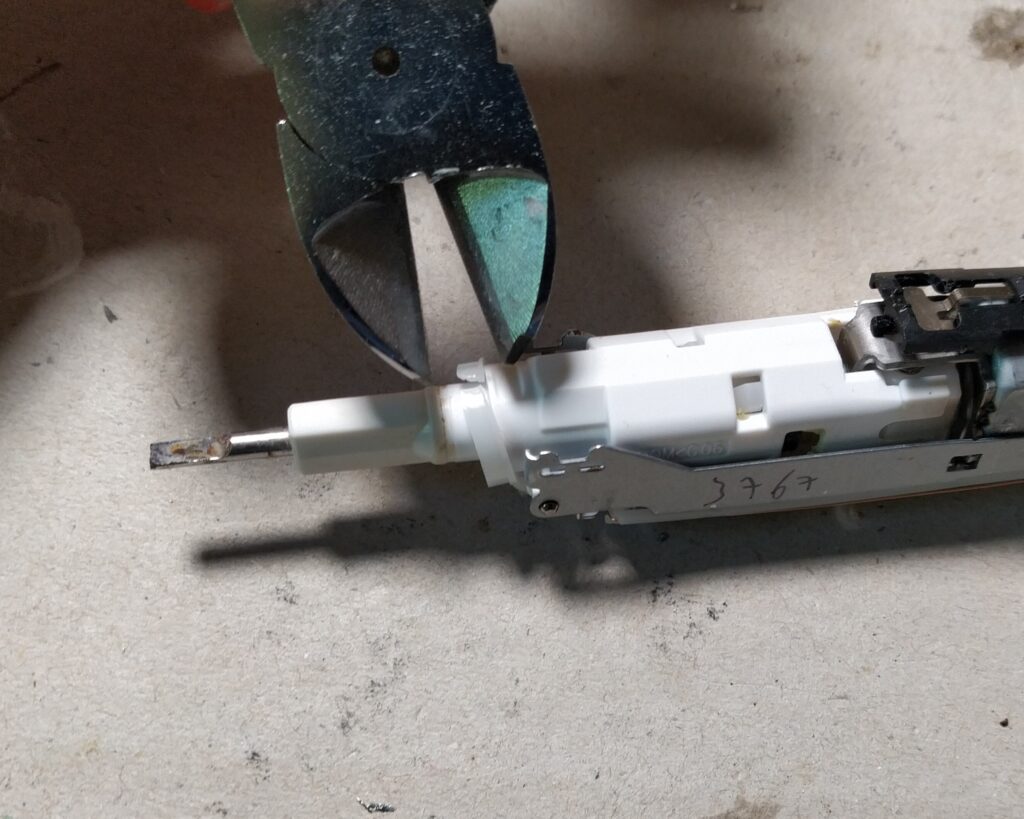
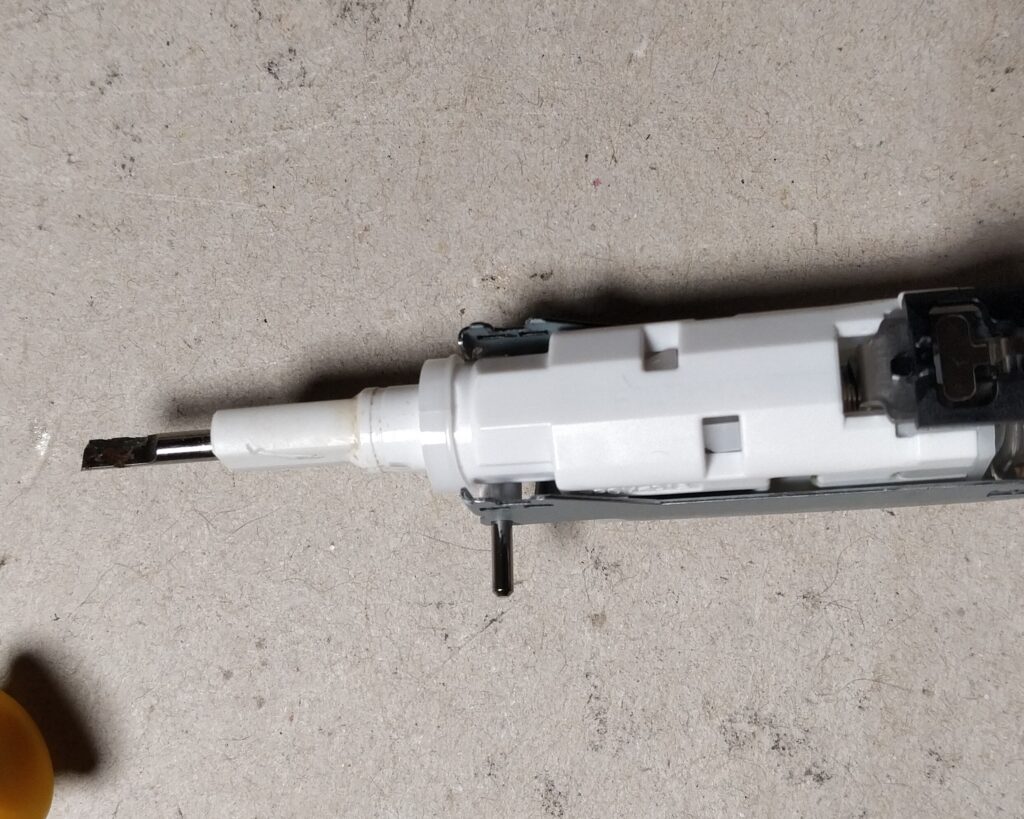
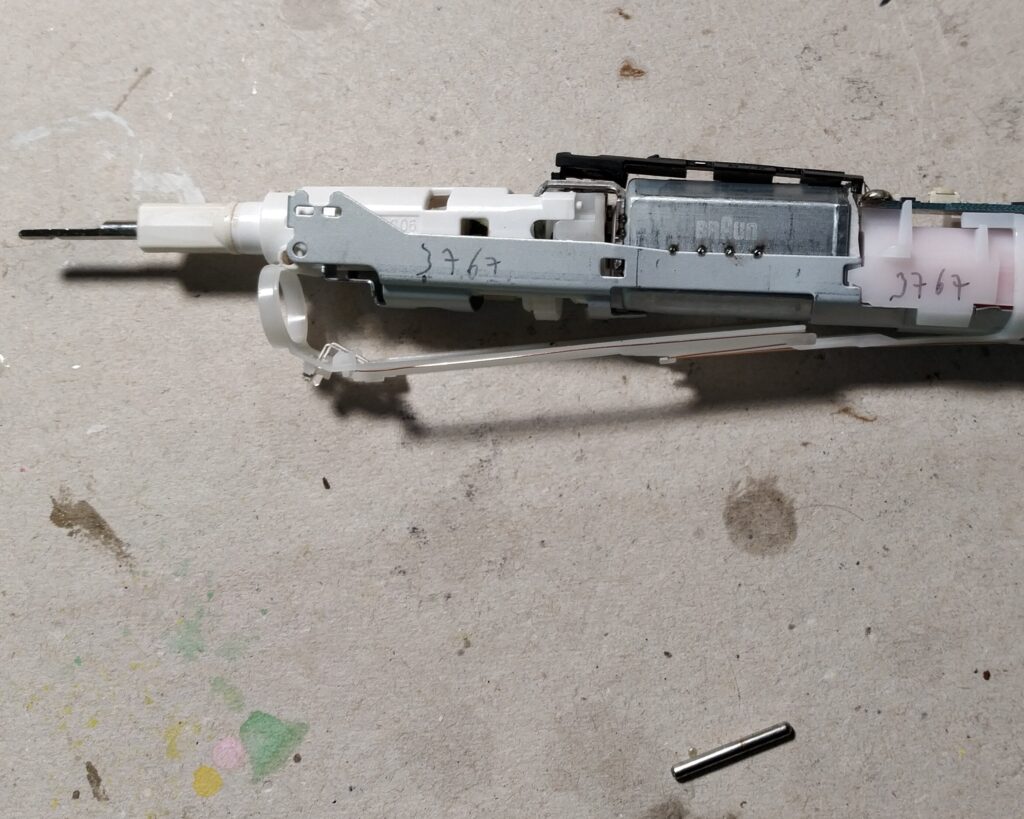
2. Push out the small metal pin that holds the drive shaft housing in place. Use a pointed tool. Sometimes this pin comes out easily; other times it requires a bit more effort.
3. Press down on the two plastic latches while gently wiggling and pulling the housing upward. Since you don’t have three hands, alternate pressure on the latches while working the housing free.
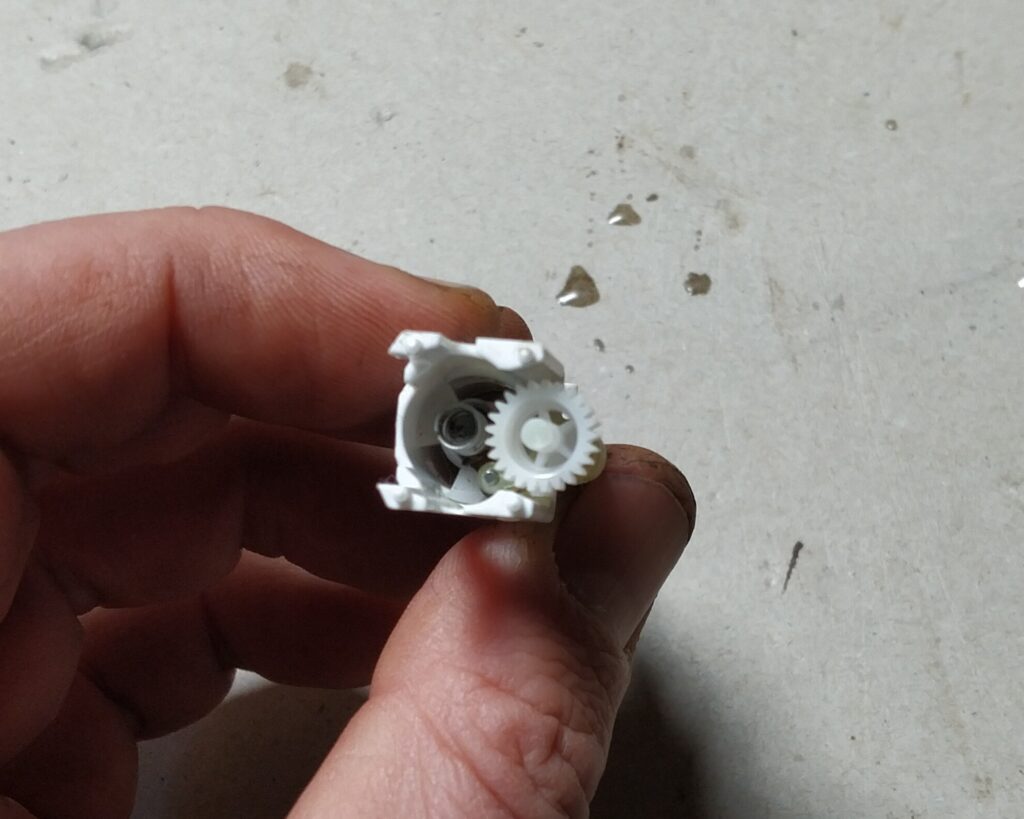
When you pull the housing loose, some gears and a spring might fall out. If not, remove them from the housing or the motor part and put them aside.
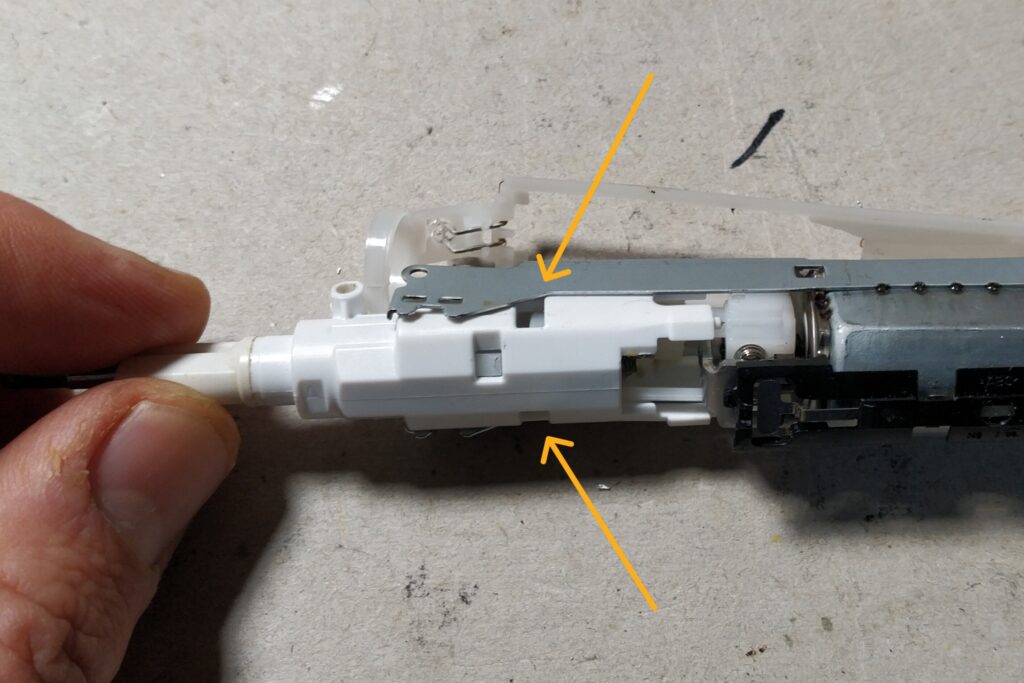
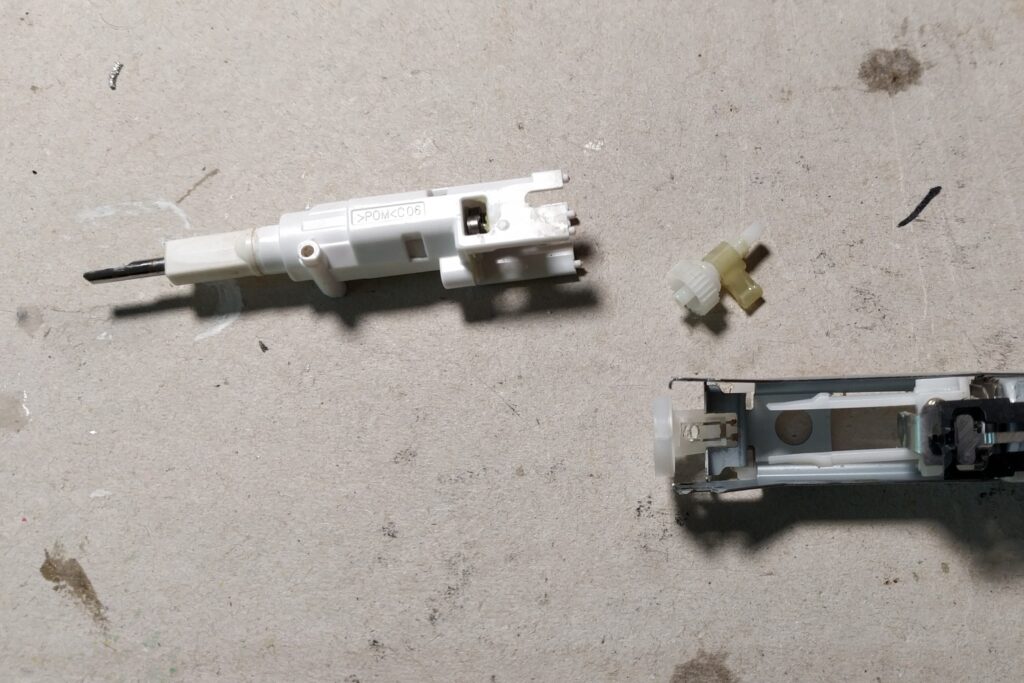
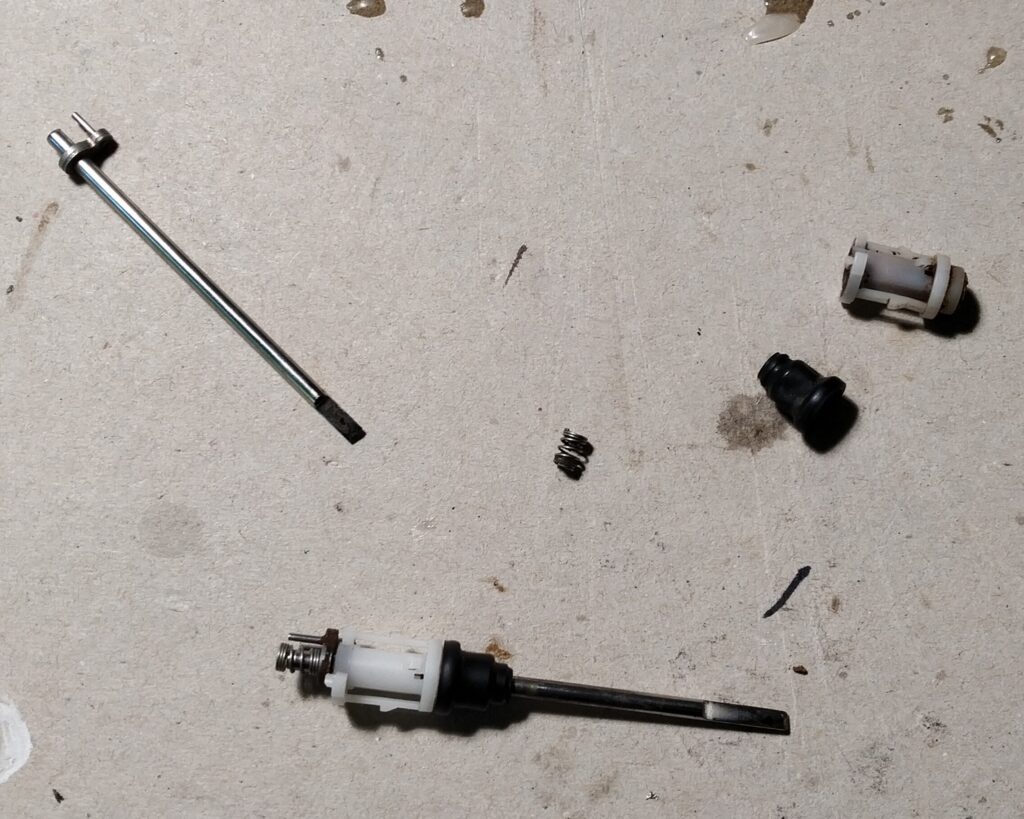
4. To remove the drive shaft from the housing, press the two opposite plastic latches one after the other while pushing the drive shaft downward against a hard surface. Alternate pressure on the latches and wiggle the shaft until it comes free.
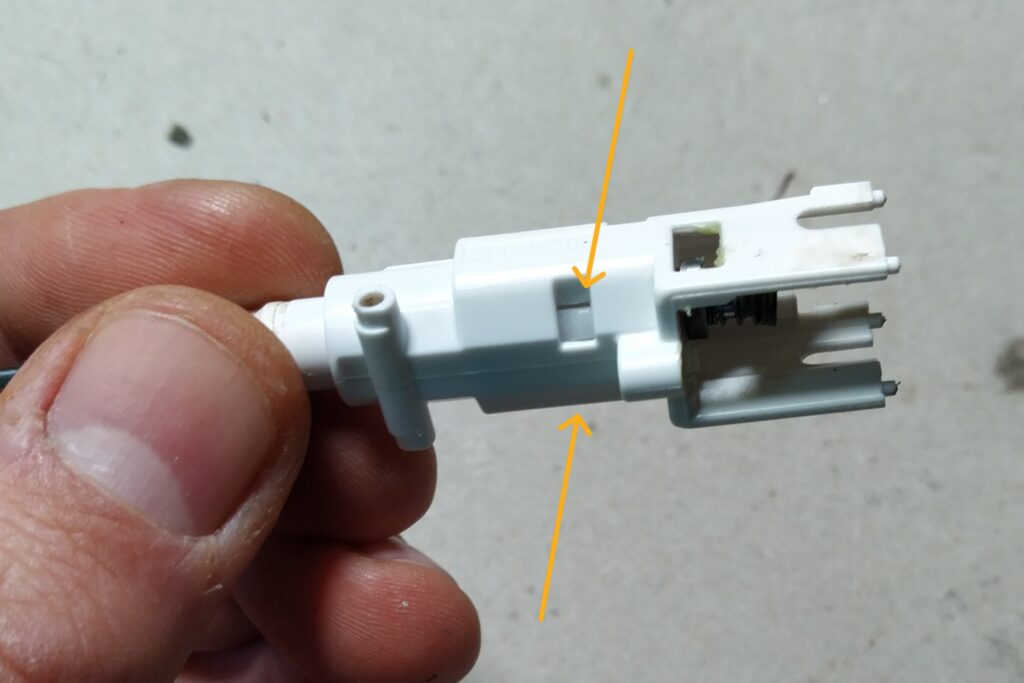
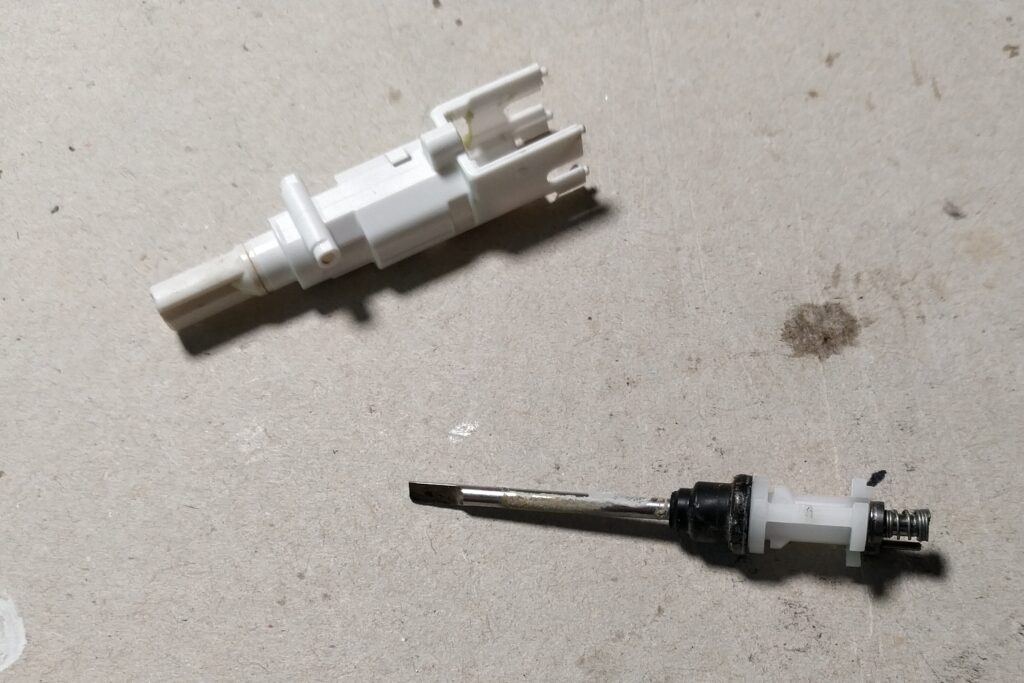
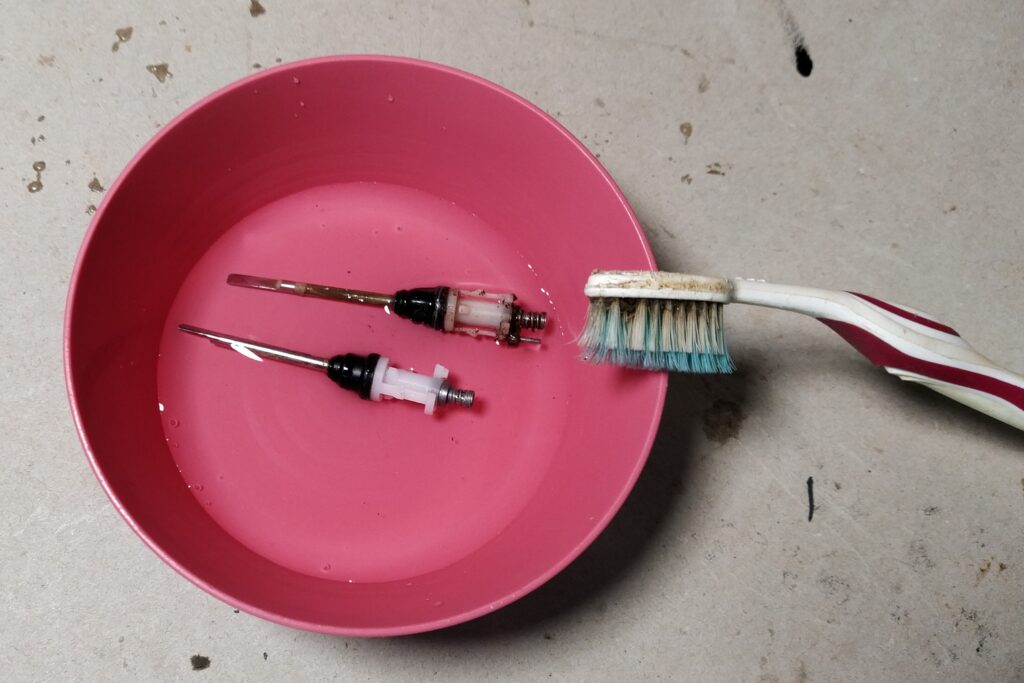
5. Once you’ve completed the removal process on both toothbrushes, you will have two drive shaft assemblies.
Soak both drive shaft assemblies in some vinegar for some time and use a brush to remove any limescale and dirt.
6. After cleaning, inspect the rubber seals. In my case, the donor drive shaft had a damaged rubber seal, while the broken drive shaft still had a good one. I therefore transferred the good seal to the donor shaft.
* To remove the rubber seal: Press the shaft against a hard surface and push the plastic part downward. This slides the rubber seal down the shaft.
* To install the good seal on the good part, reverse the process. I apply a little amount of silicone grease on the seal before installing it.
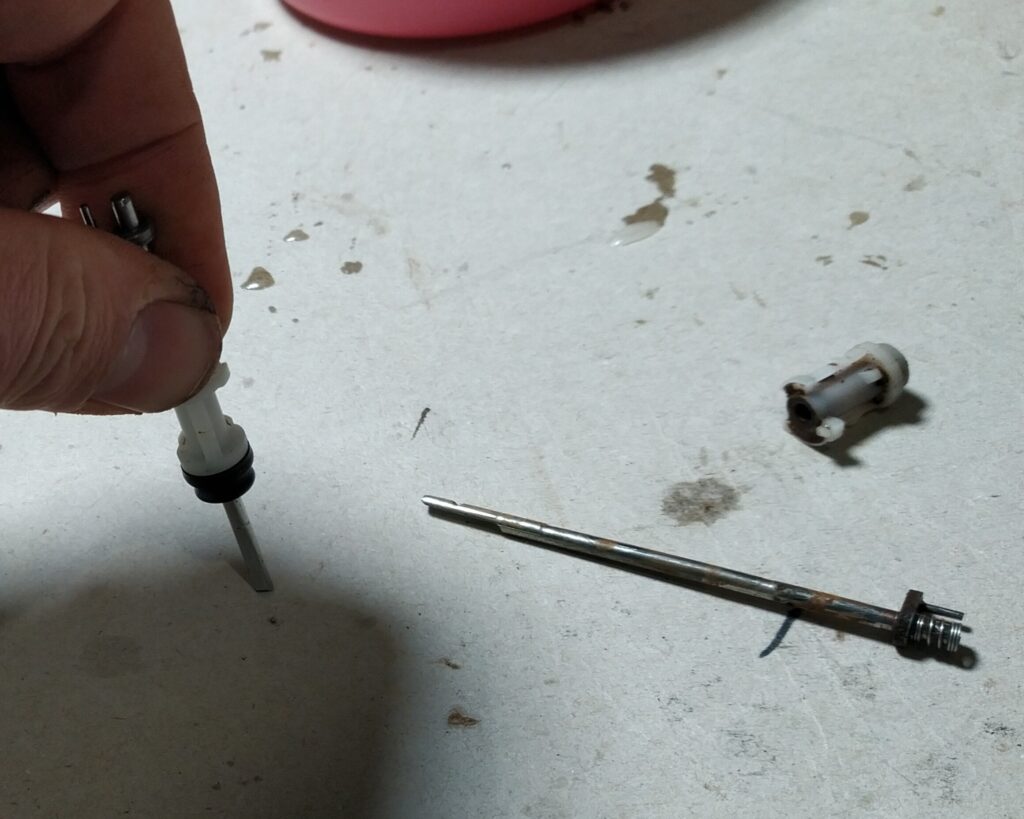
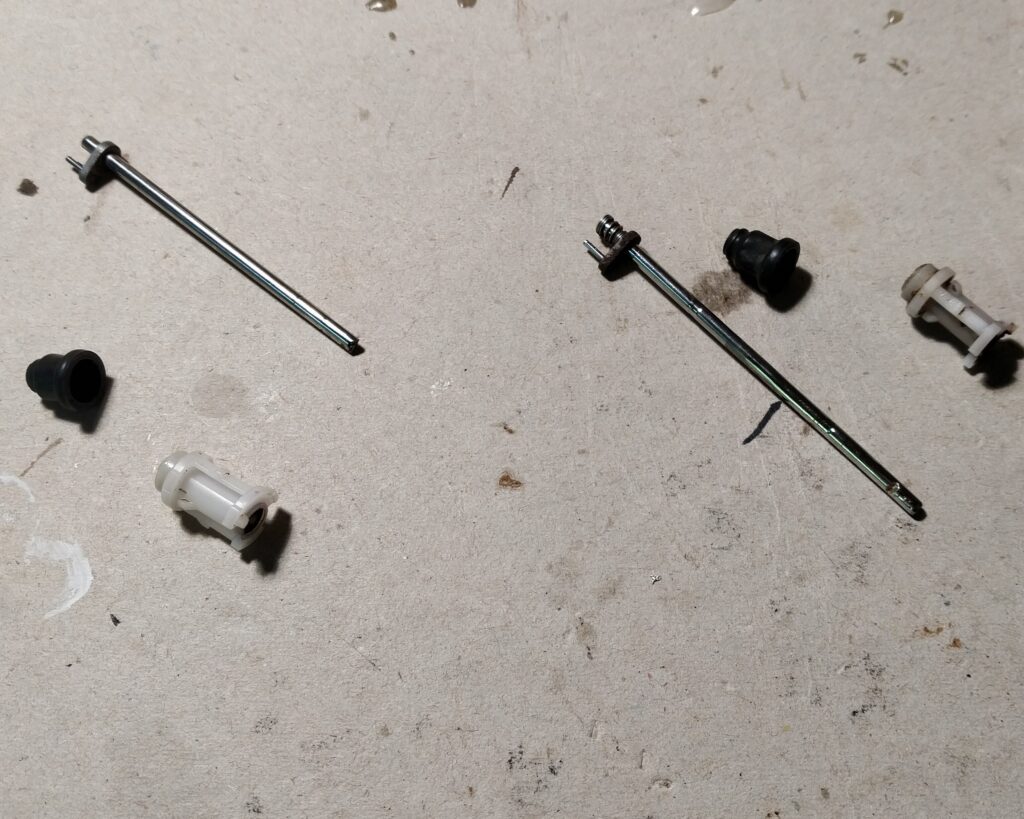
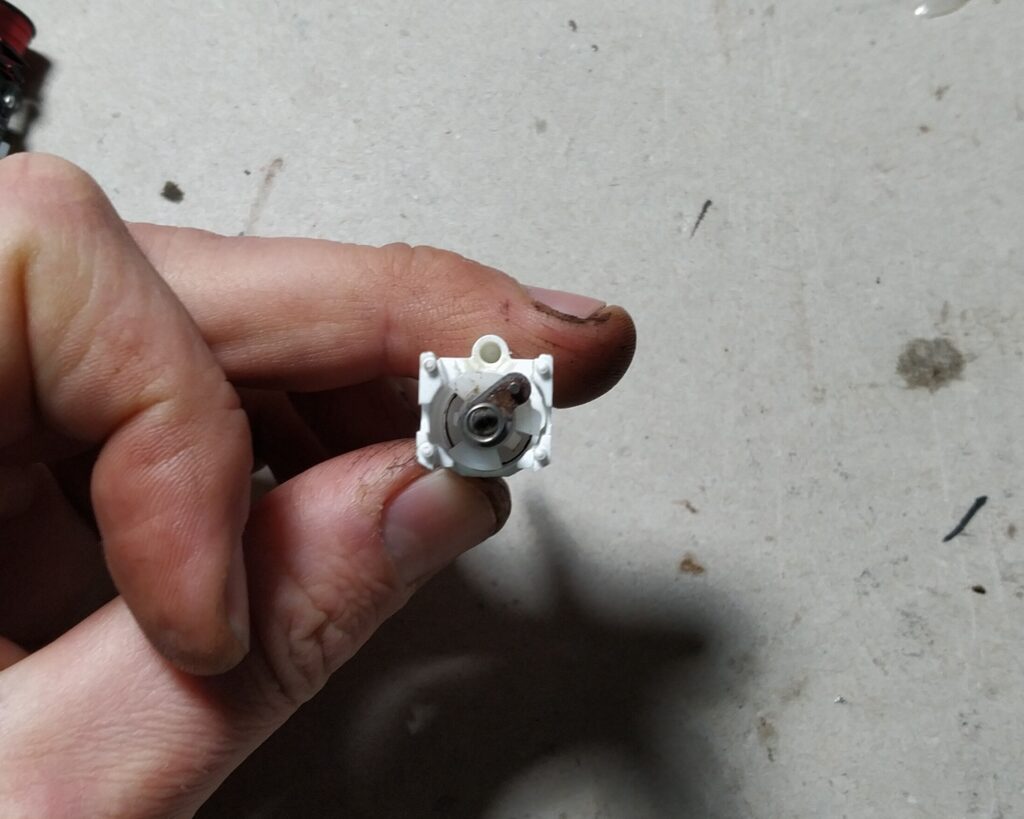
7. We can now reassemble the toothbrush:
- Push the drive shaft assembly back into the driveshaft housing. Make sure to put it in the right position! Use below picture for reference.
- Next install the small spring and gear assy.
- Afterwards, push the drive shaft housing back onto the motor. Make sure to verify that the gears are positioned properly.
- Insert the metal pin.
- Put the ring from the plastic led holder back around the frame.
- Turn on the toothbrush and check if all works properly before inserting it back into its housing.
Water ingress inside the toothbrush
Over time, water ingress into the toothbrush housing is almost inevitable.
The water usually starts by corroding the metal frame and the motor. If it reaches the electronics lower down, it can cause short circuits and even make the toothbrush turn on by itself. (Yes, I’ve actually been woken up in the middle of the night by a rogue, vibrating toothbrush!)
The problem gets worse once the rubber seal around the drive shaft deteriorates or breaks. This allows significantly more water to enter the housing.
Since spare parts for Oral-B Pro toothbrushes are generally unavailable, the only practical solution is to salvage a good rubber seal from another irreparable toothbrush.
To replace the seal, simply follow the same drive shaft removal steps described earlier. Once the shaft is out, you can easily slide the old seal off and transfer a good one onto the working drive shaft.
The simplest and most effective way to prevent water from seeping deep into the toothbrush is to store it upside down when not in use.
This easy habit allows any moisture to drain away from the motor and electronics instead of pooling inside. It significantly extends the life of your toothbrush. (On the condition that you also replace the battery when needed.)
To keep our toothbrushes stored upside down, I found this Joseph Joseph Easy-Store holder. It’s almost perfect for the job.
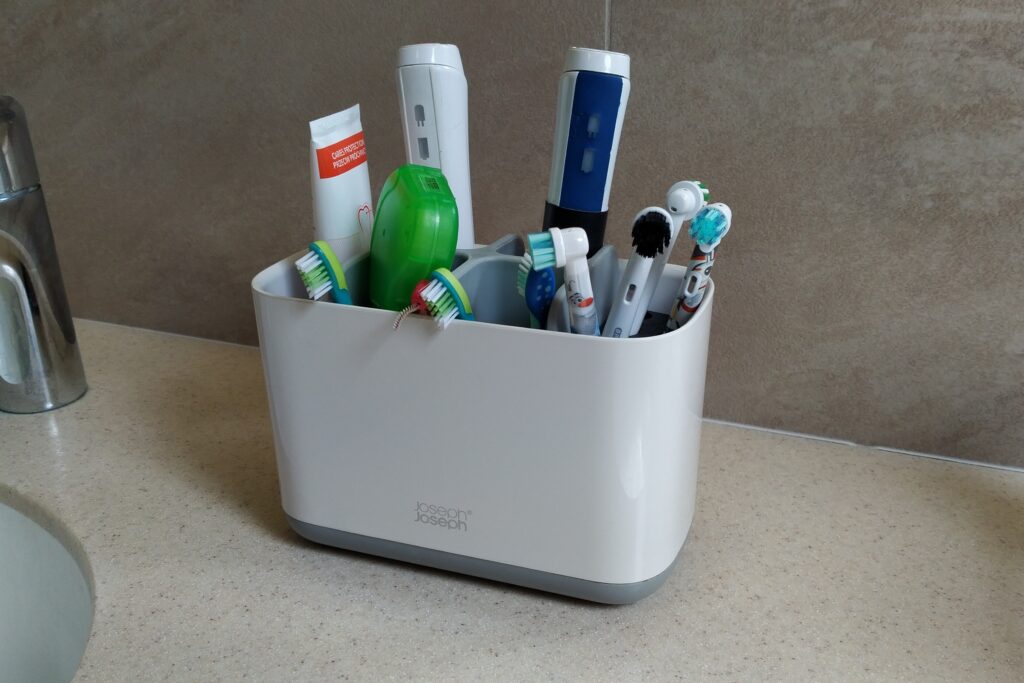
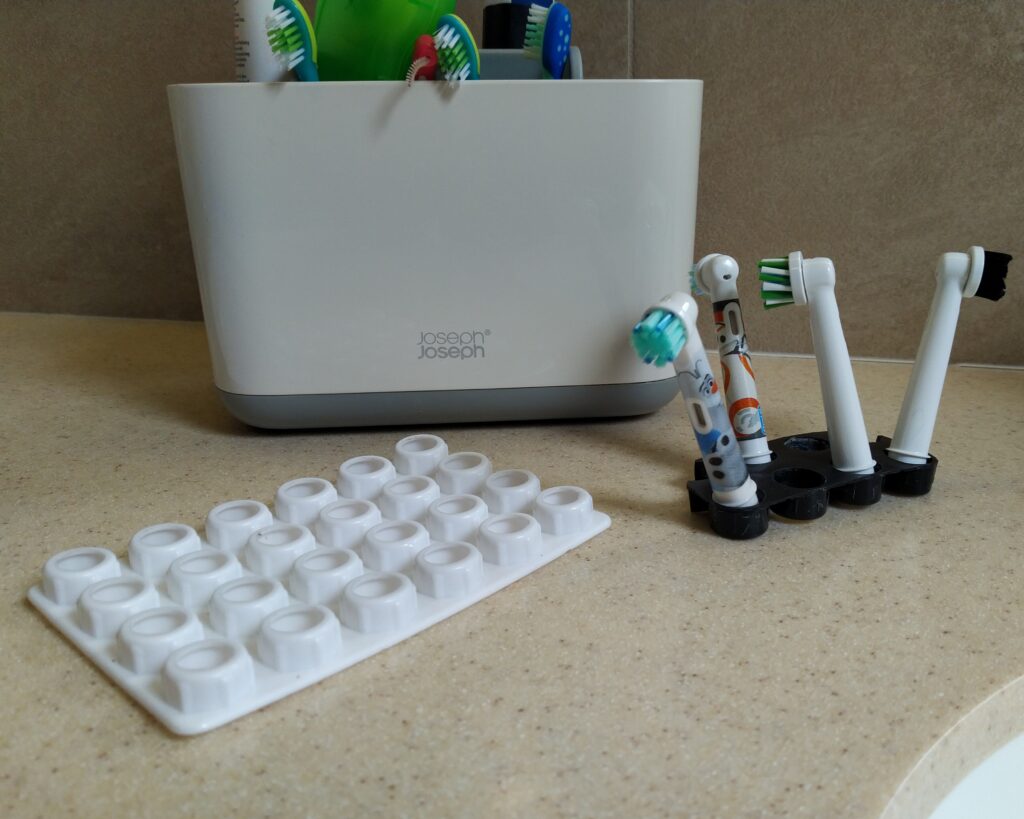
The only issue was that it didn’t have dedicated spots for the brush heads. I solved this by trimming down a small plastic frame (originally used for glue sticks in the shop) that I had lying around. It fits our toothbrush heads perfectly — no need to 3D print anything.
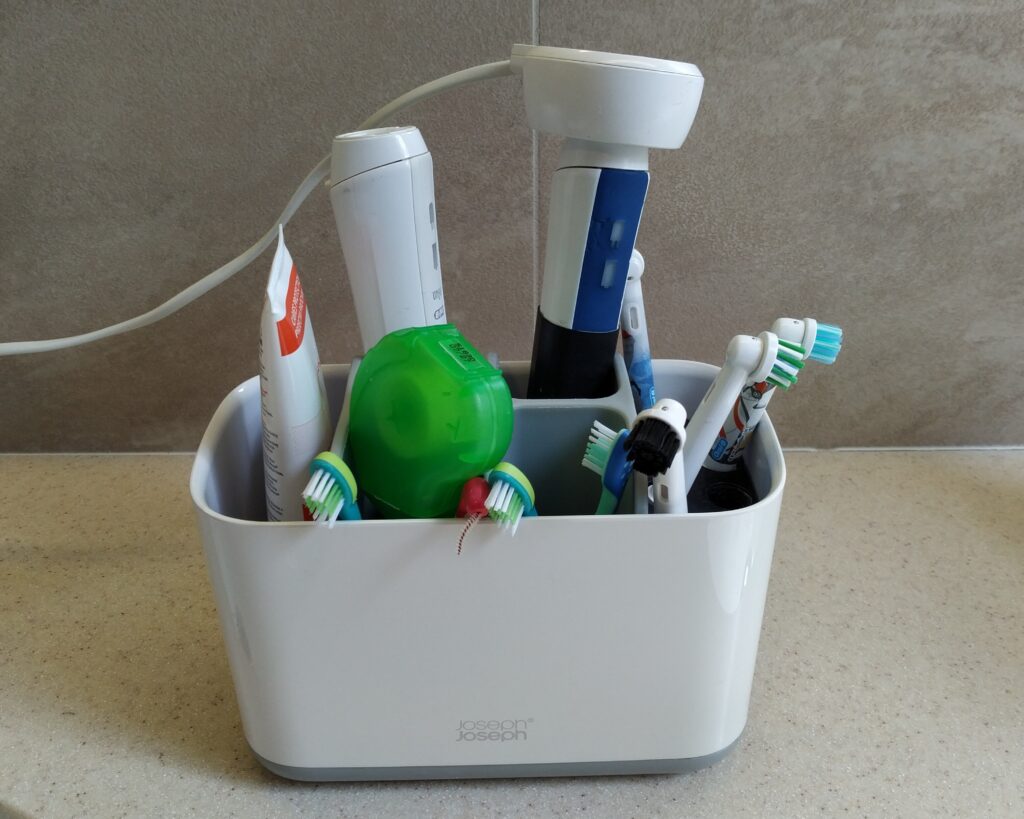
This sleek holder now organises all our toothbrushing gear in one neat place.
When a toothbrush flashes red, we simply place the charger upside down on it while it sits in the holder. It looks like a strange thing, but it works great!
Not only does this simple setup significantly prolong the life of our toothbrushes, it also keeps the bathroom decluttered, peaceful, and quiet.
Sometimes the simplest solution really is the best.
Degrading of the rubber on the housing and button
If you use your Oral-B toothbrushes for many years, the soft rubber on the housing will eventually start to degrade and wear away. The key is to fix it early before it reaches a bad state.
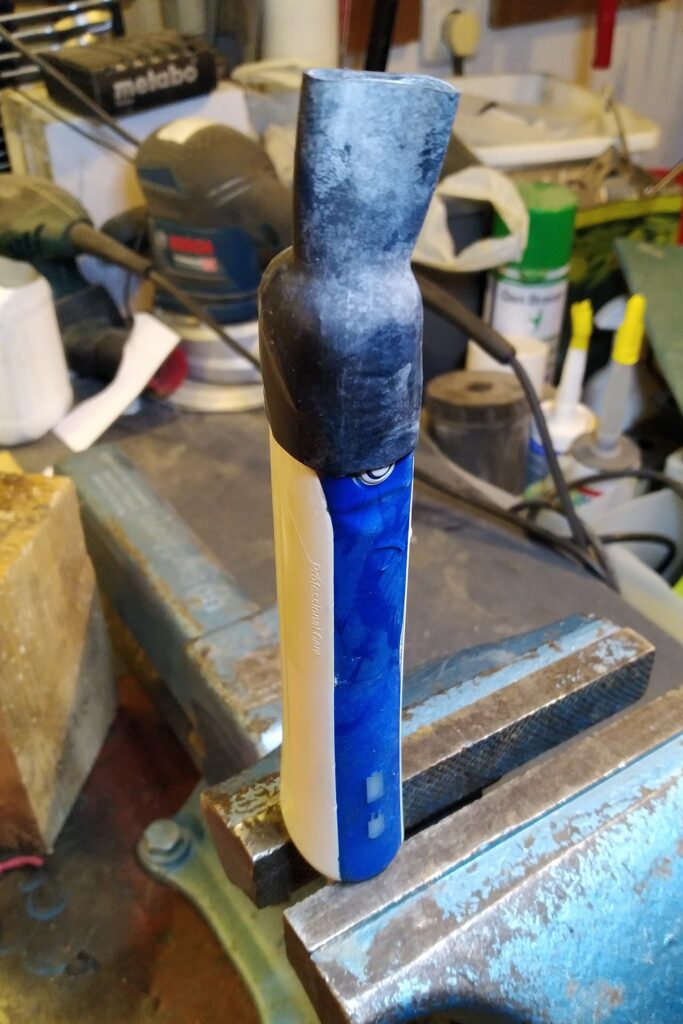
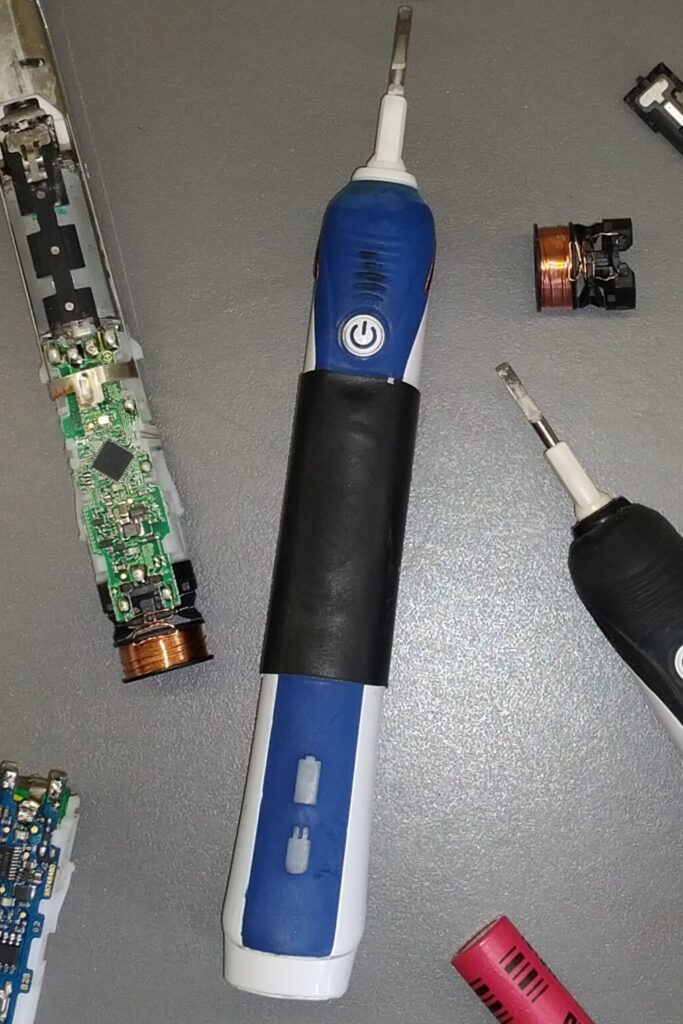
I cover the degraded areas with a piece of rubber bicycle inner tube (18–28 mm diameter):
- Measure the tube against the section of the housing you want to cover and cut it slightly longer than needed. (The tube will shorten a little when you stretch it over the housing.)
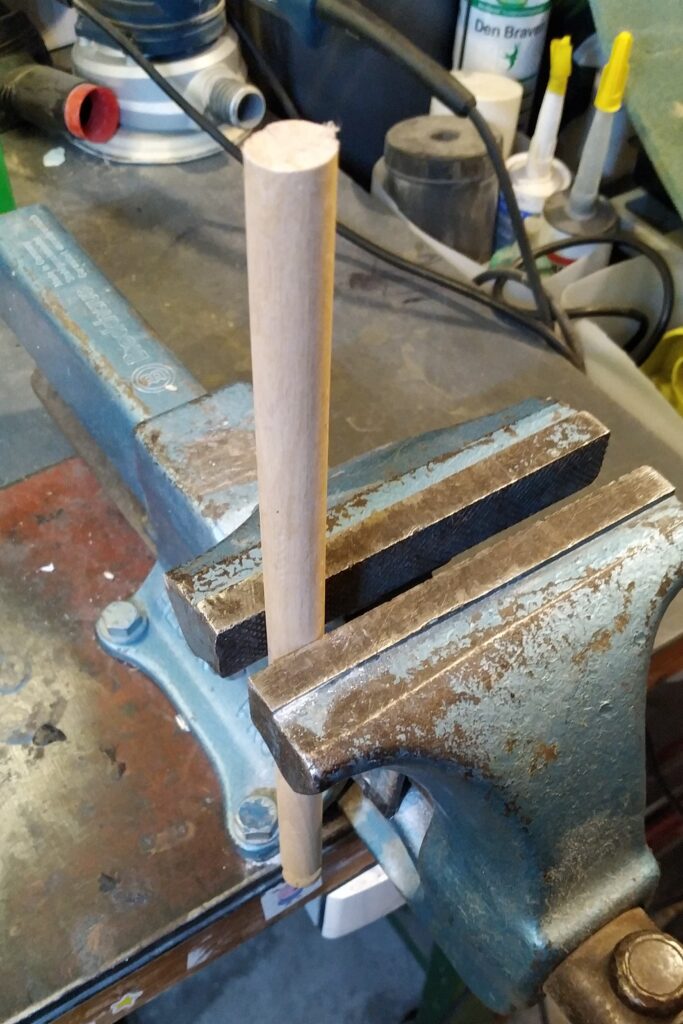
- Place a wooden stick or dowel in a vice and slide the toothbrush housing over it (so the bottom of the housing rests on the vice jaws).
- Apply a some dishwashing liquid (as lubricant) to the toothbrush housing.
- Gradually push and twist the tube over the housing until it’s fully in position.
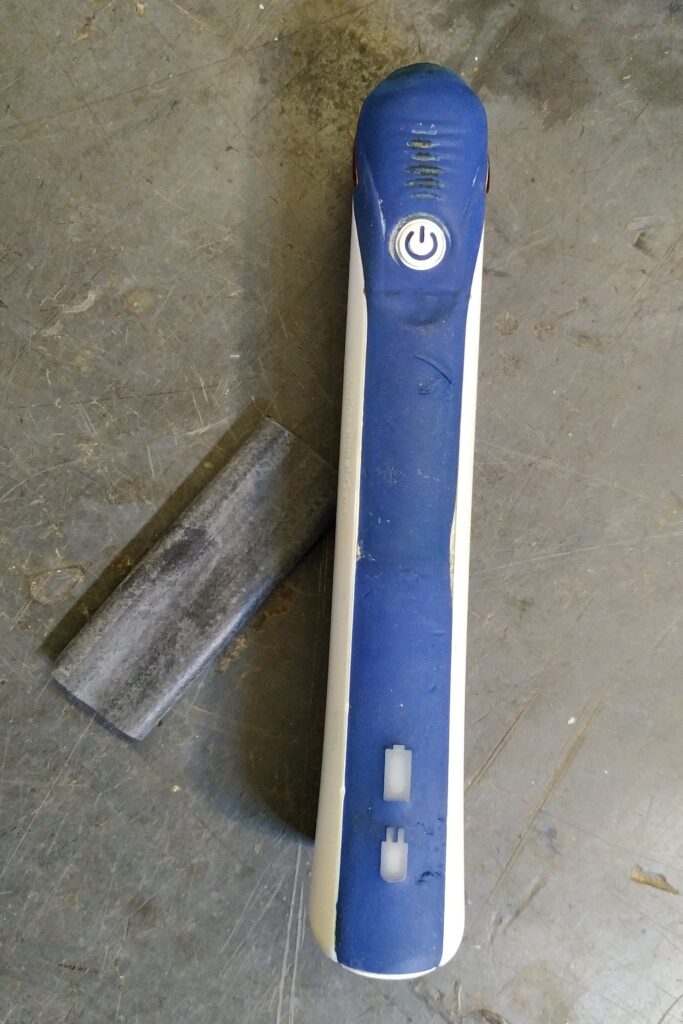
On/Off button area
If the rubber around the power button starts to deteriorate and is no longer waterproof, the same tubing trick works well. Simply cut off the entire button, then slide the tube over the toothbrush from the top.
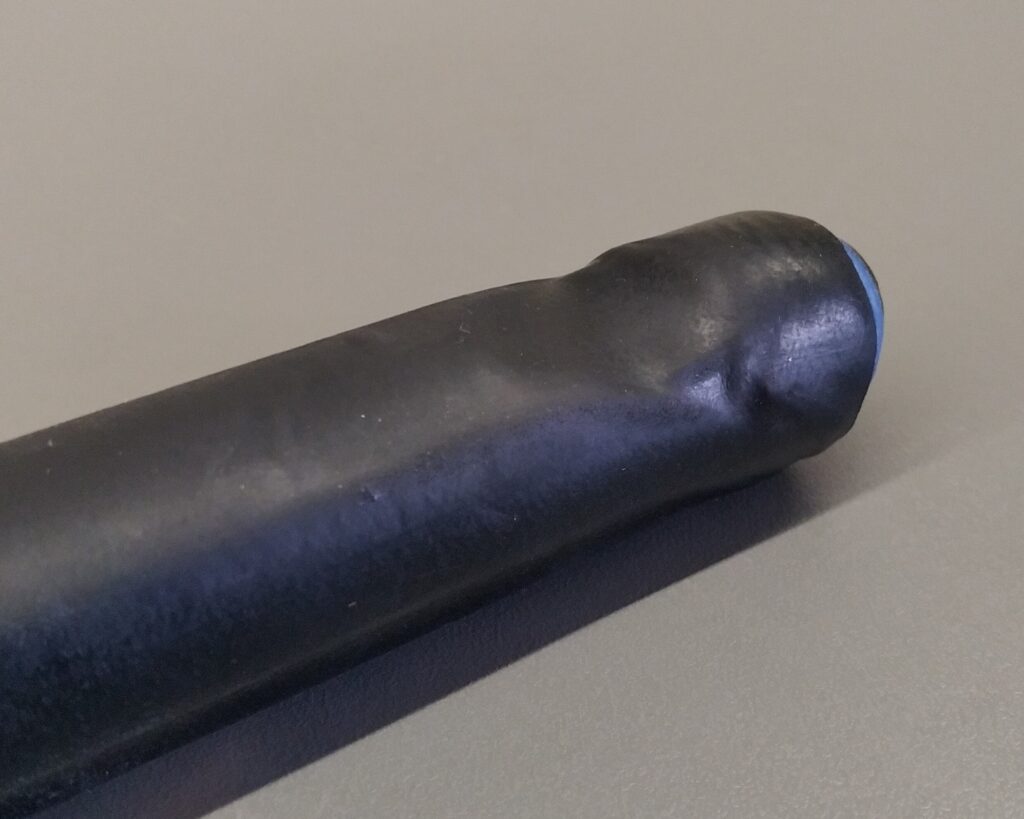
Lower LED indicators
You can also cover this area with the tube. Once in place, use a hole punch to carefully cut small openings for the LEDs to shine through.
Reassembling the Housing
Before closing the toothbrush, I check the housing for any limescale buildup. If needed, I soak the housing in vinegar for a while and clean it thoroughly with a small brush. I then let it dry completely.
- Install the bottom cap in the reverse order of removal: Place the cap on a flat surface, hook the rear of the housing into the cap first, then push down while tilting the housing forward until the front clicks securely into place.
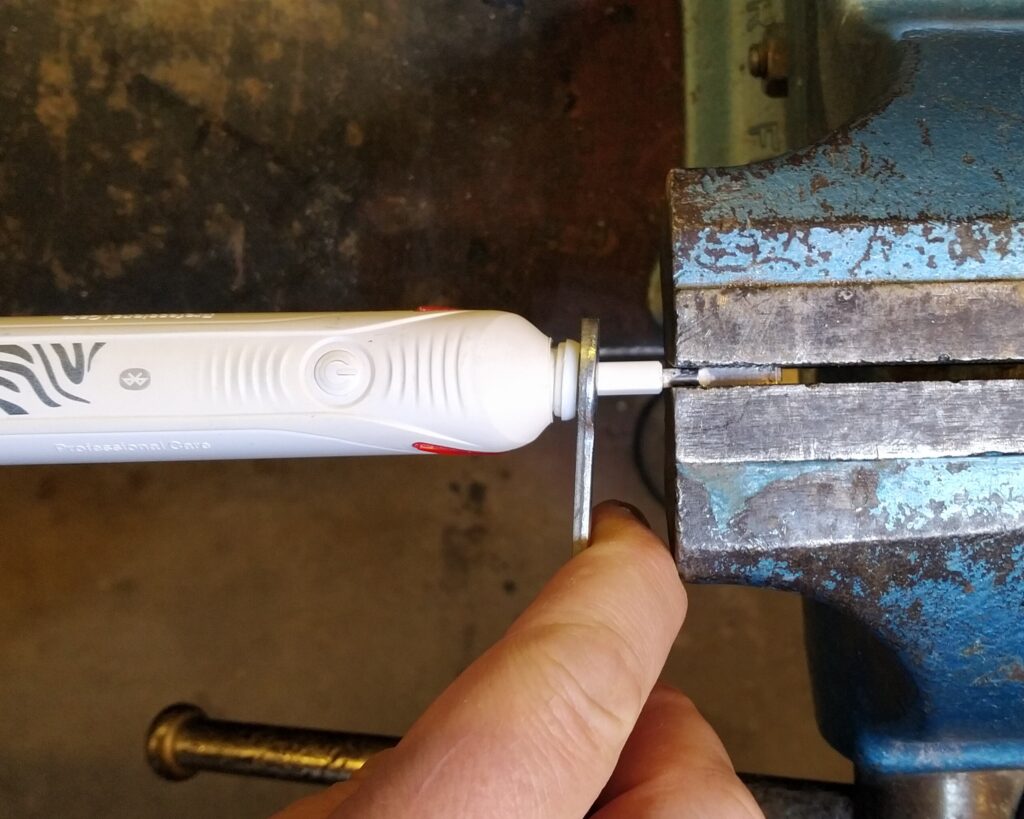
- For the top washer/ring: Clamp the drive shaft firmly (but not too tightly) in a vice. Use a 10 mm flat wrench to press the top washer/ring back into its original position.
Final considerations
All the repairs and tips in this guide were successfully performed on the following Oral-B Pro models:
3754, 3756, 3766, and 3767.
I was able to exchange mechanical parts between these models without any issues. However, please note that the charging coils and control boards differ between the NiMH and Li-ion versions. I have not checked whether there are any differences between the motors of the NiMH and Li-ion models.
From my research, many other Braun/Oral-B toothbrushes use very similar internal mechanisms (motor, drive shaft, charging coil, and battery layout), only differing in the outer housing and control board. This means most of the repairs and techniques described above should also apply to a wide range of other Braun toothbrush models.
For completeness, I also came across this helpful video during my research. It demonstrates how to repair a stuck motor and, specifically for the Oral-B Genius line, shows how to fix a blown fuse and a damaged current-sensing resistor: https://www.youtube.com/watch?v=Wfuu_V_HekU
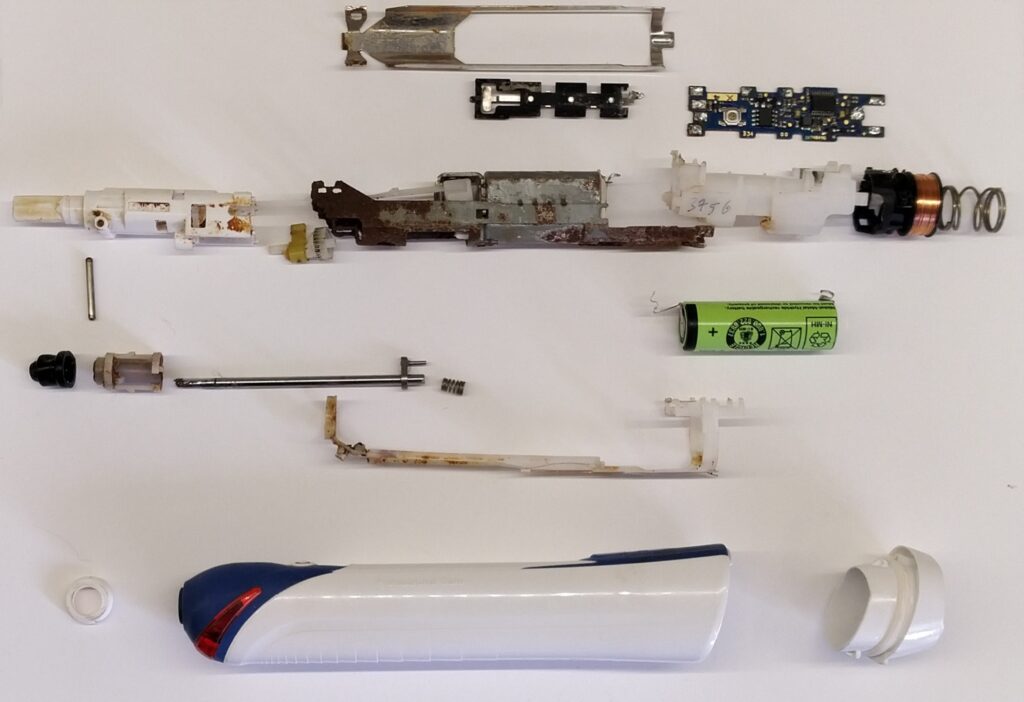
I haven’t been able to find any official spare parts for these toothbrushes. If anyone knows of a good source, please let me know! Since there are no official parts lists or service manuals available, I created the exploded view below to make things clearer. I hope it helps you better understand the internal layout and makes your own repairs easier.
Our oldest toothbrushes were eventually retired after more than 10 years of service (with occasional battery replacements along the way).
In the end, the combination of heavy housing degradation and internal rust became too much. Although I probably could have kept patching them up, I finally decided it was time to let them go.
I’m confident that if Braun offered the drive shaft seal and replacement housings as reasonably priced spare parts, these toothbrushes would still be running today.
Seeing how rugged and long-lasting these simple toothbrushes are, here’s my honest opinion: I’m not a dentist — this is just common sense after many years of using them. I see no reason to overpay for the fancy high-end models with all their extra bells and whistles. In my experience, a good basic electric toothbrush performs just as well. I don’t believe the advanced features actually give you noticeably healthier teeth.
If you have any tips, tricks, or personal experiences with these Oral-B toothbrushes that I haven’t mentioned, I’d love to hear from you. Always happy to learn!