
One day my daughter asked if I could make her a heart that lights up.
Wanting to capture her exact vision (kids have the best ideas!), I asked her to sketch it out for me. She came back with two adorable drawings: one plain heart with lights inside, and another heart with lights, cat ears, and a cute cat snout.
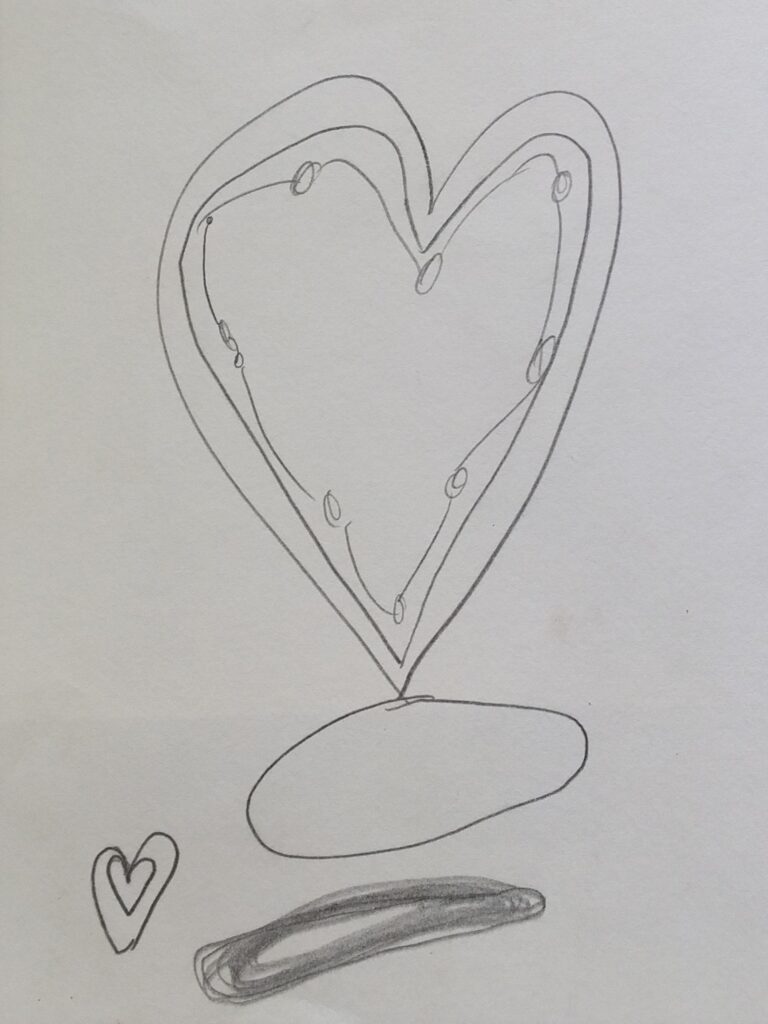
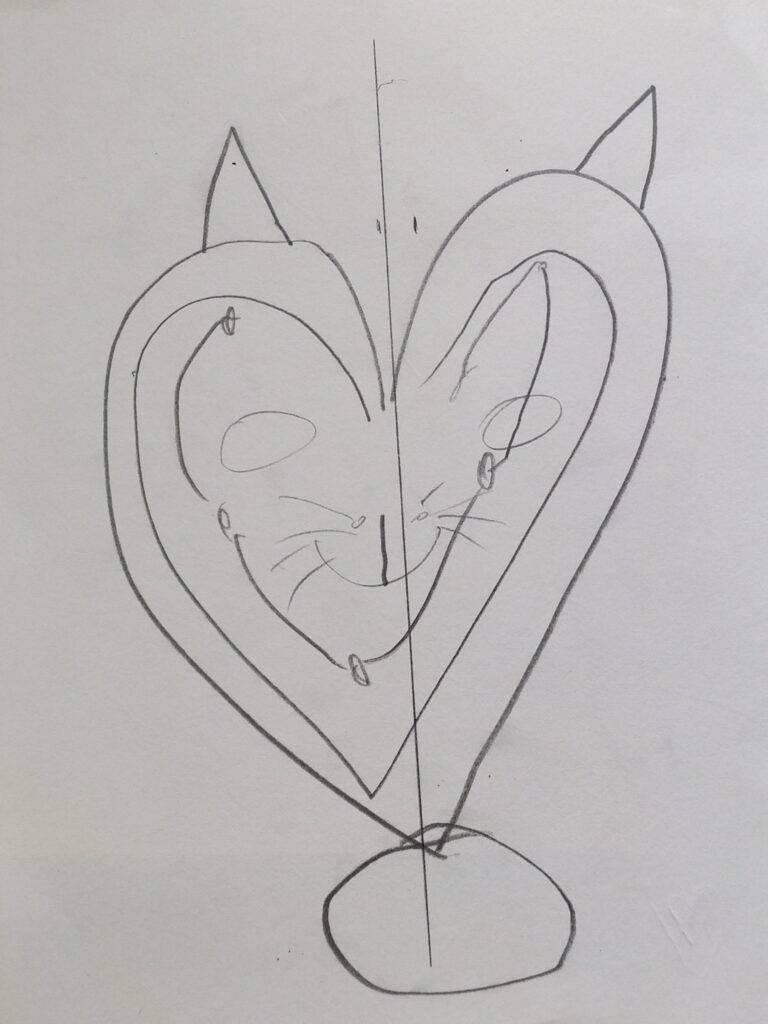
The lights’ positions weren’t quite clear yet, so I asked a few more questions to double-check we were picturing the same thing (and to make sure she’d love the final result!).
Luckily, she let go of the cat snout idea.
Wanting to turn it into a fun father-daughter project, I said, “I hope you’ll help me build this heart!” She said yes right away.
From sketch to glow
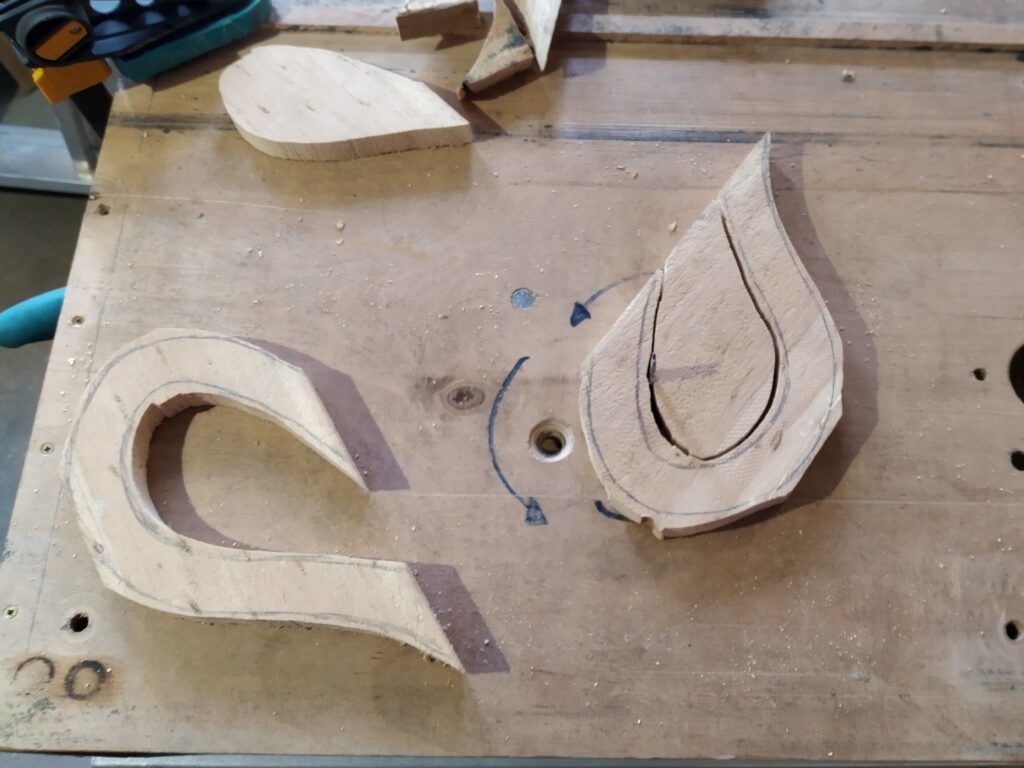
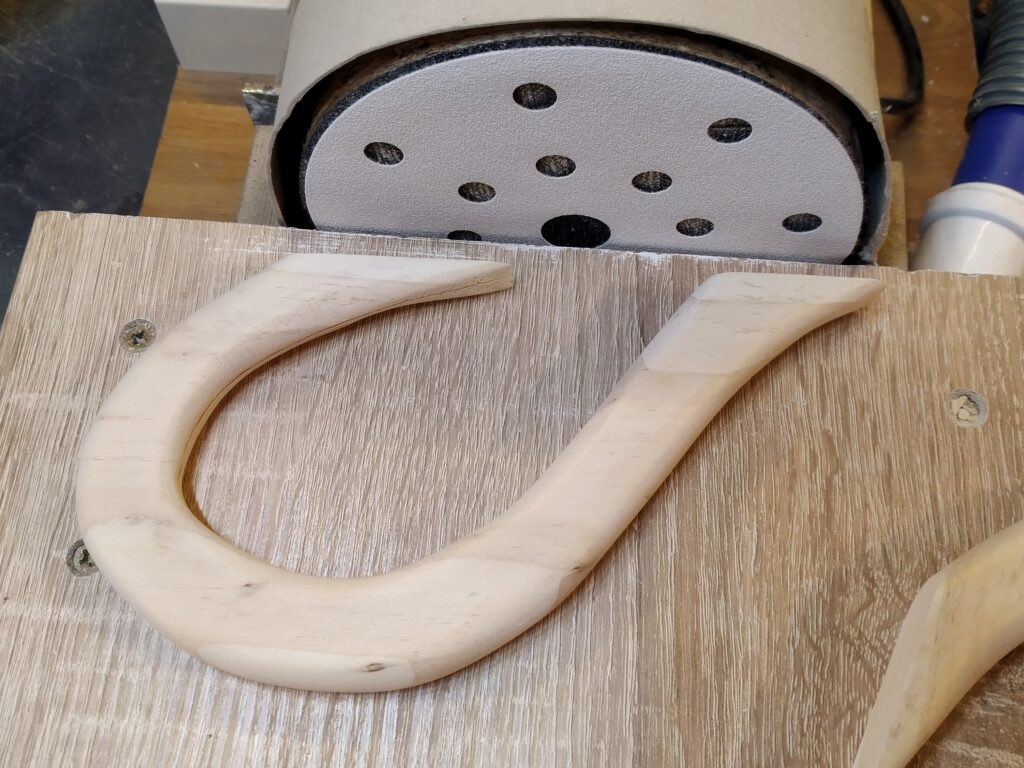
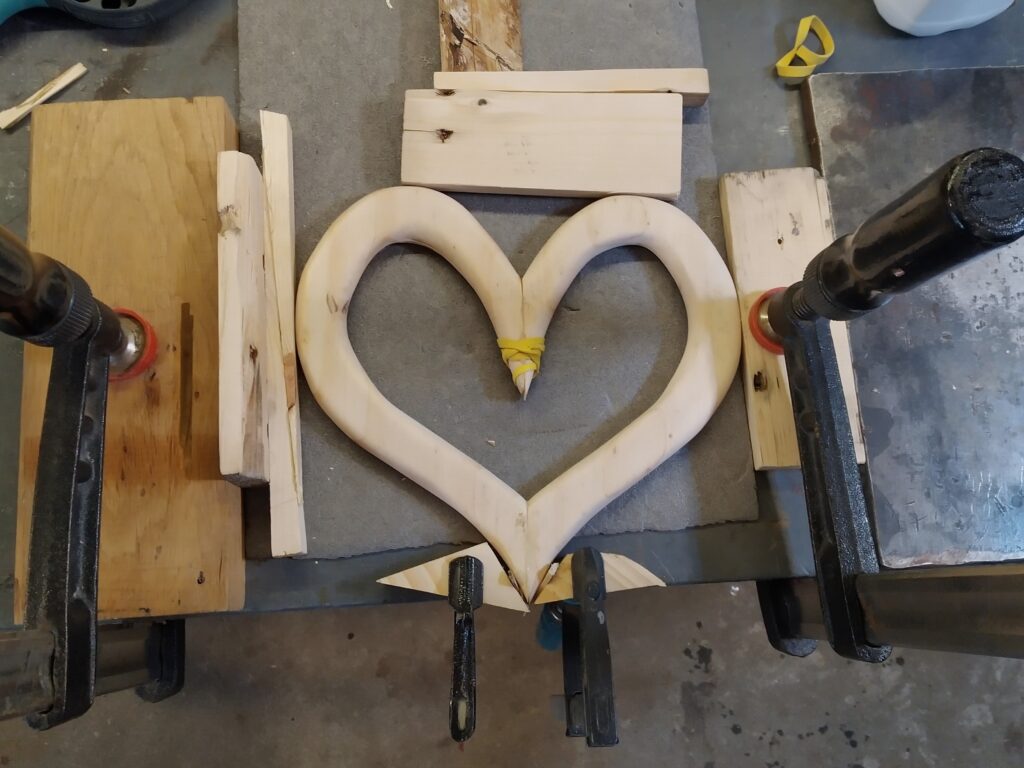
I sketched half the heart on a piece of paper until I got the shape just right. I cut it out and transferred this shape two times to an undamaged piece of soft pallet wood.
I flipped my jigsaw upside down to use it like a makeshift bandsaw and roughly cut out the two halves of the heart.
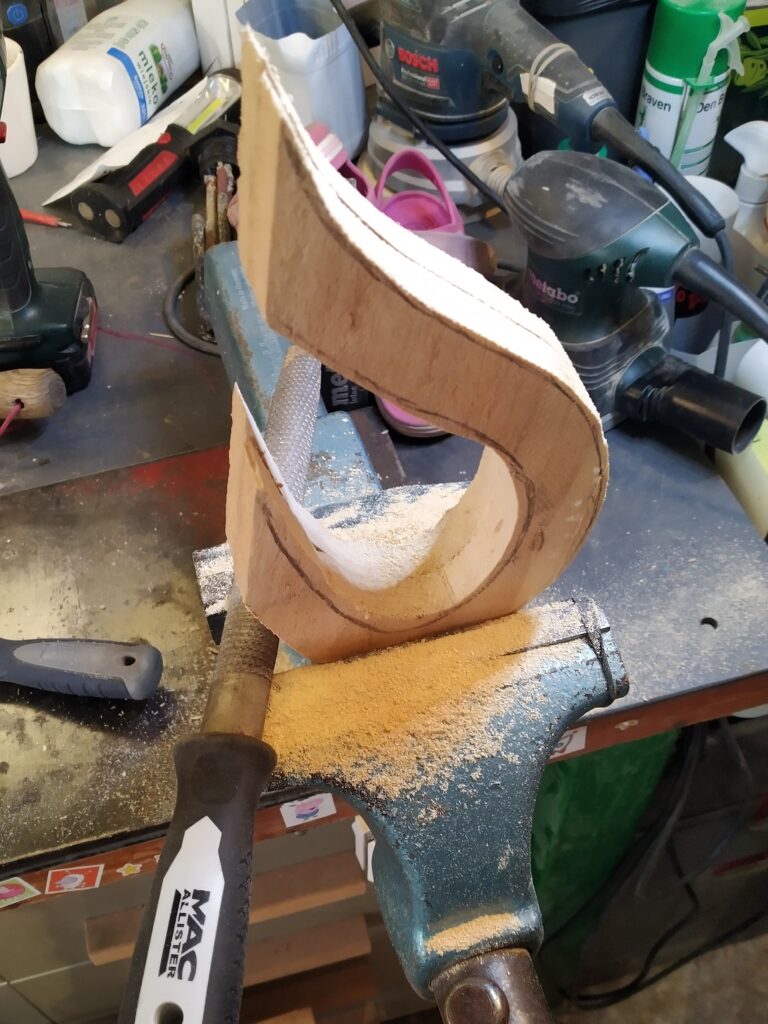
We secured both halves together in the vise, and my daughter and I took turns with the rasp and the file, slowly but surely shaping the wood until it had the right shape.
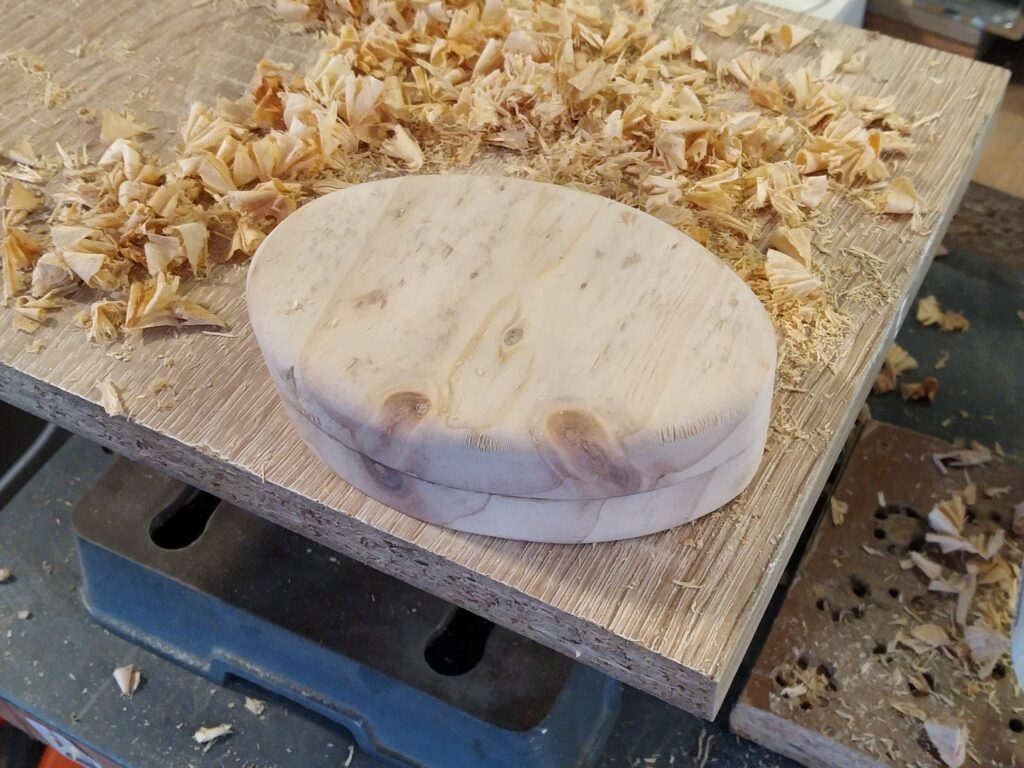
Once both sides had the right shape I clamped them separately and rounded them over and then sanded them with 80, 120 and 240 grit.
The base
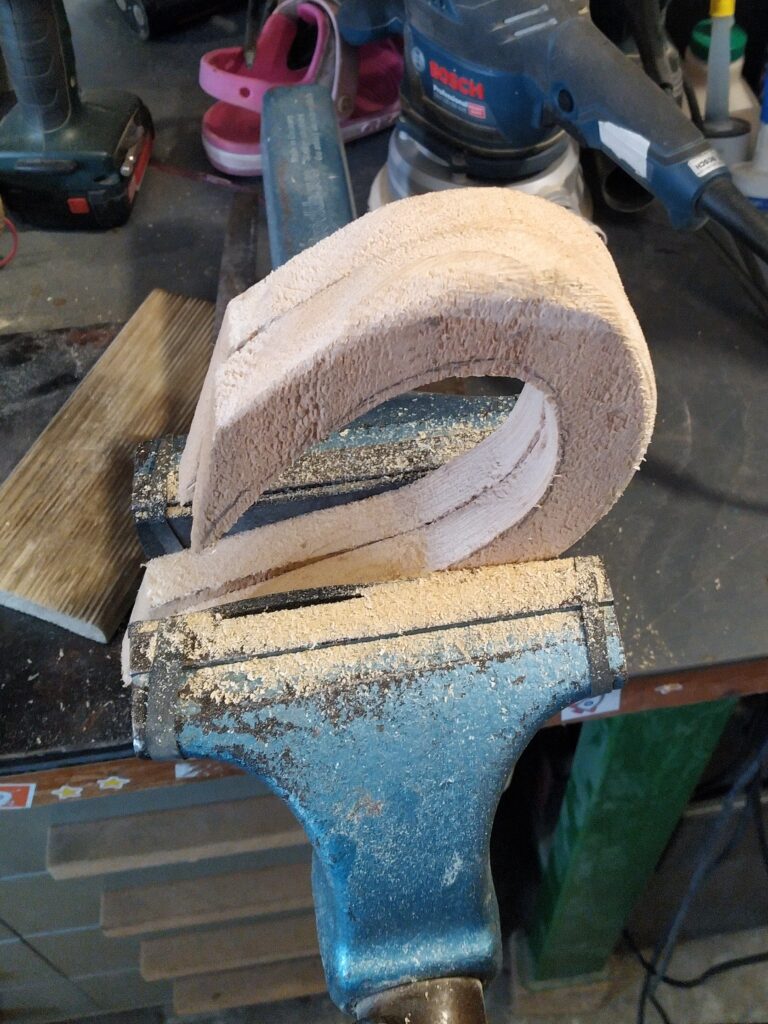
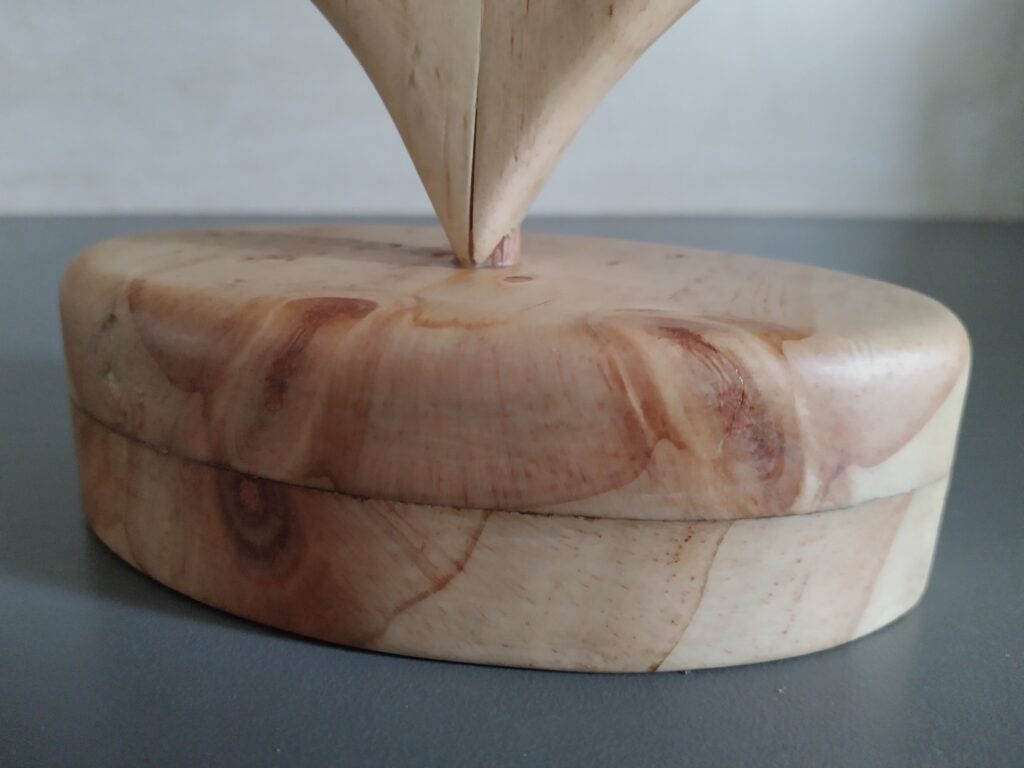
For the base of the heart, we went about in the same way. We made a template from wood and transferred it two times two a piece of the same pallet wood and cut them out with a jig saw. I then glued them together to get a thicker base. Once dry we shaped the base with rasp and file and ended with some sanding.
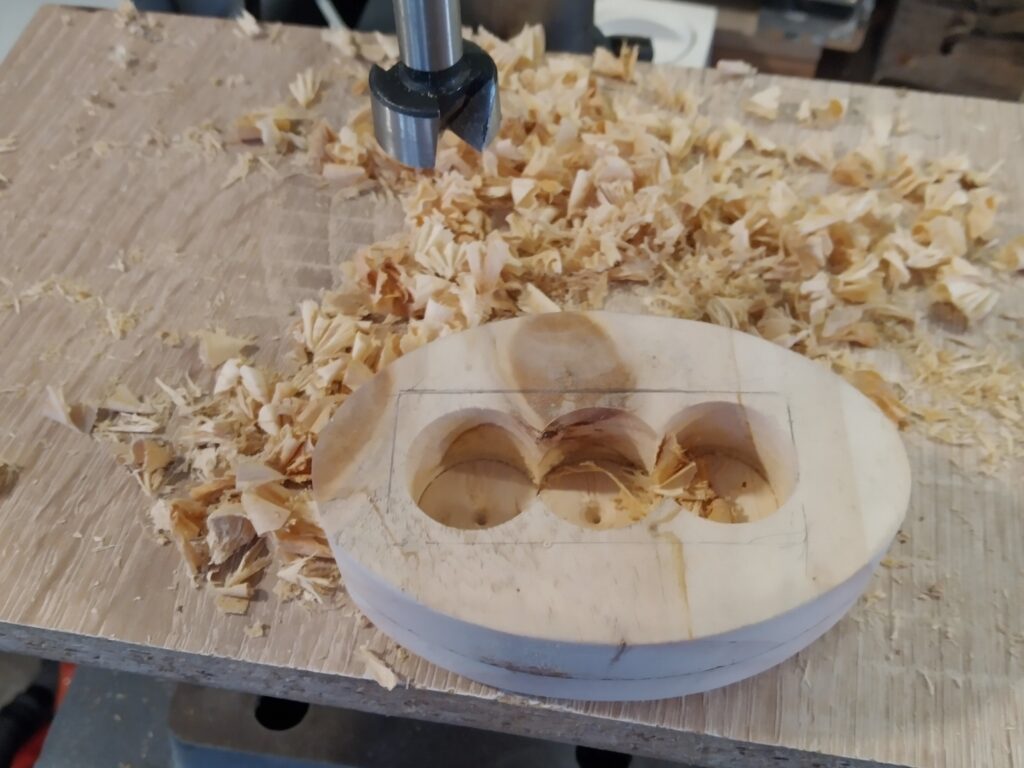
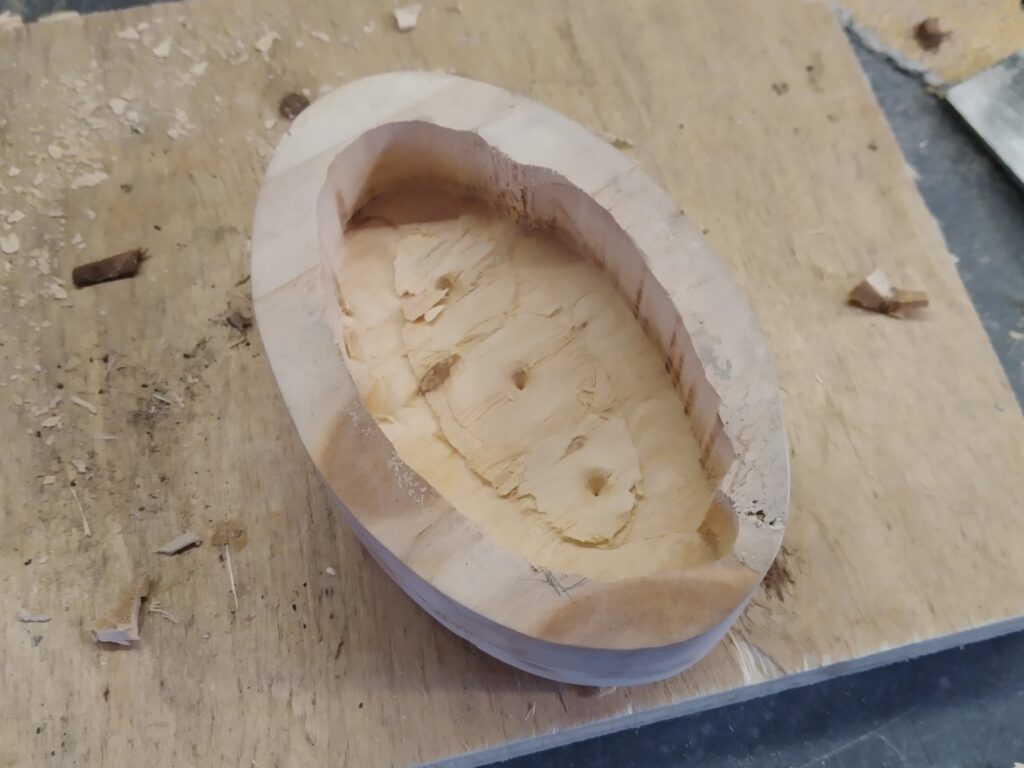
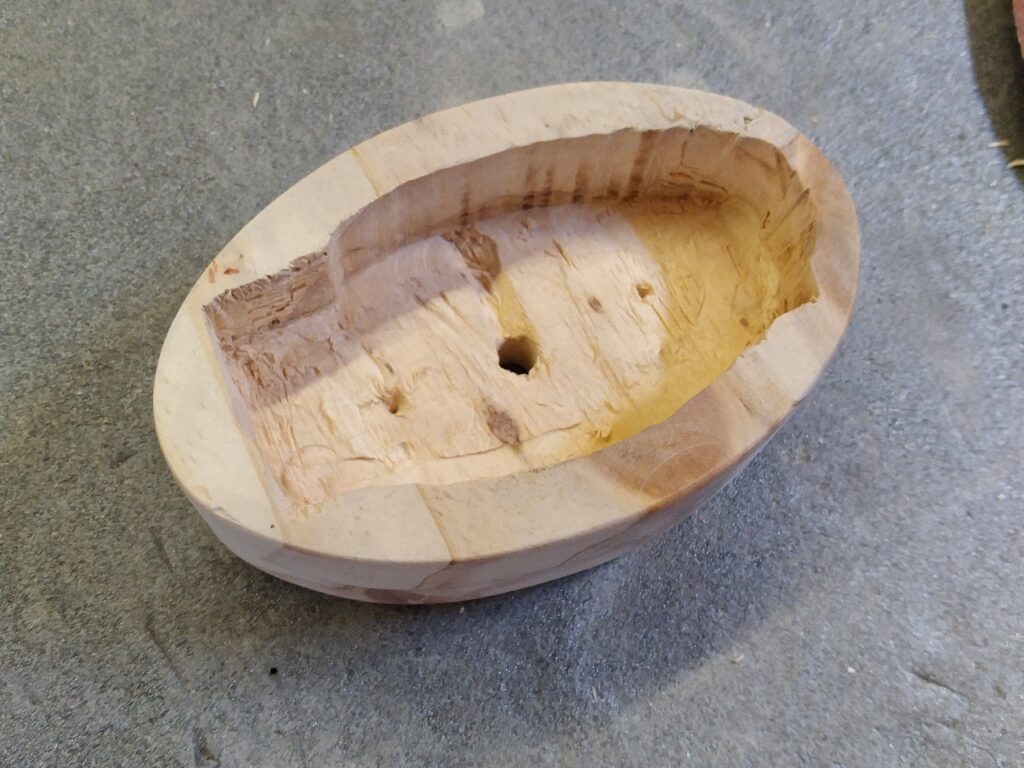
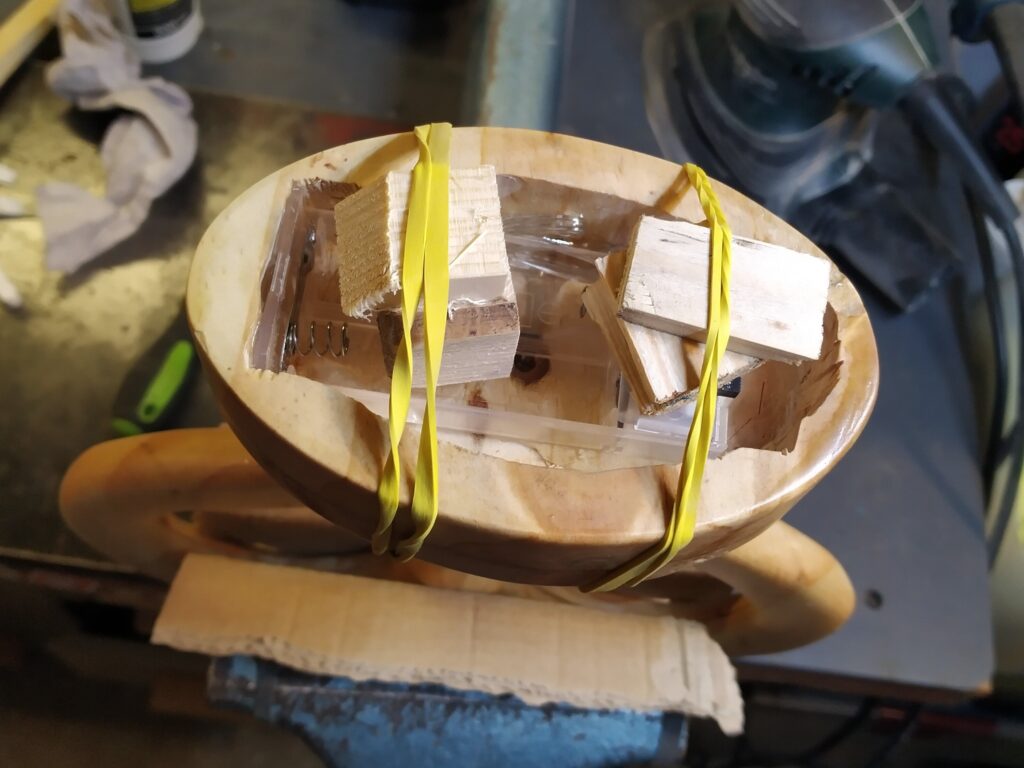
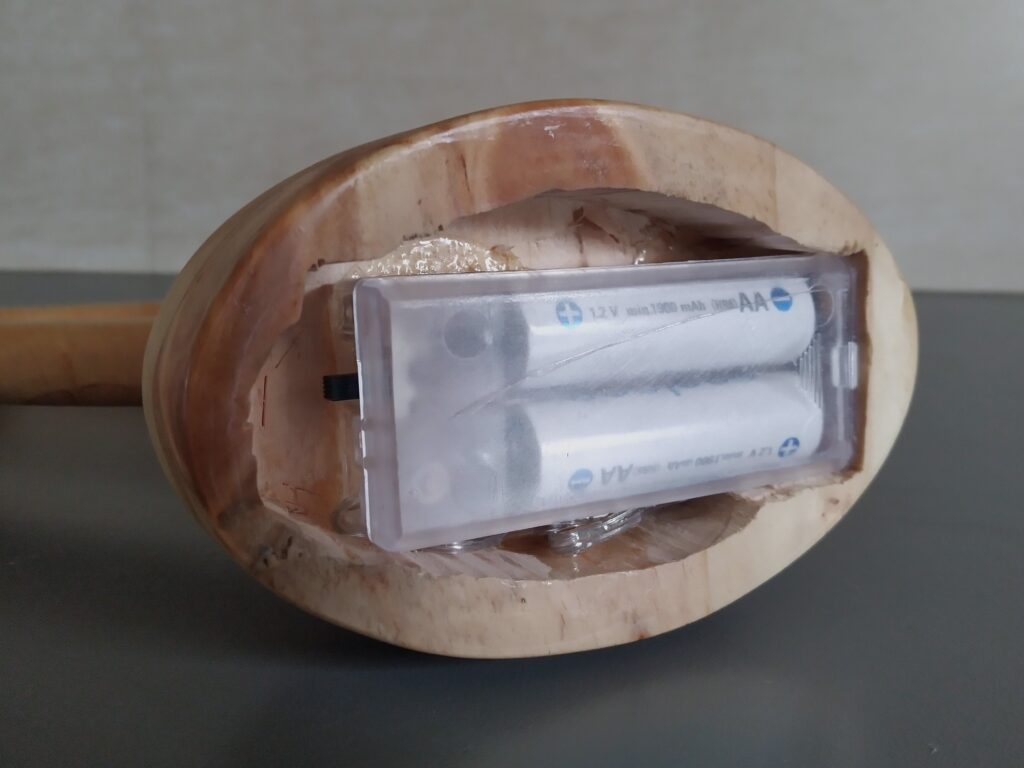
Once the shape of the base was finished I had to make a void in the bottom for the battery pack for the lights. First I removed some wood from the bottom with a Forstner bit. I followed it up with my router and finetuned the shape to make the battery pack fit and still have comfortably access to the on/off switch.
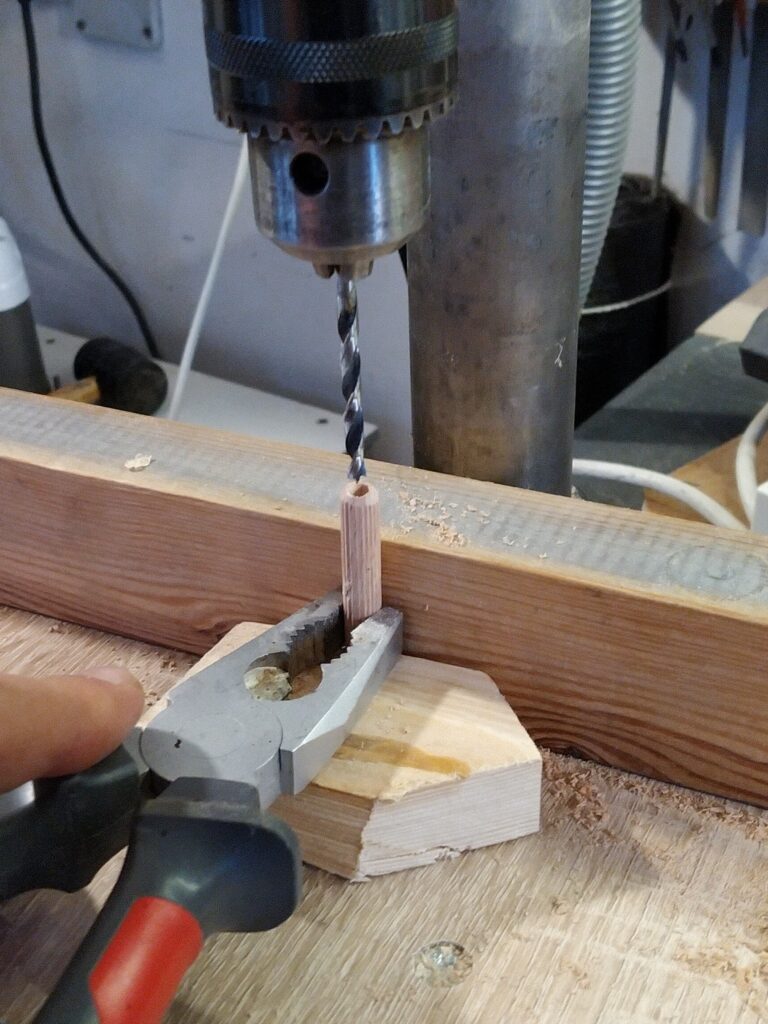
I had also drilled an 8mm hole in the middle for a dowel to attach the heart.
Installing the leds
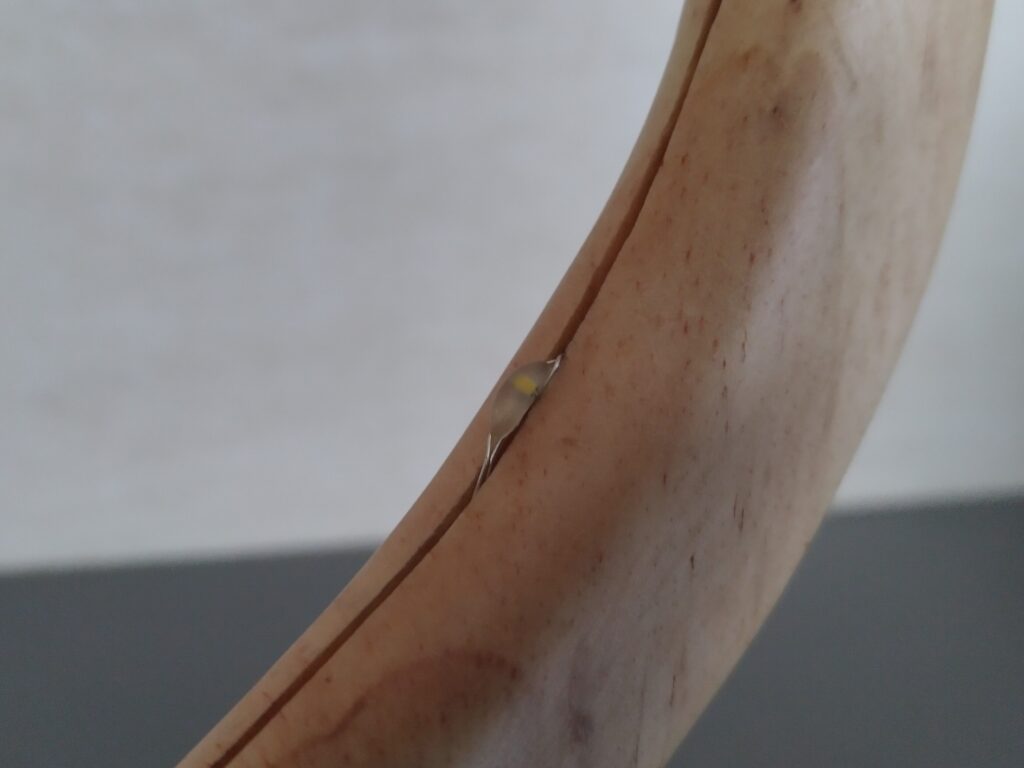
For the lights I had found a fine wire string with 8 tiny leds on it and a 2x AA battery pack. The leds were a little too far spaced apart for this project so I had to find a way to install the leds so the wire wouldn’t be visible and would allow me to get rid of some excess wire. I decided to try and cut a tiny channel all along the inside of the heart to shove the tiny wires in.
Problem was that I didn’t really have anything appropriate to cut the channel at hand… I decided to try and make a tiny slot cutter. I took a metal bottle cap (Chimay bleue – it looked the most solid:-)) and hammered it flat. I drilled a hole in the middle and I cut a few teeth in it. I then installed it with a few washers on the shaft of a slot cutter router bit.
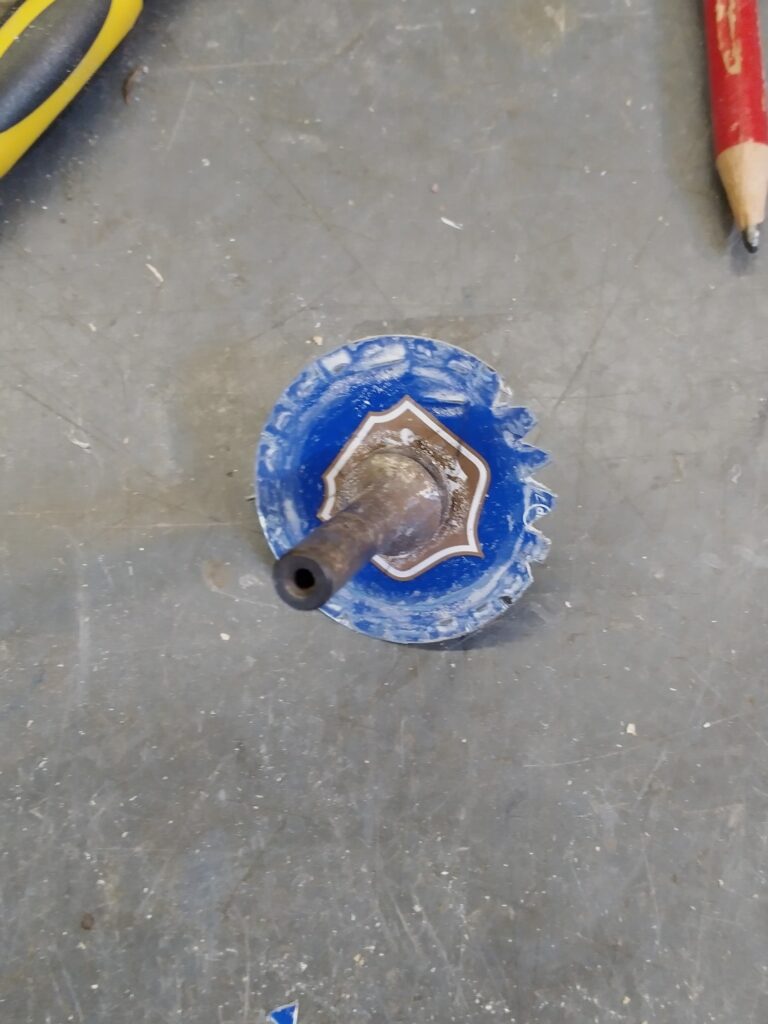
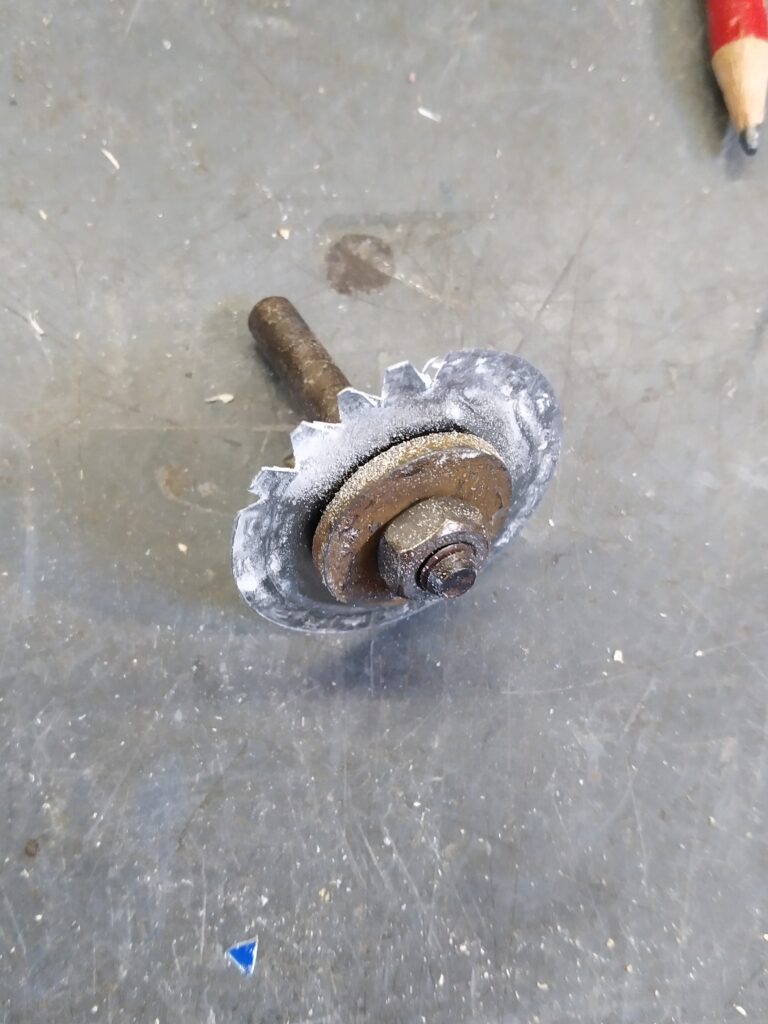
It didn’t really felt safe to put this self made contraption in my router and make it spin at 27.000 rpm so I put it in my drill press. I then guided both halves of the heart by hand along the self made cutting disk. It cut through it like butter. I was really amazed at how well this little contraption worked!
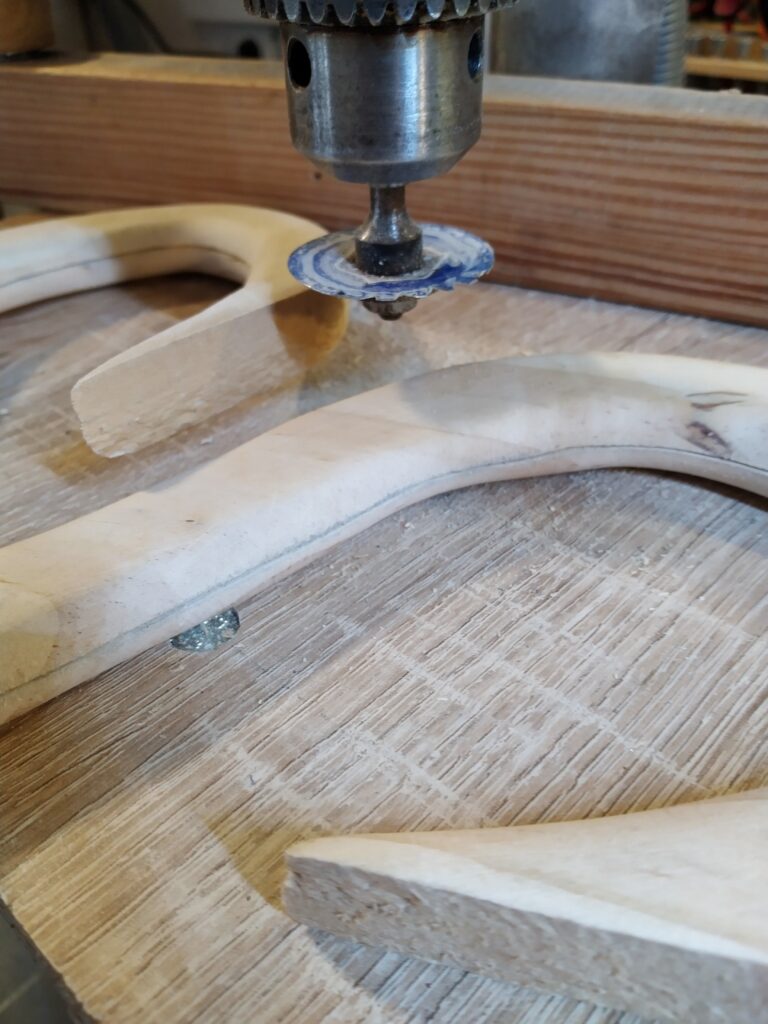
It didn’t really feel safe to put this self made contraption in my router and make it spin at 27.000 rpm so I put it in my drill press. I then guided both halves of the heart by hand along the self made cutting disk. It cut through it like butter. I was really amazed at how well this little contraption worked!
Assembly
To glue both halves of the heart together I first grinded the connecting surfaces flat on my disc grinder.
I then made a contraption on my workbench so I would be able to clamp the heart from all sides and push it together for glue up.
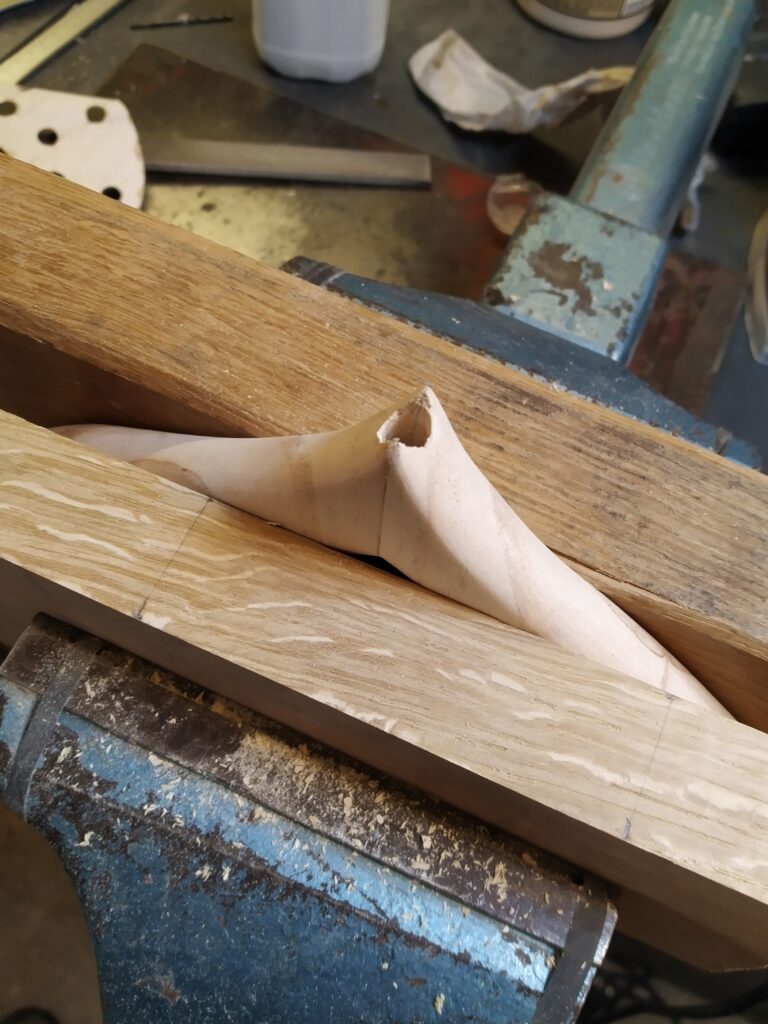
Once it was dry I clamped the heart in my vise and drilled a 8mm hole in the lower part for a dowel.
I then drilled a 4 mm hole through an 8mm dowel, glued the dowel in the lower part of the heart and used the hole in the dowel as a guide to drill a 4mm hole through the lower part of the heart to feed the led wire through.
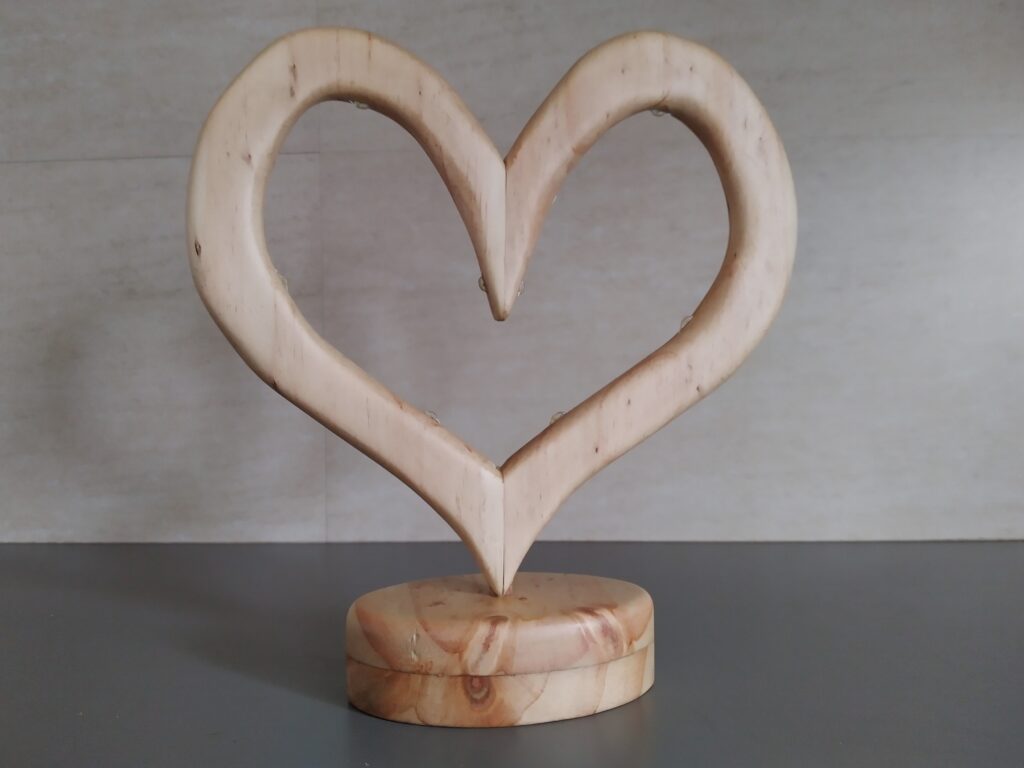
Next, I attached the heart to the base with the dowel and some wood glue. Once it was fully dry, I gave the whole piece a final sanding to smooth everything out.
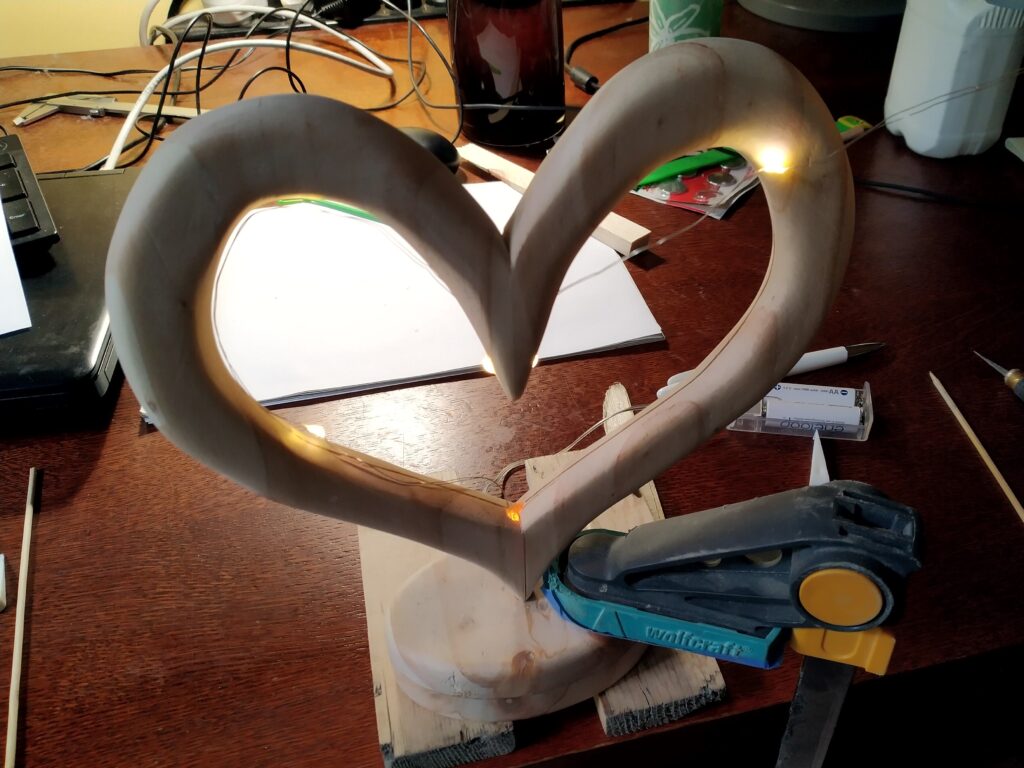
I then brought it over to my desk, fed the LED wire through the pre-drilled hole, and used a skewer to gently push it along the slot I’d routed—folding or overlapping the wire in places to tuck away any excess. I didn’t use any glue—the slot was narrow enough to grip the wire tightly on its own. I figured the finish I’d apply later would be more than enough to hold the LEDs and wires securely in place.
Finish
When the leds were installed, I screwed two long screws in the bottom of the base so I could clamp it and paint it in one go. I clamped it in my vise and gave it two coats of Osmo polyx-oil original.

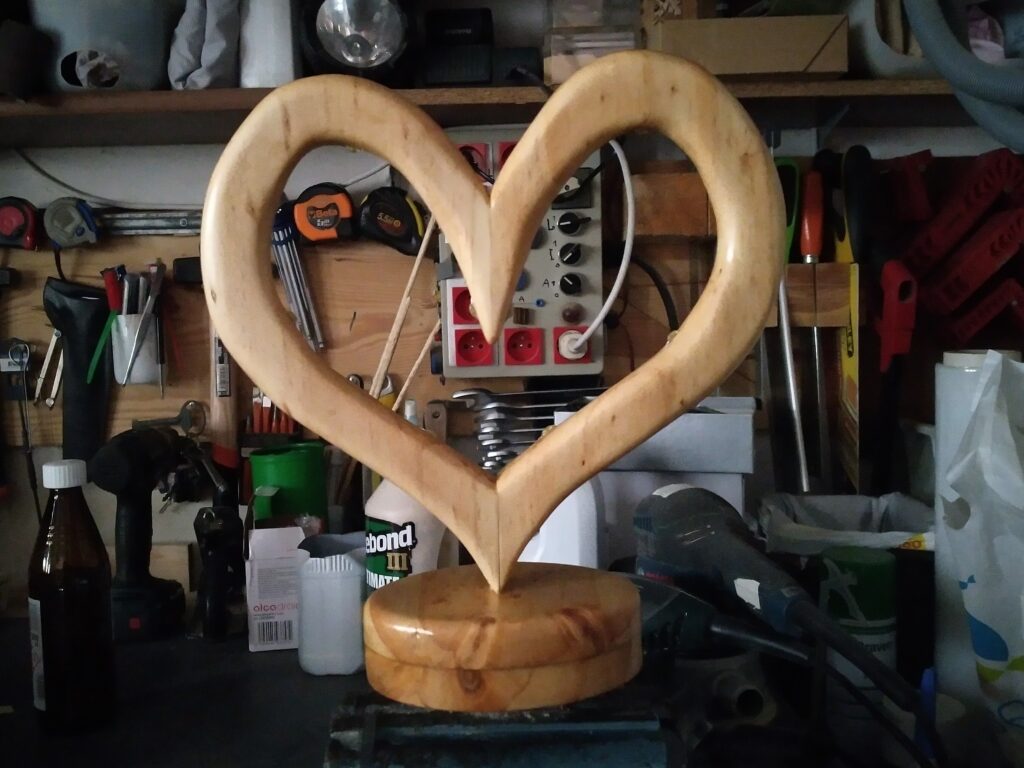
When the paint dried, I removed the screws and glued the battery pack and excess wire in the void in the bottom of the base. Then the time had finally come to insert some batteries and enjoy the result!
Lights on!
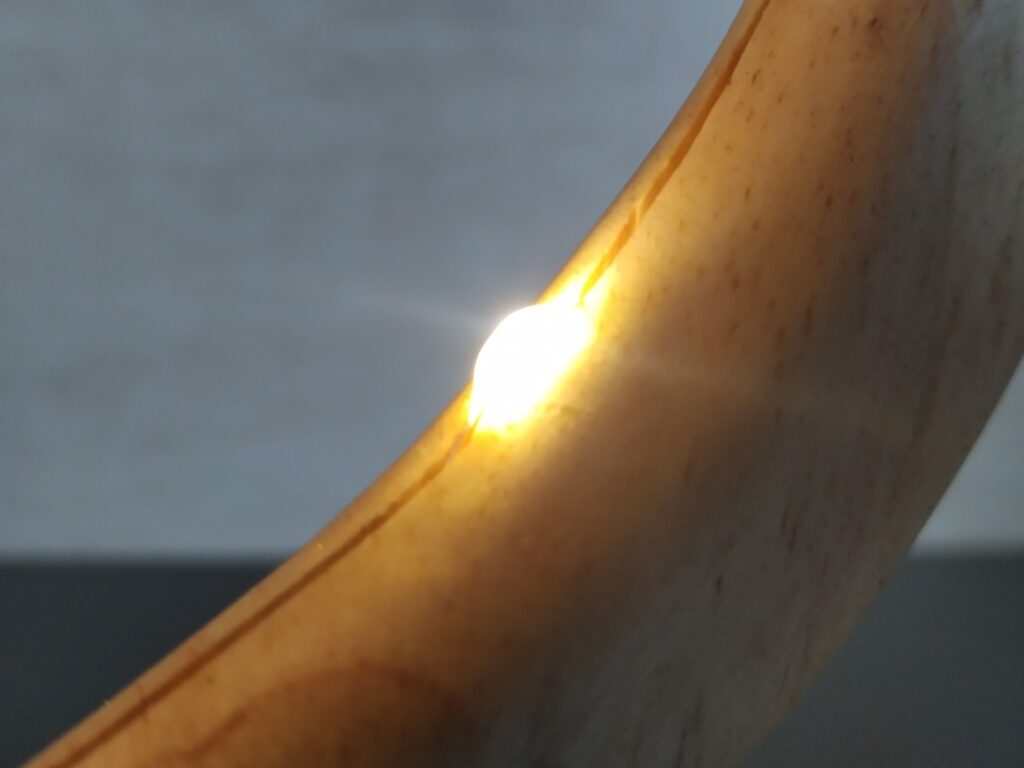
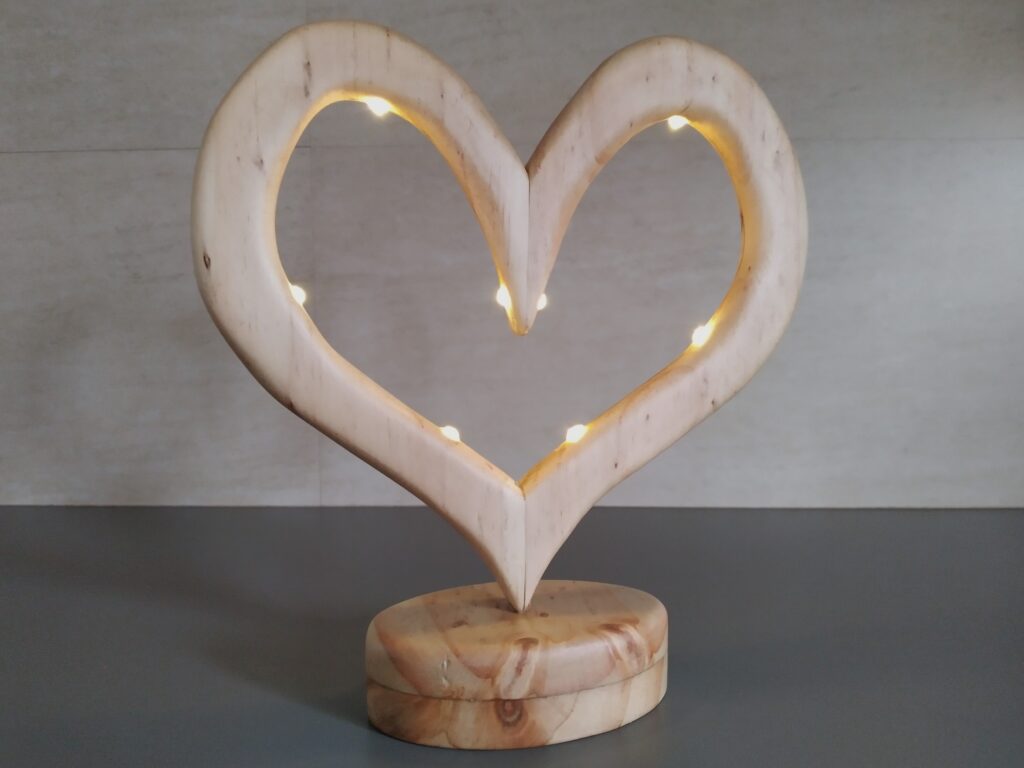
My daughter was trilled with the result! I was pretty pleased myself also I must admit!