
My kids needed a desk in their rooms so I started thinking…
I really like plywood. It’s strong, stable, and—depending on the top veneer layer—it can have a soft, serene appearance. I think this understated surface pairs beautifully with minimalist setups.
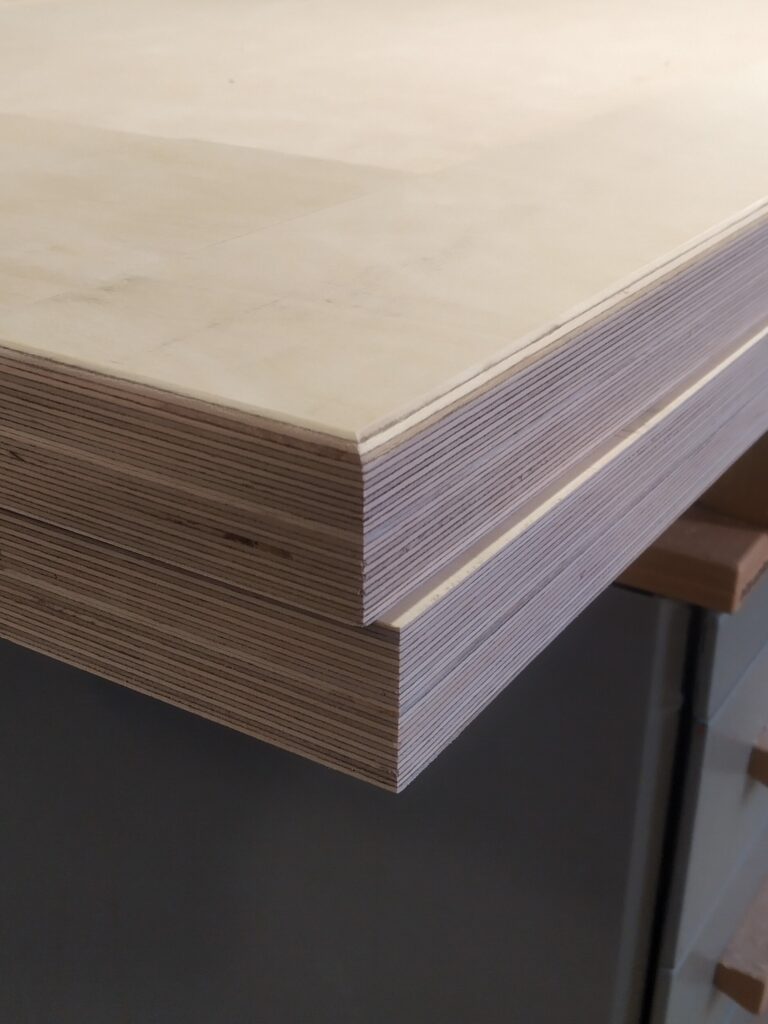
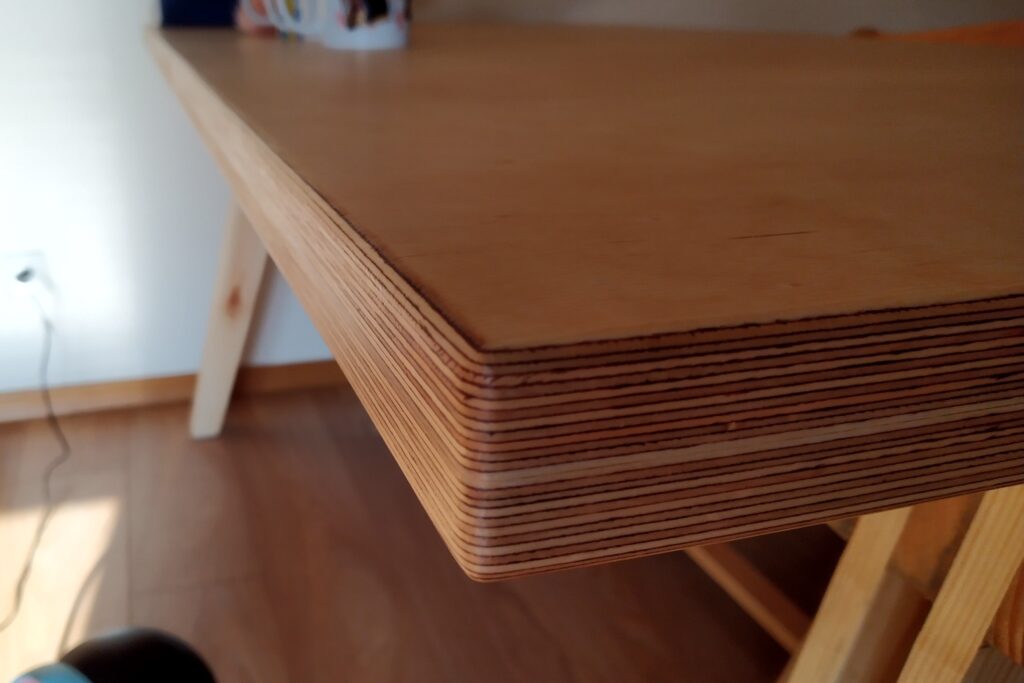
For many projects, you can leave the edges exposed. When you do, the layered stripes create a subtle, rhythmic pattern. They act like delicate picture frames around the piece, adding just enough visual interest and definition without overwhelming the design. It’s a small, thoughtful detail that highlights the material’s purity.
Birch plywood feels like the perfect choice for a desktop—serene, warm, and strong!
I did consider plywood for the legs too, but too many exposed edges risked tipping the desk from minimalist to repetitive or busy. Instead, I opted for reclaimed pallet wood, which I always have on hand. In my experience, if you select the boards carefully and sand them nicely, they become beautifully warm and characterful. The notches, nail holes, and subtle weathering add just the right amount of detail to make them interesting—much like an exposed plywood edge. Plus, the industrial character of plywood and pallet wood complements each other perfectly.
This keeps the overall look balanced: calm with attention for details on top, rugged below.
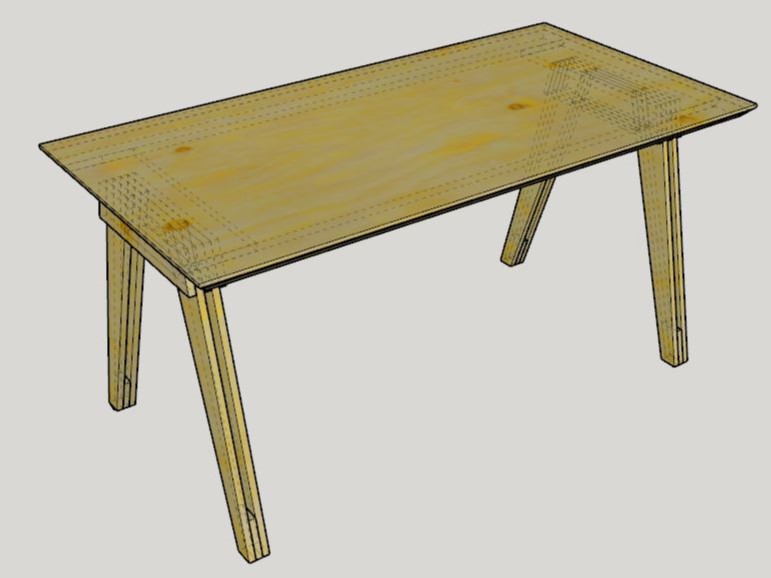
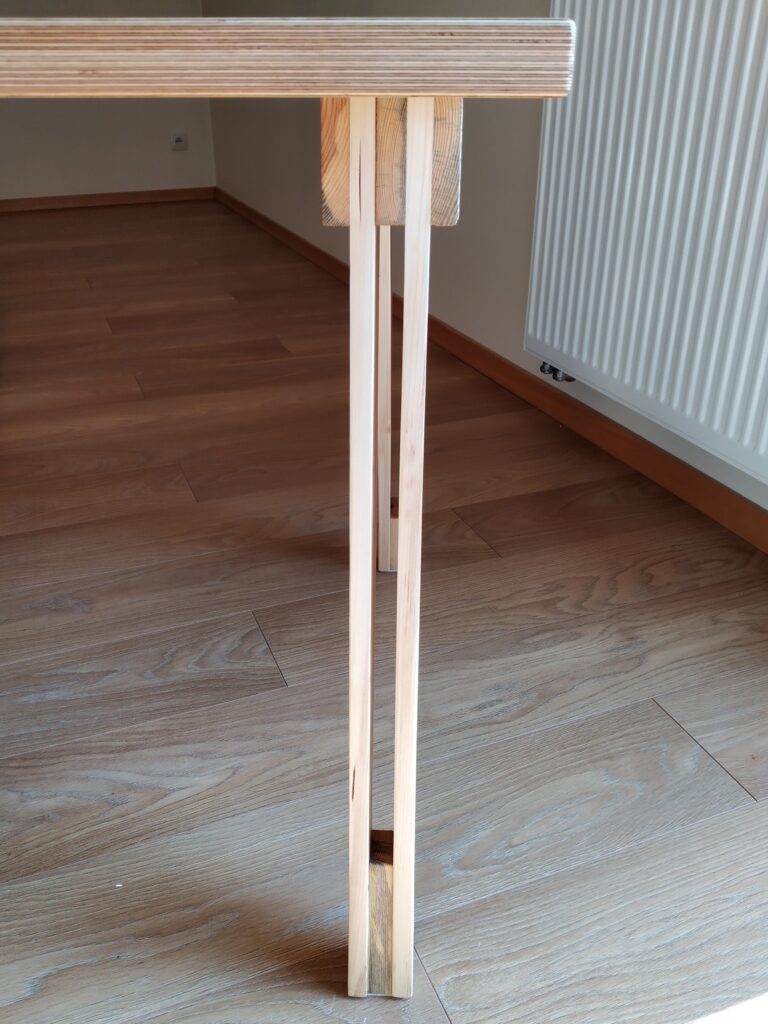
For the first set of legs I had set my mind on legs in the shape of an inverse V. To give the legs a more elegant appearance, I decided to add a slight taper.
Using a single 2 cm thick board for each leg would look – and be – flimsy. Instead of simply glueing boards together to create a thicker, solid leg, I wanted something more visually interesting: two parallel boards separated by the width of a board in between, creating an open, airy effect.
At the bottom, I glued in a spacer to tie the two outer boards together, adding rigidity. This small connection also makes the legs look much more intentional and appealing in my opinion.
The desks’ top
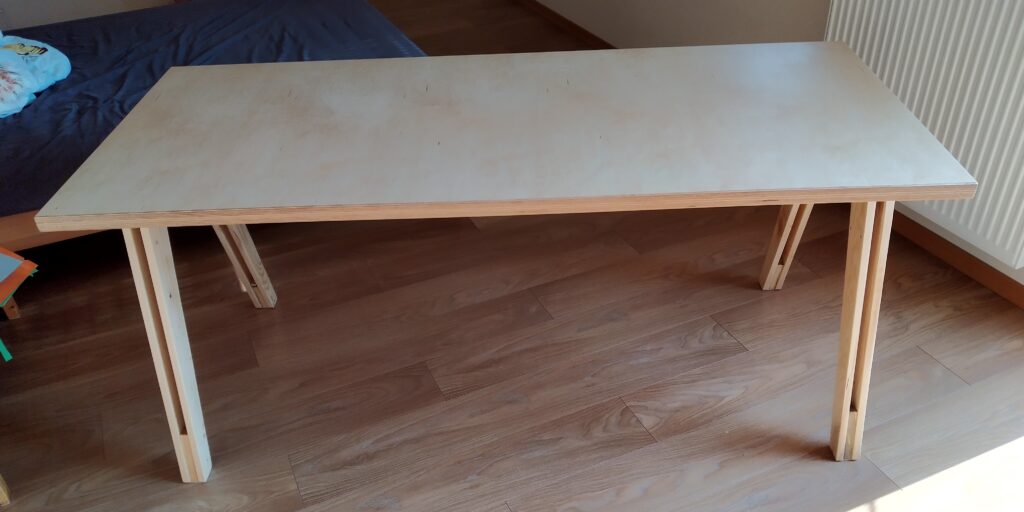
I settled on 180×80 cm for the dimensions of the desk’s top. Just like the dining table I made before I wanted to keep things simple: A top and some legs. 18mm plywood is strong enough in itself and doesn’t really need any skirts in support but on such a big desk, it might look a little weak. 30 or 35mm plywood would look right but it would be overkill and where would I use the offcuts later…
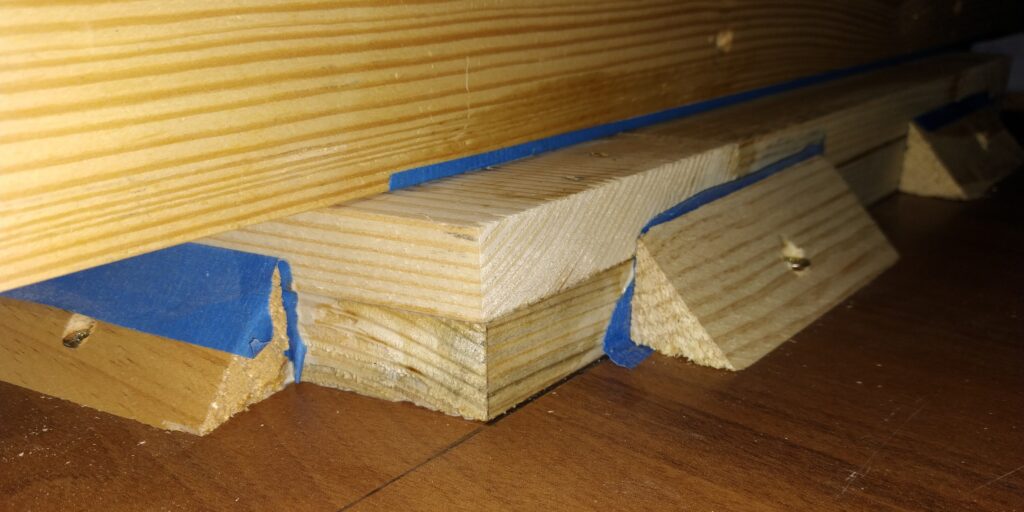
So I decided to use 18mm plywood with an added 10 cm strip on the edges to make it look like 36mm plywood. For the ends I choose 20cm strips
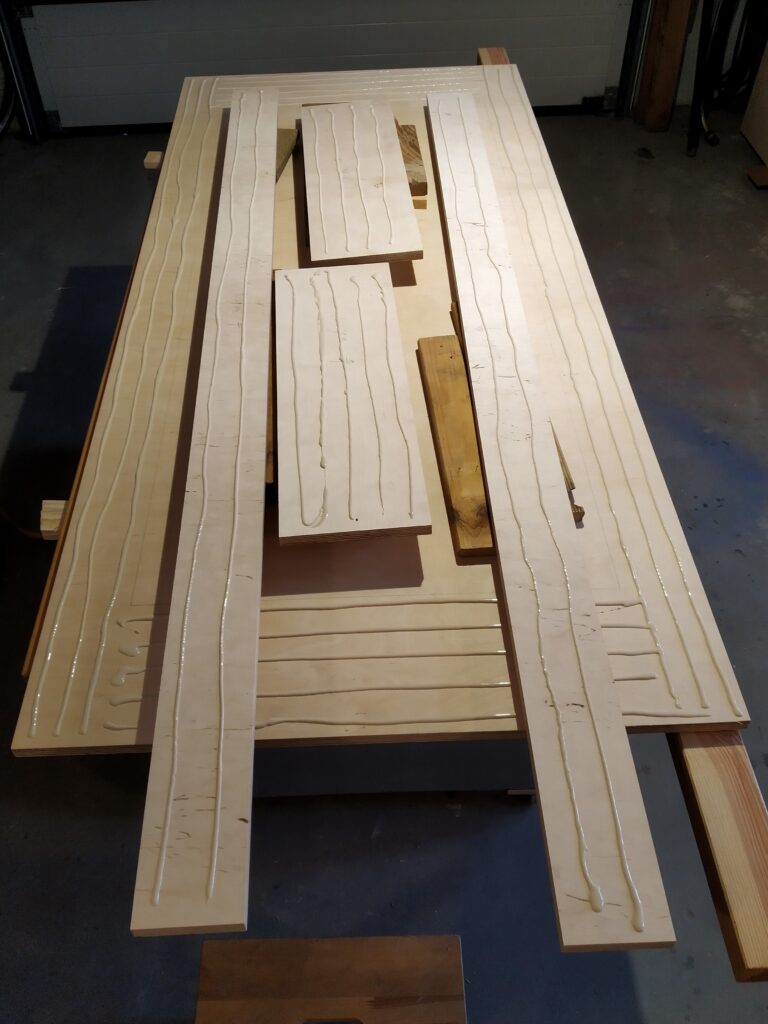
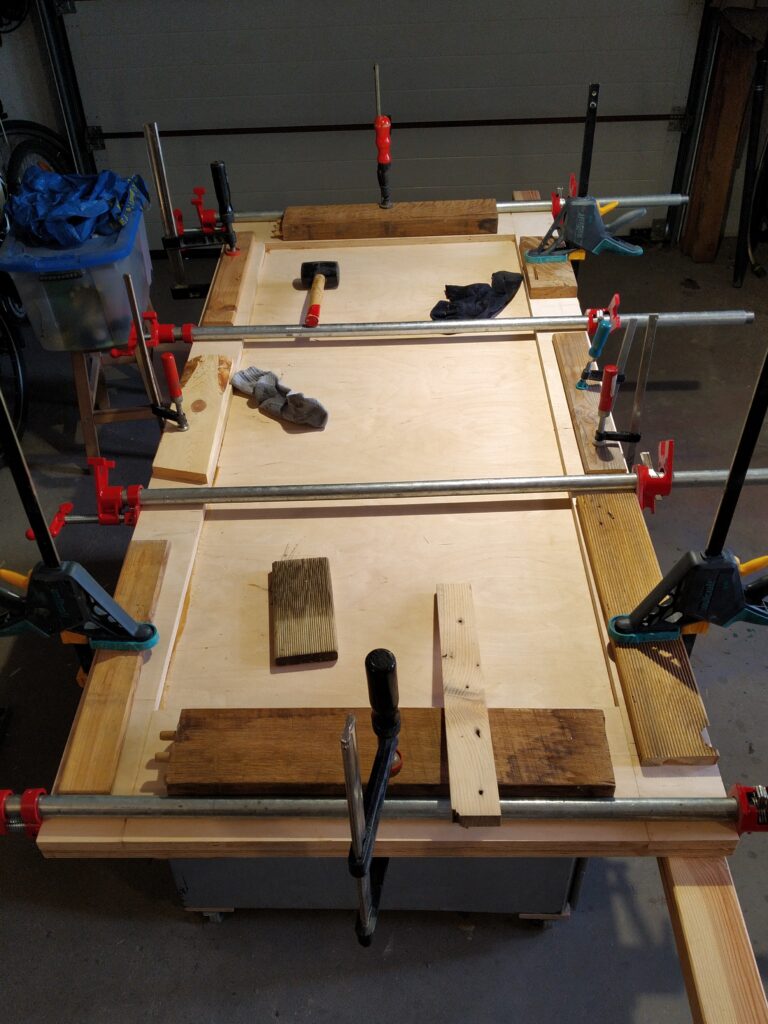
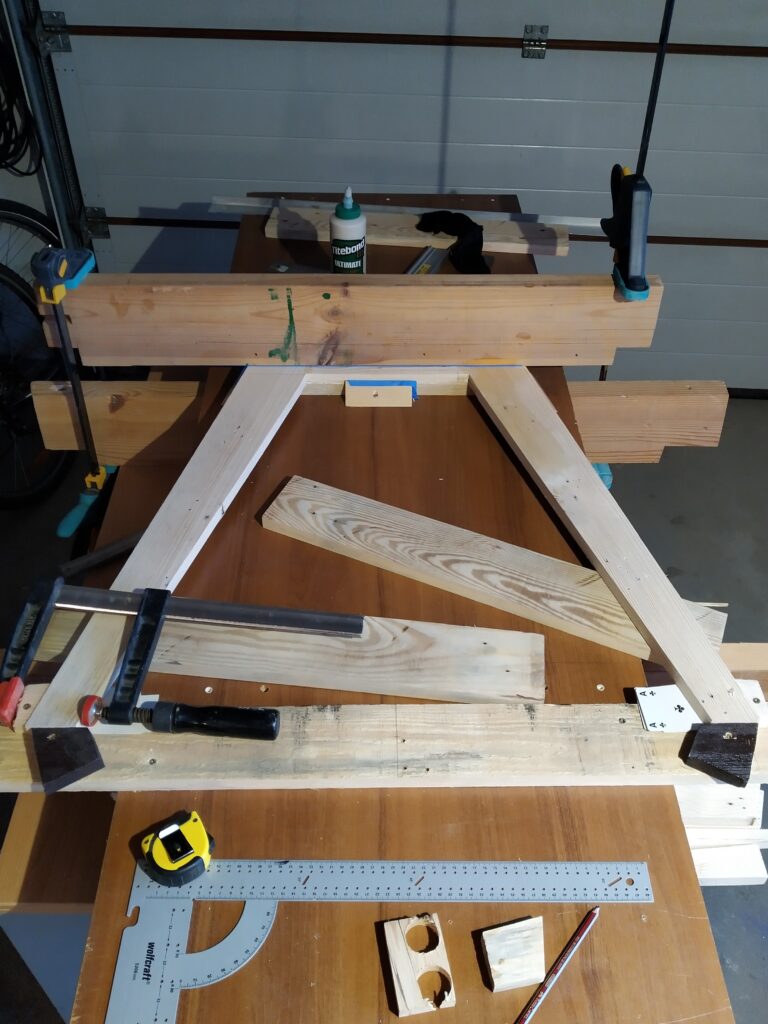
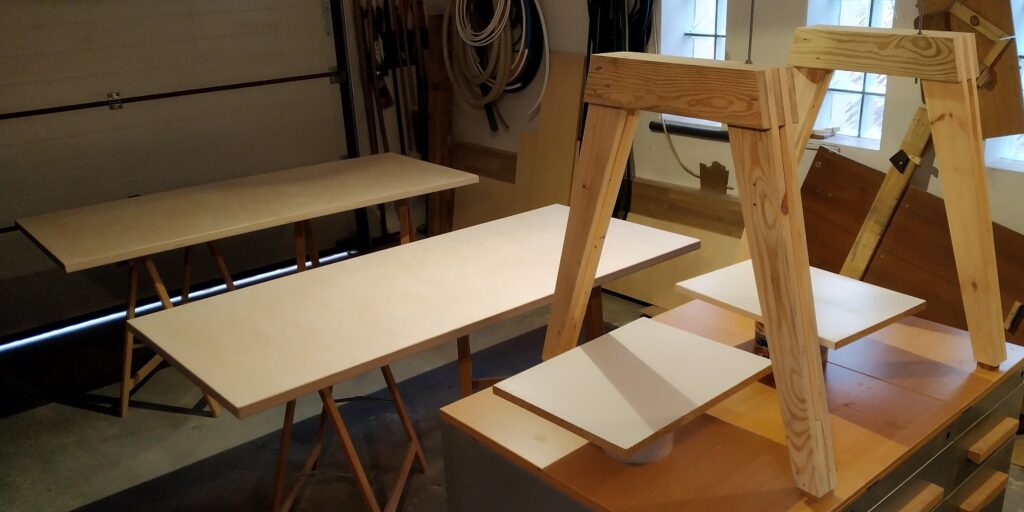
As I am making two desks, I decided to glue up the tops in one go. I prepared the first top and glued it upside down. I put the long edges on some wooden beams, this makes the clamping a lot easier. No need to worry about some wood to protect the desk from the lower side of the glue-up. I took special care to make sure that the top and the strips align perfectly to minimise the work I would have afterwards when finishing it. After about an hour I removed the clamps and put the second top on top of the first one and repeated what I had done before. I clamped both of the tops together and let them dry overnight.
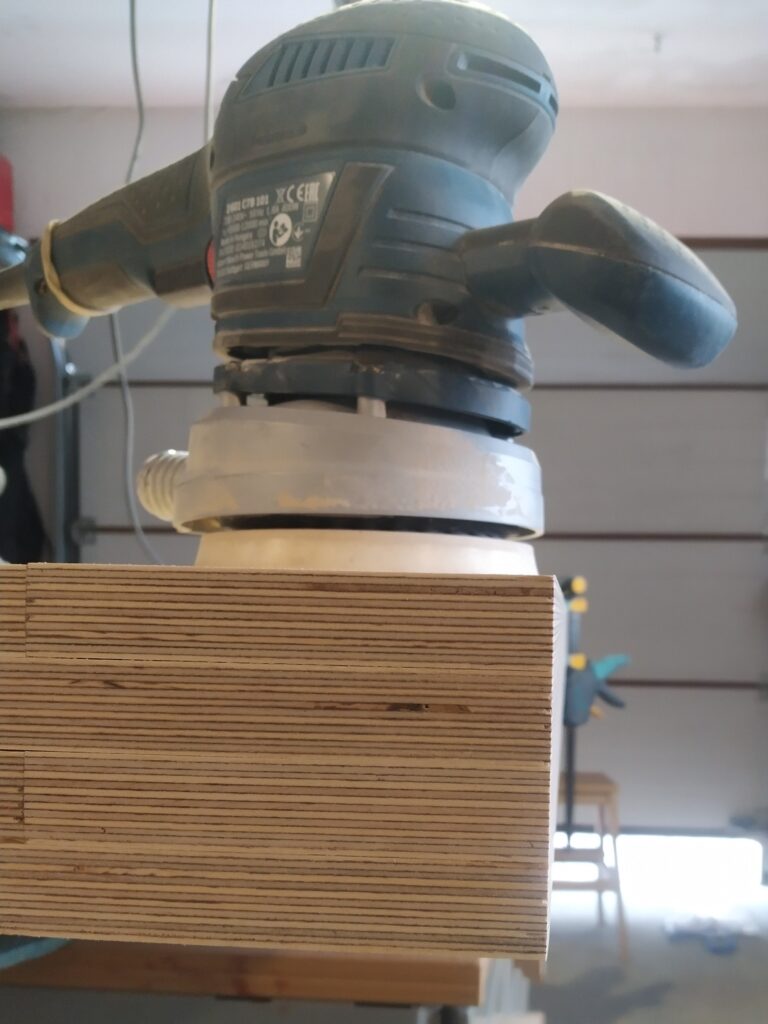
Once dry I left them clamped together and sanded all the edges flush in one go. Once all edges were sanded and consistent, I finished them with my router and a roundover bit.
4 Pairs of legs!
For the exact dimensions and shape of the legs I played around a little in sketchup until I got something which I considered pleasing to the eye.
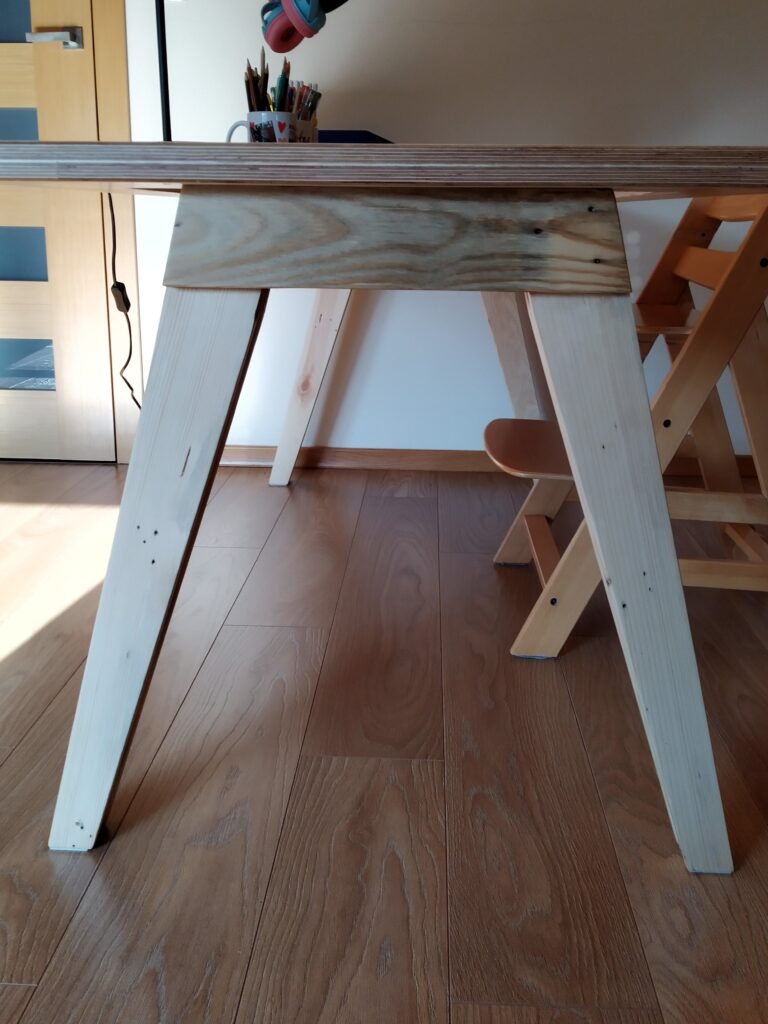
Just like with my dining table I didn’t want any skirts or profiles assuring the lateral stability of the legs so I had to make sure that the fixation of the legs to the table would be sufficiently wide. I decided to sandwich the legs between layers of wooden boards. This would also provide a sufficient glueing surface for the legs. For my leg sandwich I would need to pack together 5 boards, each measuring about 2cm, resulting in a connecting beam about 10cm wide. When I would attach these legs with M8 bolts to inserts in the desk’s top, I was confident they would be sufficiently rigid.
As the glued connection between the legs and the beam would be subject to torque I made the beam as high as I could to have a bigger glueing surface to resist the torque. I kept the full width of my boards, about 9 cm.
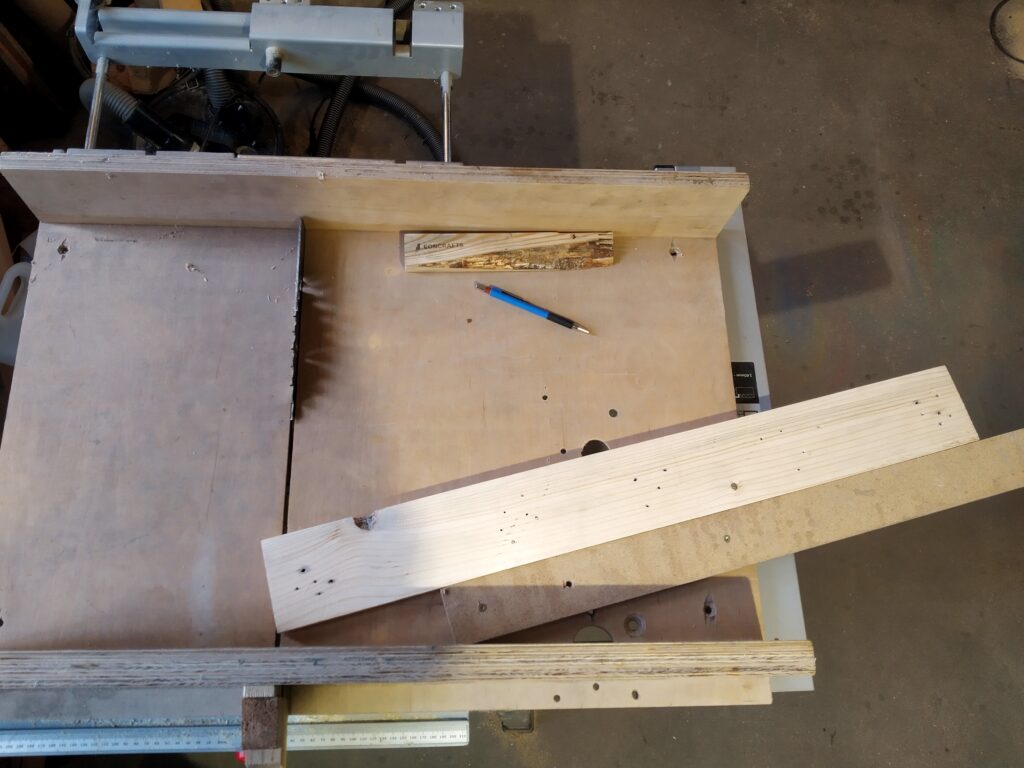
After careful selection of the various boards from my supply I straightened them up using my table saw (not having a planer-thicknesser at the time) and gave them a first bulk sanding with 80 and 120 grit.
Next, I had to cut the boards to size and under the correct angle. Luckily it is not all that important to cut them under the exact angle as in the drawing. A small deviation would just result in the desk sitting a little higher or lower. Consistency though when cutting all different pieces is very important. If not, the desk might end up being wobbly…
So, lacking a mitre saw I screwed a wooden guide rail to my crosscut sled to keep the boards in the right angle. Once all the top sides were cut, I screwed a stop block on the guide rail and cut the boards to length, immediately at the right angle.
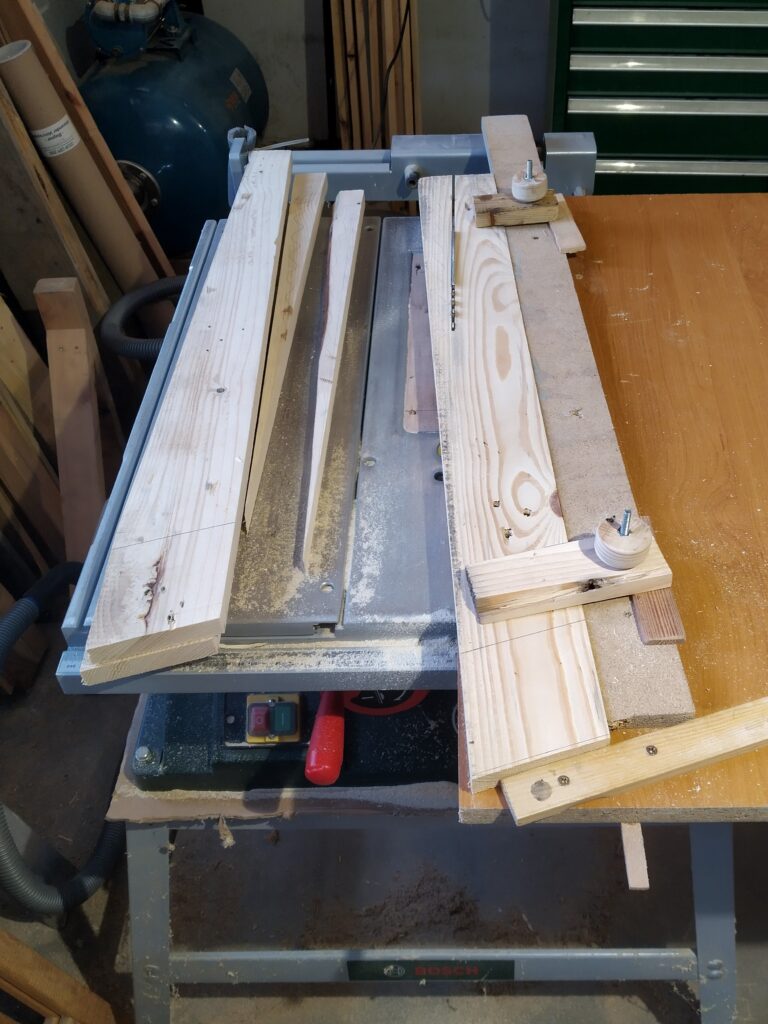
As I had decided to add a slight taper to the legs. I quickly built a taper jig for my table saw to insure all the legs would be tapered consistently. I made sure to start the taper about 11 cm down from the top, leaving the upper section with parallel edges. This straight portion would be glued into the sandwich, keeping its edges parallel made it much easier to cut the filler pieces at the right angle. I could simply re-use the temporary guide rail on my crosscut sled.
After tapering all four legs, I gave the long edges a small chamfer using a handplane.
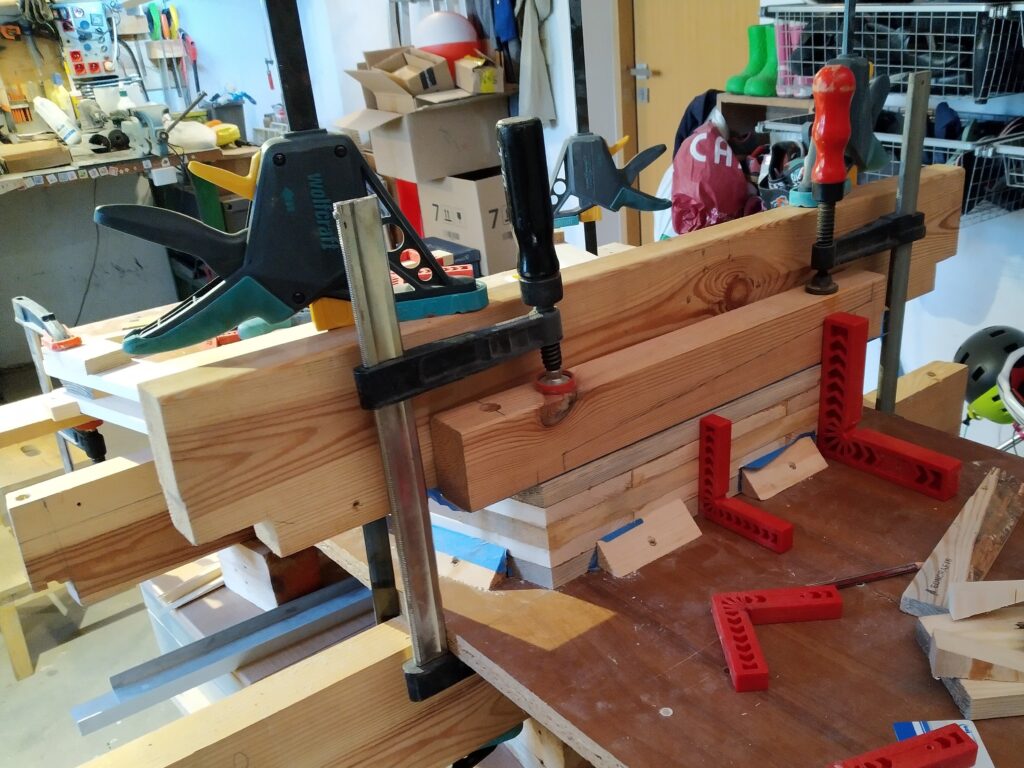
To maximize the chances of the glued-up legs being perfectly consistent and square to the desktop, I chose to assemble them in stages rather than attempting the full glue-up all at once. I decided to first glue each leg pair to a top beam, letting it cure and finally glue two leg pairs with spacers together to make a complete assembly.
To glue the leg pairs consistently I made a template to position them correctly. Once they were in the right position I could measure the top connecting board and cut it to length on my crosscut sled with the guide rail still on it. Once this board fitted, I could cut the filler pieces on the crosscut sled.
Once I had cut the connecting boards and filler pieces in sufficient amounts I started with assembling and gluing 4 pairs of legs.
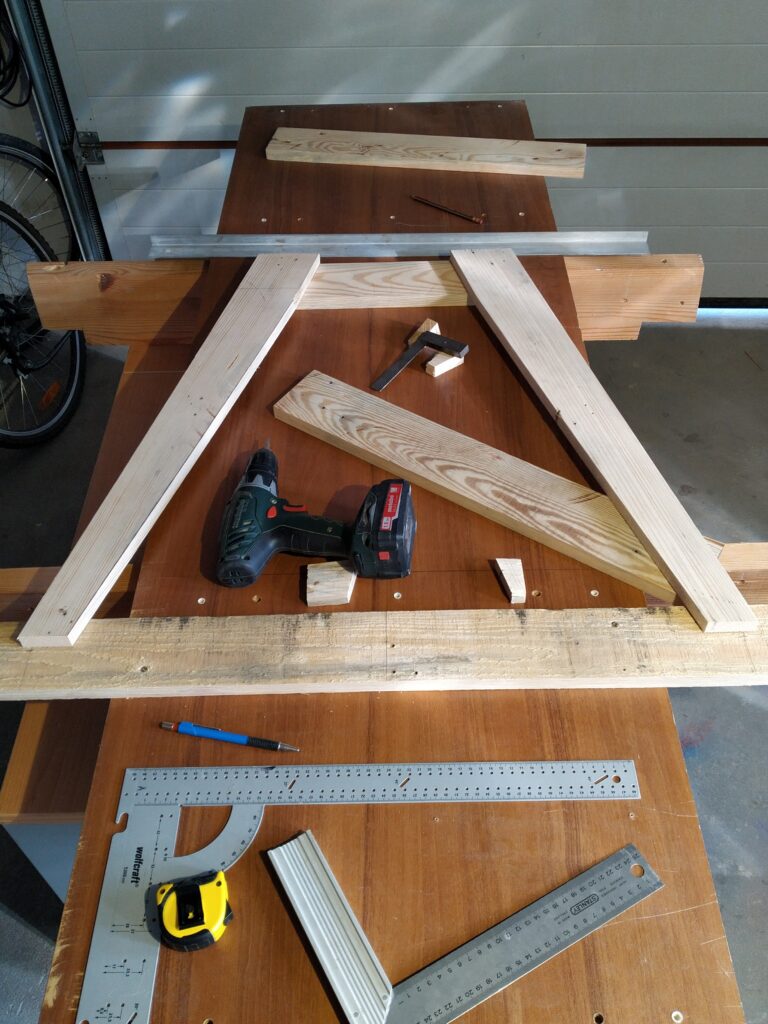
Once the leg pairs were ready I glued 2 pairs of legs together with a filler board between them. I took special care and attention to make sure the top part was perpendicular with the legs.
To tie the bottom of the legs together I made spacers with the same taper as the legs but just slightly thinner to give just this little bit of detail. I also glued them in place.
Just like on my table design, I am going to fix the legs to the top with M8 allen bolts and inserts. I took exactly the same steps to prepare the holes and inserts.
- Drill 16mm countersunk holes for the washers and allen bolt’s head in the legs. Do not forget a drill stop.
- Drill in the centre of the countersunk holes through the legs with a 10mm drill.
- Clamp the legs to the upside down table top.
- Marked the location for the inserts on the table top with a 10mm drill through the holes in the legs.
- Remove the leg and drill the holes for the inserts with a 10,5mm drill. Do not forget a drill stop.
- Slightly countersink the holes for the inserts.
- Screw in the inserts.
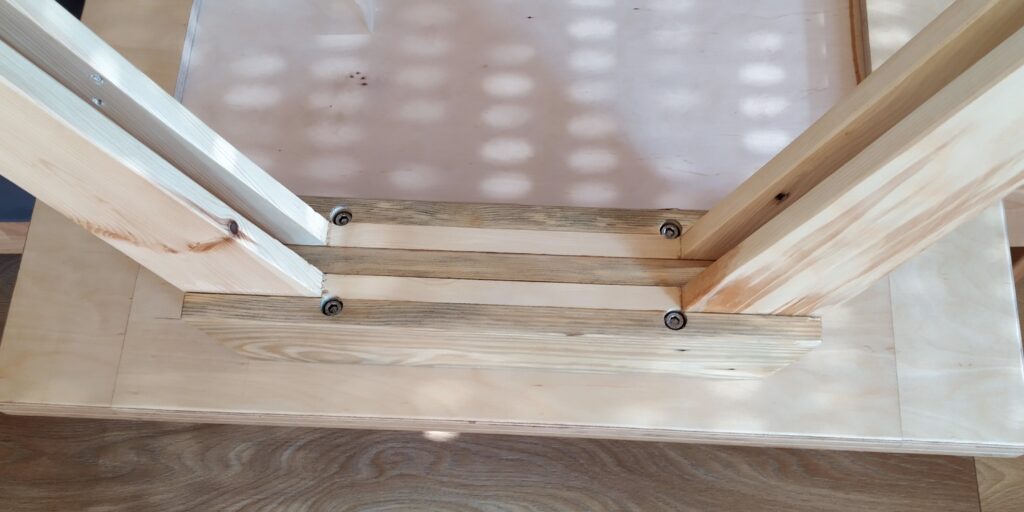
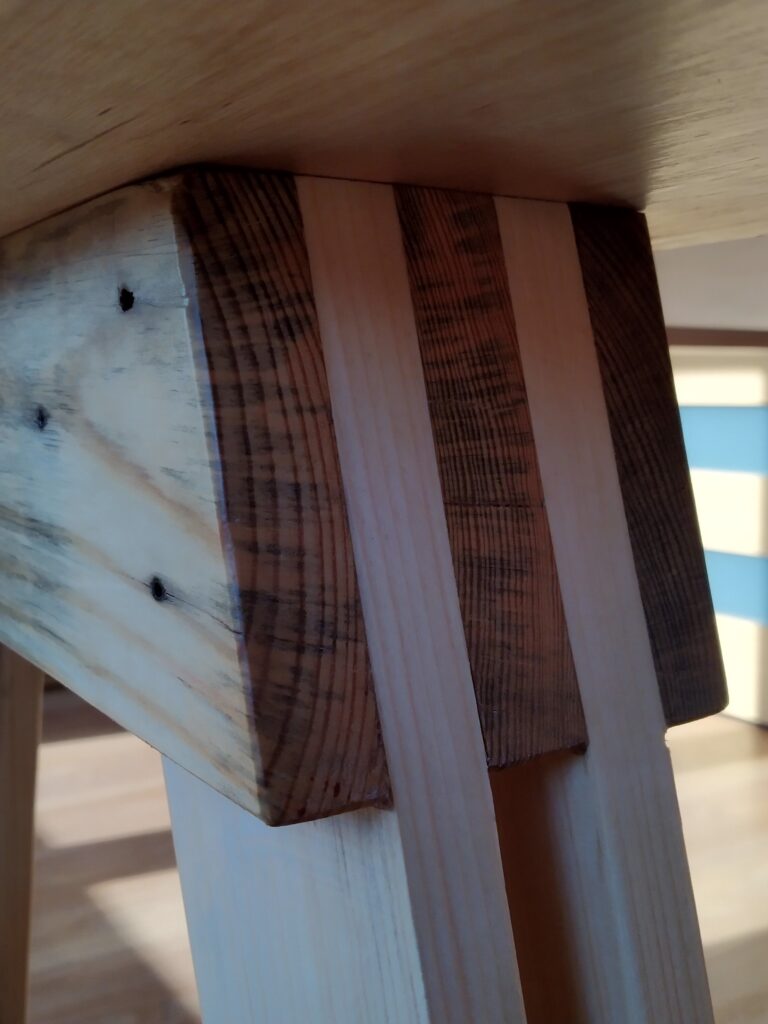
To make the fixation as strong as possible I wanted to have the holes as close to the extremities of the cross beam as possible. This was difficult as the inclined legs would get in the way of my drill chuck. To avoid this, I used extra long drills.
The below picture shows the positioning of the holes really close to the legs. The sandwich structure of the beam can also nicely be seen here.
Finish
Once all the cutting, gluing and drilling was done I sanded the tops and legs with 120 and 240 grit. I positioned all parts such that I could give them a complete coat of paint in one go.
After applying a double coat of Osmo polyx-oil original (clear matt finish, code 3062) everything was ready for assembly.
Assembly
Assembly couldn’t have been easier. Flipping the top upside down, positioning the legs and screwing tight 8 M8 allen bolts. And finally, flipping the desk on its legs!
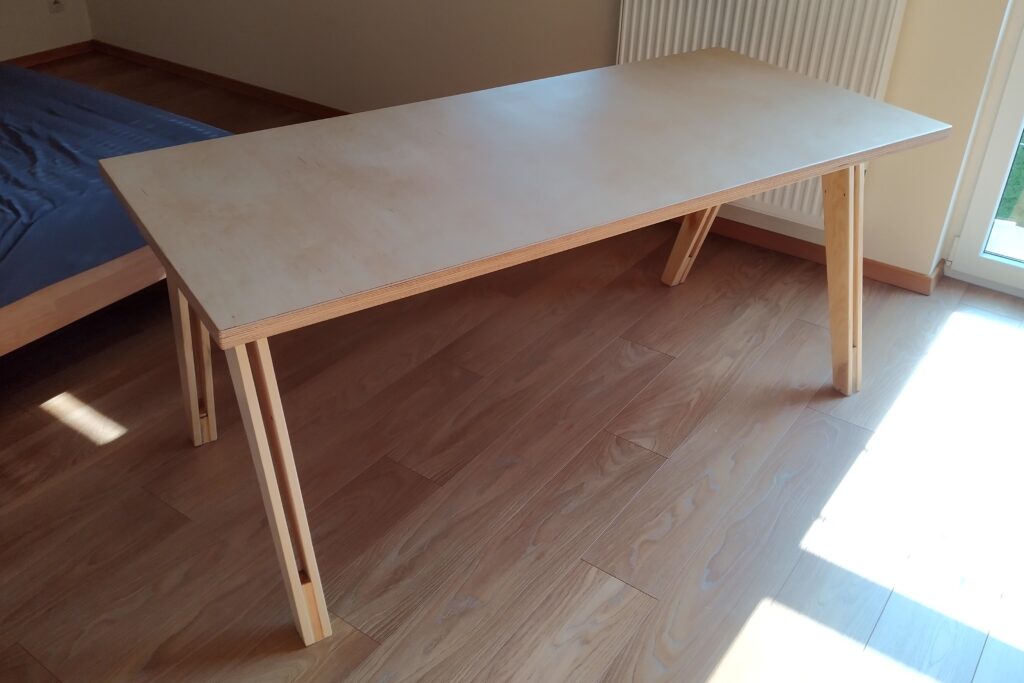
I’m really happy with how this desk turned out. It’s solid and has exactly the minimalist look I was after, but with some subtle, intentional details.”
So I built two tops… but only one set of legs. The second desk deserves its own twist on the legs. Something different this time. More to come soon.