I had this old car stereo lying around and I wanted to use it to put on some background music in my workshop while creating. I like that it has the possibility to listen to FM radio (while FM emissions are still around). And, as I still have a cd-collection it is nice that it can play cd’s. (Though I don’t really plan on playing any cd’s in my workshop.) Before installing it in my workshop I wanted to see if I could greatly increase it’s usability by adding an auxiliary input to it.
I want to see if I can localise the signal coming from the ‘cd-block’ before it is being fed to the amplifier and try if I can replace it with the signal from an auxiliary input.
Research
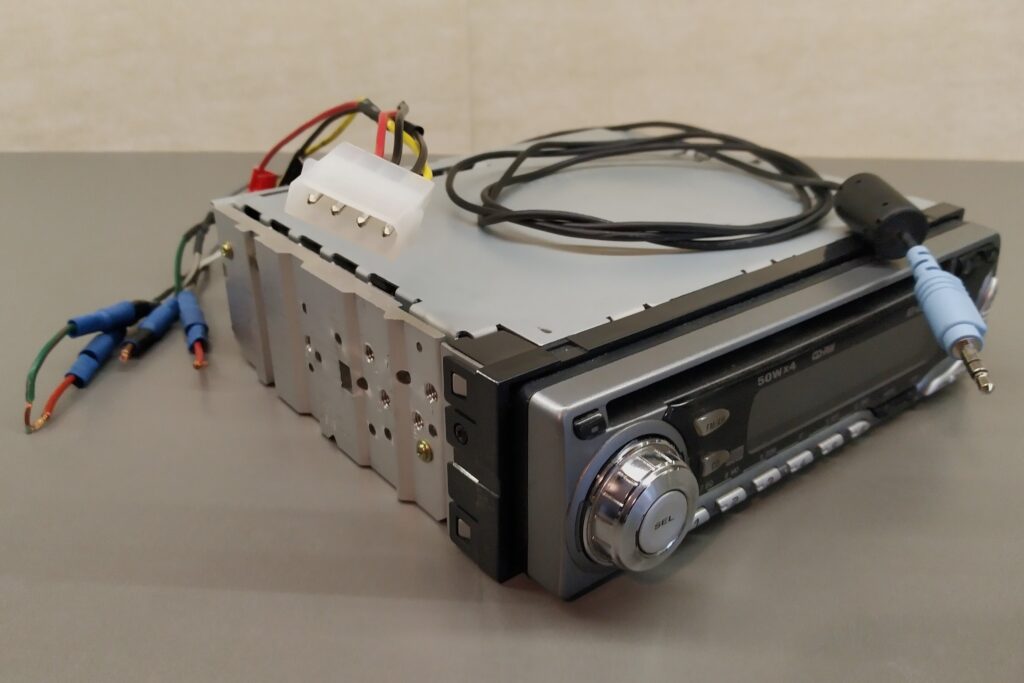
The car stereo concerned is a JVC KD-G202. It has 4 channels with a maximum output of 50W per channel. Unfortunately it does not allow bridging of the speakers. As I am only planning on using 2 speakers I will thus only be able to draw half the power of the unit. This should be enough for some background music in the shop but it will not be able to go to eleven😊.
I was lucky to find the service manual online. It contains all schematics, circuit boards and components. And though it is not impossible to try and locate the link between the cd-block and the amplifier without having the schematics, having them greatly facilitates the job.
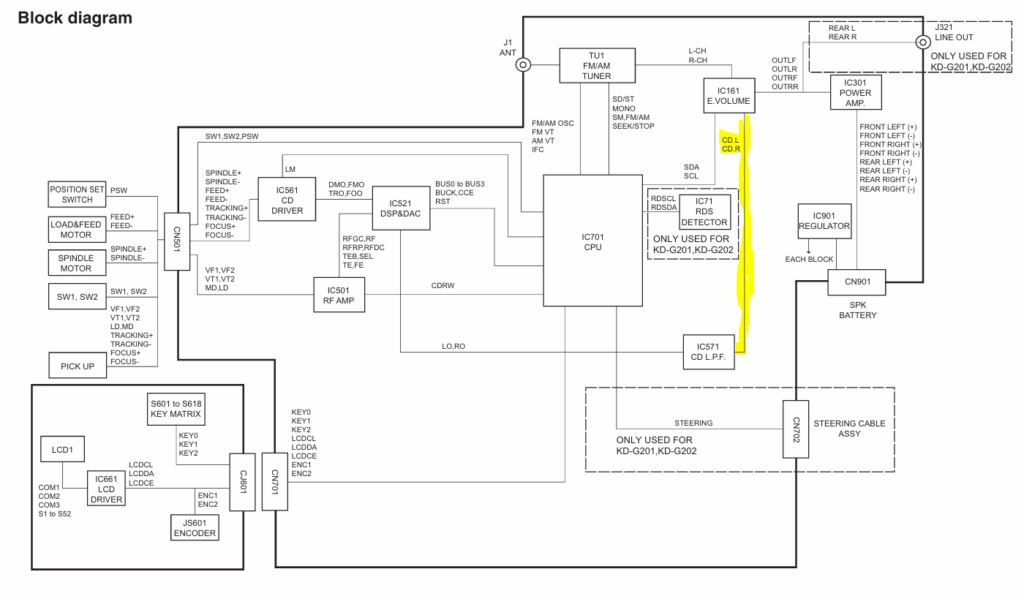
When checking the supplied block diagram one can clearly see the cd’s left and right signal coming out of the de-emphasis filter IC571 and going to the IC161. Now I have to go and search in the schematic diagram if I can find a logical position/component between IC571 and IC161 where I could interrupt the original cd signal and add the new auxiliary one.
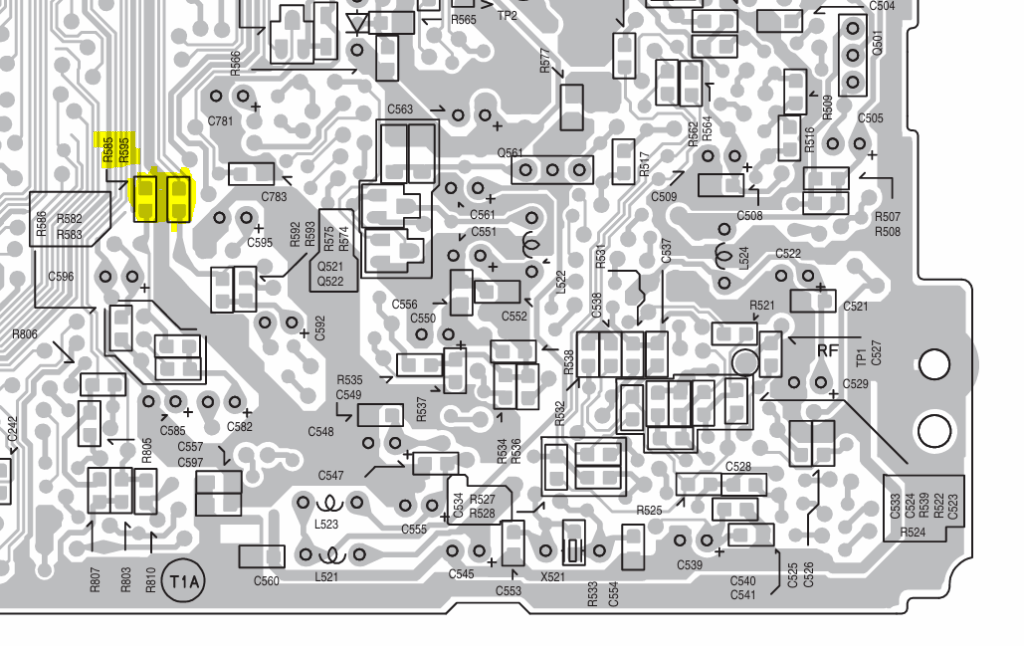
When inspecting the schematic diagram I found IC571 and right after it, in both the left and right signal paths were 0 ohm resistors (R585 & R595). If these ‘resistors’ would be easily accessible on the circuit board, I would just have to remove them and solder the auxiliary in to the amplifier side of their connection points.

I now searched the circuit boards’ drawings and found both resistors on the bottom side of the main board.
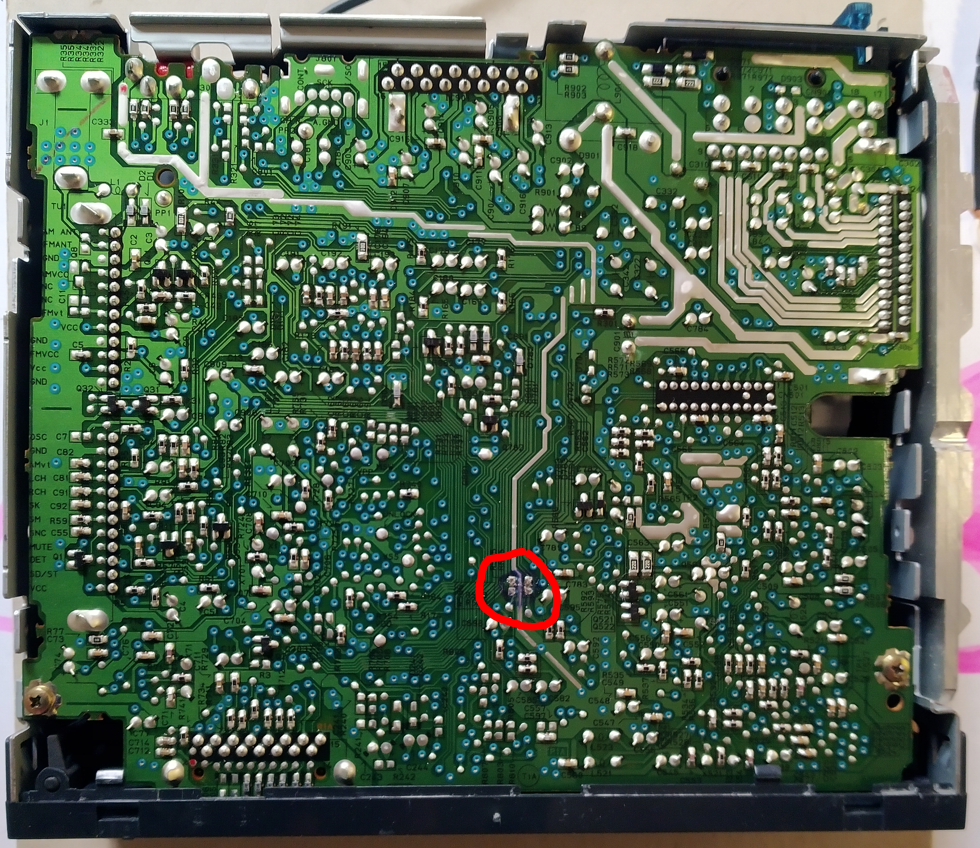
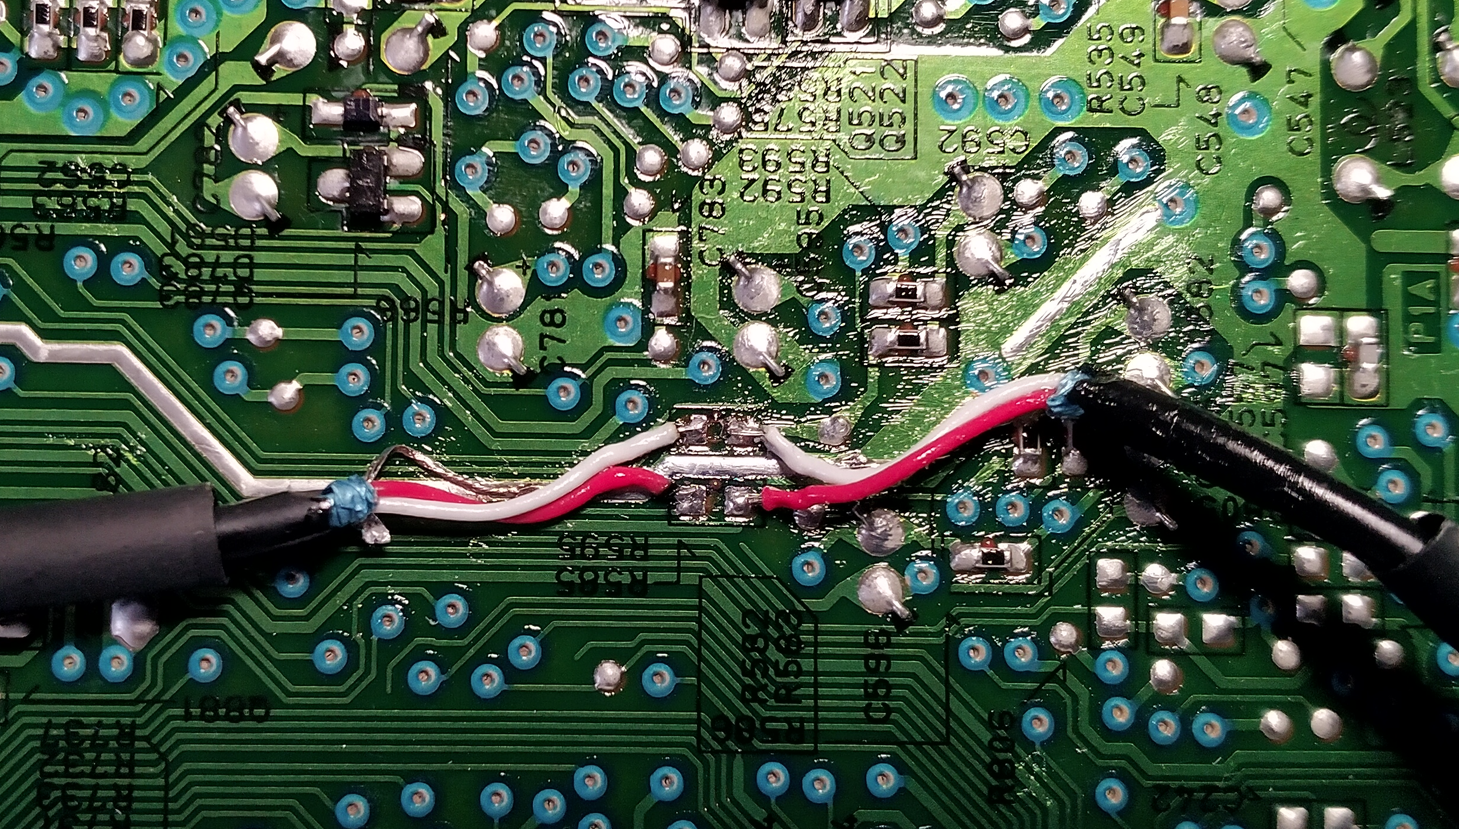
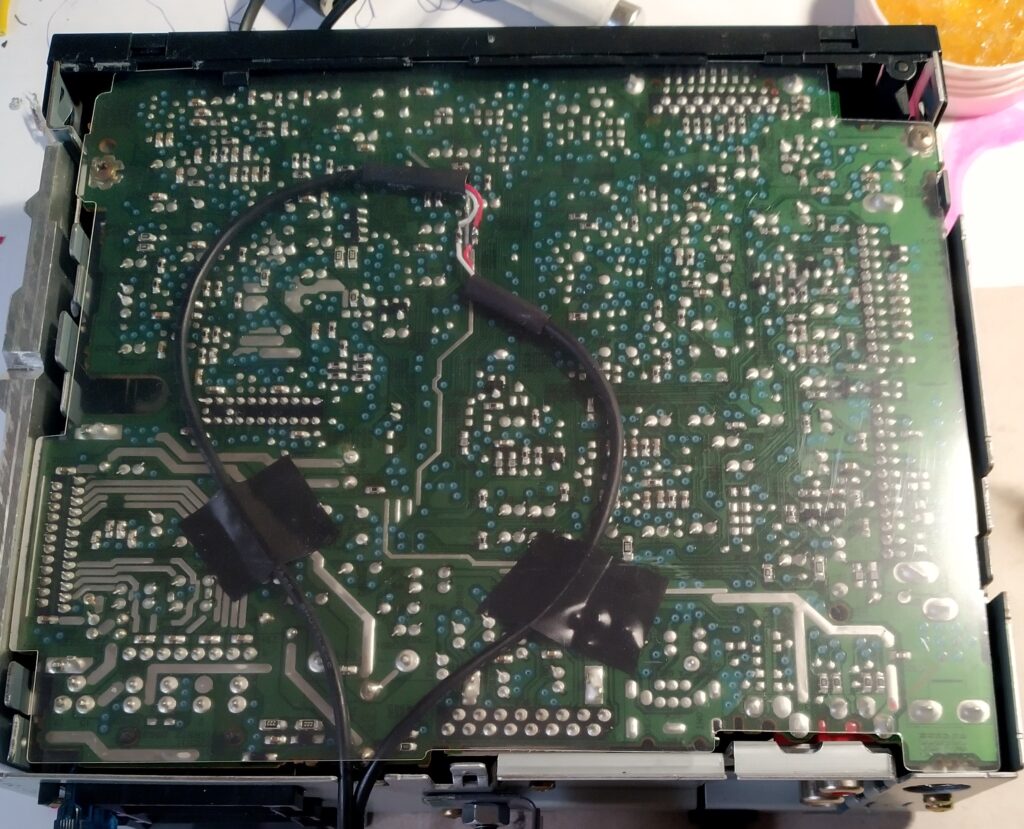
I now went to see if I could find these resistors on the actual stereo. I was happy to see that the bottom panel of this unit could very easily be removed by unscrewing a couple of screws and it allowed direct access to the bottom of the main board. It could not have been any easier. The below photo shows the bottom of the main board with both resistors already desoldered.
Modification
Seeing how easy it was going to be to separate the output signal of the cd-player and the input of the amplifier, I decided to upgrade my plan and bring both of them outside of the stereo. This would allow me to add a selector switch and I would be able to choose between cd-player or auxiliary in. This would be better than just replacing the cd-player with an auxiliary in. I soldered some shielded wire to the soldering pads of both sides of the resistors and found a suitable place to solder the ground/shield of the wires right between/behind the soldering pads for the left and right signals. As these are really little soldering pads I took my time to verify that the soldering was done properly and that I hadn’t created any short circuits. To avoid the possibility of short circuits, I slid a shrinking tube over the wire’s end to protect the naked ground/shield wire up to its soldering point.
I then pinched a hole in the back side of the housing and guided the wires towards the opening. I paid attention not to guide the wires directly over other soldering pads as there would be a small risk that the wire ends of the soldered components might penetrate the wire. I held the wires temporarily in place with some tape. Once I would install back the bottom plate, the wires would be slightly squeezed and they would not be able to move anymore.
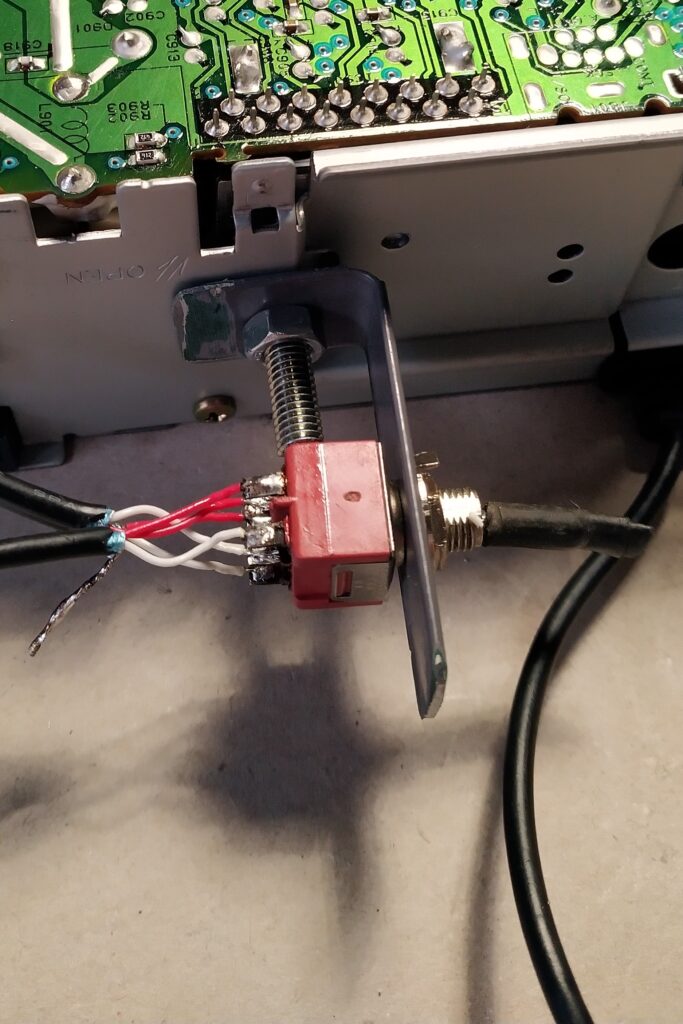
Next I made a small bracket which I bolted at the rear to the outside of the housing in a vacant threaded hole. (This seemed the most convenient location at the moment. As written earlier, I wasn’t really planning on using the cd-player) On the bracket I first installed a double pole switch. To the centre terminals of the switch I soldered both channels of the amplifier input. On the contacts on one side I soldered the wires coming from the cd-player and on the opposite side I soldered the wires going to a 3,5mm jack which would be the aux-in. All grounds/shields I soldered together.
I could add a Bluetooth receiver but I do not have th need for one just yet.
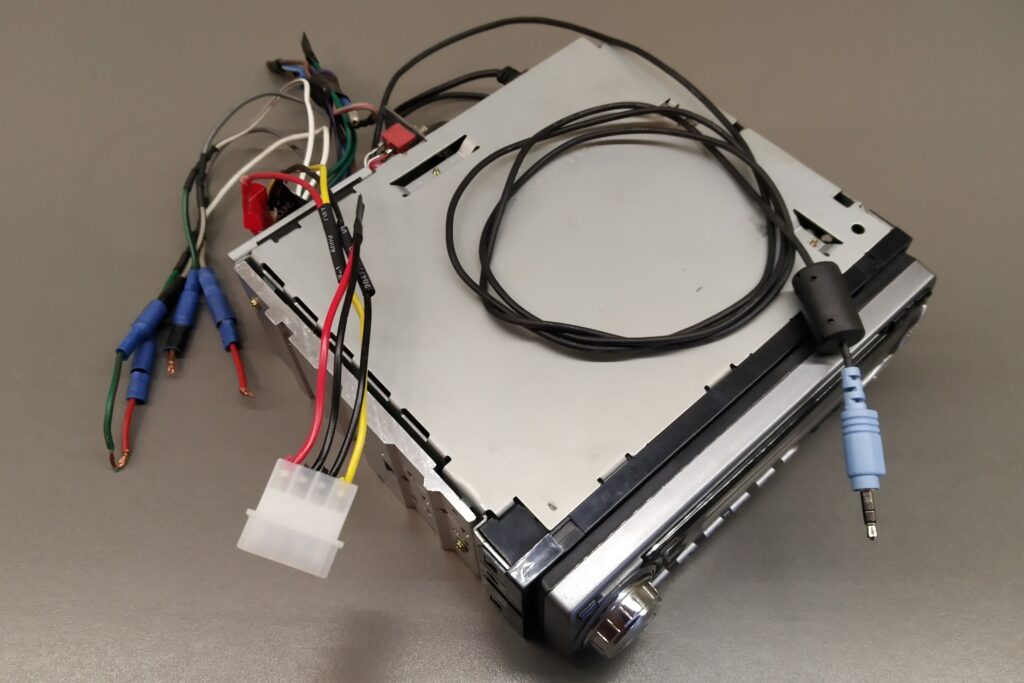
To power the stereo unit I will be using the PSU bench power supply which I described in a previous blog (https://eoncrafts.eu/convert-a-pc-psu-to-a-bench-power-supply/). I soldered a male 4-pin molex connector to the power leads of the car stereo so I will be able to plug it into one of the spare connectors of the power supply . The 12V memory backup I put together with the 12V supply. I don’t think I need a memory backup now and I can always add some small battery later on.
To connect the front speakers I plan on using the bullet terminals still hanging on the front speaker wires. I isolated the ends of the wires for the rear speakers and put them together with some tape.
FM antenna
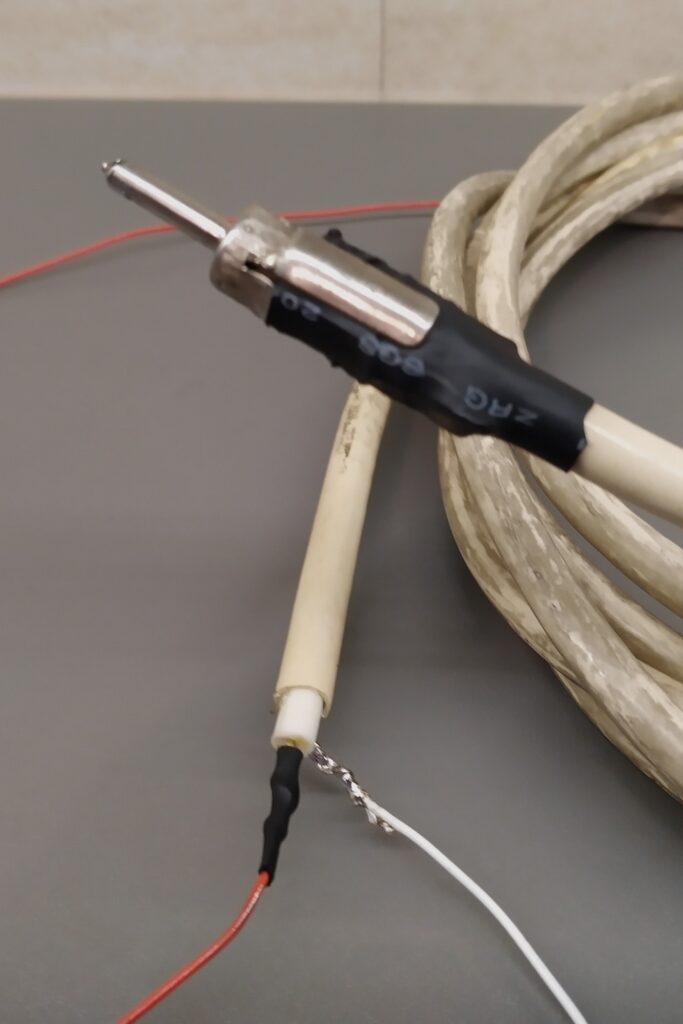
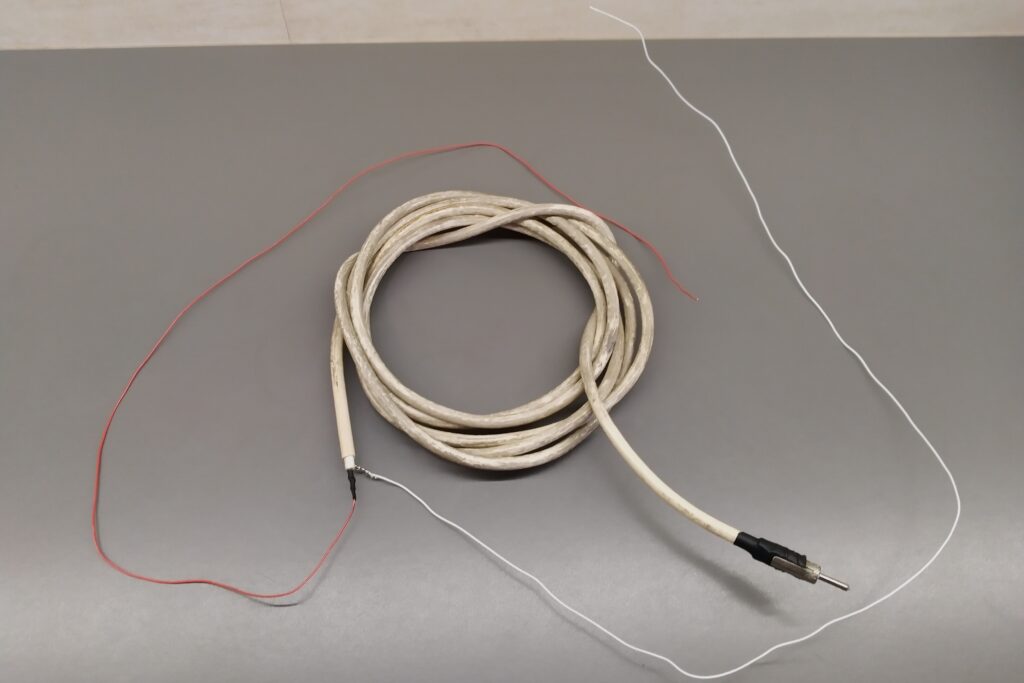
The final thing I need to do in order to be able to listen to FM radio is to make a suitable antenna and connect it to the radio. I am going to make a basic half wave dipole antenna. At 100Mhz the wavelength of the FM signal is about 3m (light speed (300 Mm/s) divided by the frequency). So the half wave is 1.5m. I cut two pieces of 75cm wire and soldered one to the signal wire of a coax cable and the other wire to the shield. If I attach both of the wires to a 1.5m stick I will have a 1.5m dipole antenna which I can put anywhere (best vertical) in the shop to get the best reception.
To easily connect the coax cable to the car stereo a special car antenna connector is needed. I was lucky to find one in between all my stuff.
Testing
When the added switch is in the ‘cd’ position, the car stereo will work just as before and play FM radio or the cd, depending on what button I push.
When the added switch is in ‘aux’ position, the stereo will play whatever I plug the 3.5mm jack into when I push the cd selector button. To do this I have to make the stereo believe that there is a cd in the drive that I want to play. So I have to insert whatever cd I have and push the cd push button on the front panel. The stereo will start spinning the cd and ‘playing’ it but will receive the signal from the aux-in to its power amplifier. To listen to FM radio I simply have to push the FM radio button.